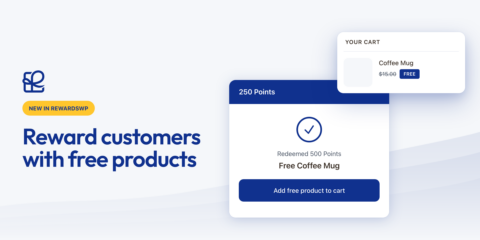
Reward Your Customers with Free Products, Not Just Coupons
Not every reward needs to be a discount. Now you can offer any product from your store as a loyalty or referral reward - customers claim it, add to cart, and it's free.
Continue Reading →
Not every reward needs to be a discount. Now you can offer any product from your store as a loyalty or referral reward - customers claim it, add to cart, and it's free.
Continue Reading →
Want to group affiliates in your affiliate program in WordPress?
Affiliate groups can help you manage your affiliates more effectively and set custom referral rates based on the group.
This step-by-step guide will show you how to create affiliate groups using AffiliateWP to manage your affiliates seamlessly.
Creating affiliate groups and adding affiliates to them can significantly improve the way you manage your affiliate program.

One of the main benefits of creating affiliate groups is the ability to set customized commission rates for each group.
This allows you to reward high-performing affiliates with higher commission rates, incentivizing them to promote your products or services aggressively.
At the same time, you can set lower commission rates for new or less active affiliates, helping you control your overall affiliate program costs.
On the other hand, managing many affiliates can be challenging. Organizing your affiliates into groups simplifies the management process by allowing you to focus on specific groups and their needs.
You can also streamline the affiliate onboarding process by creating a default group for new affiliates. New affiliates will automatically be assigned to the default group upon signup, ensuring they receive the appropriate commission rates, marketing materials, and support from the beginning.
Organizing your affiliates into groups will help you increase business revenue without adding extra work to managing each affiliate.
Now, we’ll show you how to use the popular and reliable AffiliateWP plugin for your WordPress site to set up affiliate groups and add affiliates to these groups.
By the end, you’ll know everything you need to know about how to create and run affiliate groups.
This will help you run your affiliate program more efficiently and make it as successful as possible.
Let’s begin.
First, you must install AffiliateWP on your WordPress website.
AffiliateWP is a user-friendly, feature-rich plugin that integrates seamlessly with various WordPress plugins, making managing your affiliate program hassle-free.
To get started, visit the AffiliateWP pricing page and choose the plan that suits your needs.
After purchasing, go to your WordPress dashboard and navigate to the Plugins tab. Click Add New and upload the AffiliateWP plugin file.
Once uploaded, click Install Now and then Activate.
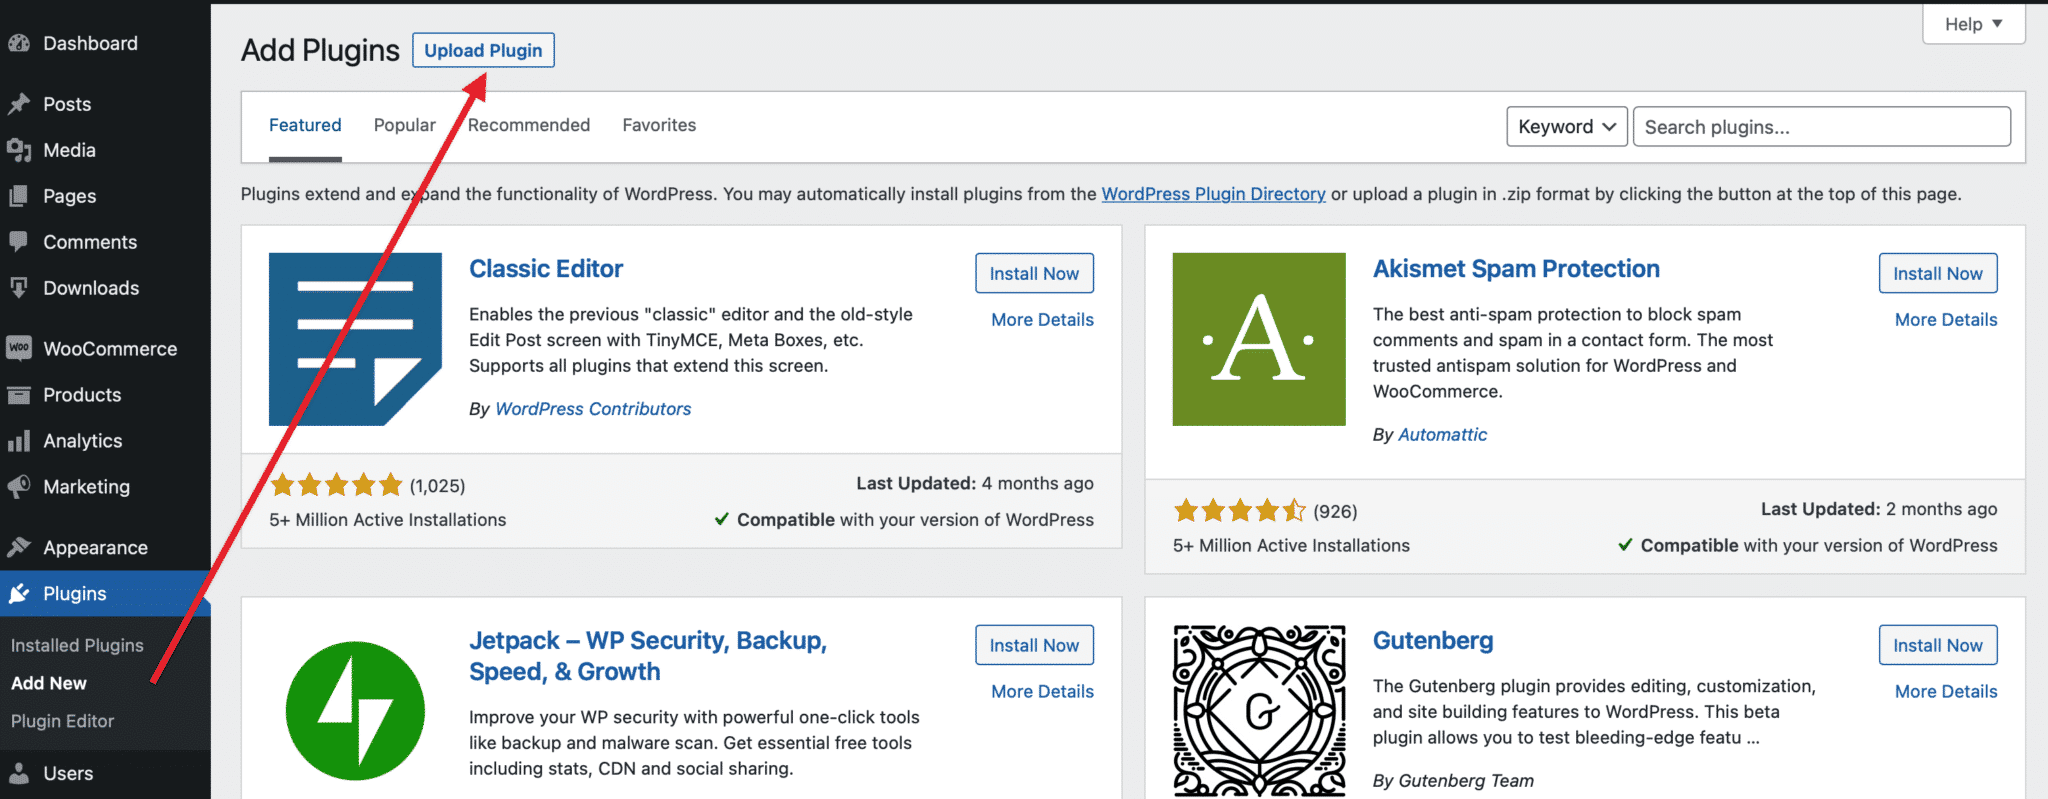
For a detailed guide on installing AffiliateWP, you can refer to their comprehensive step-by-step guide.
After installing and activating the plugin, the AffiliateWP setup wizard will guide you through configuring your affiliate program.
Access the setup wizard by hovering over AffiliateWP in the left-hand sidebar of your WordPress dashboard and clicking on Settings.
Scroll to the bottom of the page and select Launch Setup Wizard.

You will be prompted to enter your license key, which you can find in your confirmation email or AffiliateWP account.

Copy the key, paste it into the designated box, and click Continue.
The setup wizard will guide you through integrating AffiliateWP with your preferred e-commerce or membership plugin.

With over 15+ integrations available, including popular choices like WooCommerce, Easy Digital Downloads, and MemberPress, you can select the one that works best for your website.
Check the box next to your desired integration and click Continue.
Next, you will configure some basic settings, such as currency, referral type (fixed rate or percentage of the total value of sale), and referral amount.

Input the necessary information and click Continue.
While these settings establish your global affiliate commission rate, you can always adjust them later in the AffiliateWP Settings tab.

Now, click Finish Setup and Exit and exit the Setup Wizard.
Now that you have installed and set up the AffiliateWP plugin, it’s time to create your affiliate groups.
Go to your WordPress dashboard and click AffiliateWP in the left menu to do this.
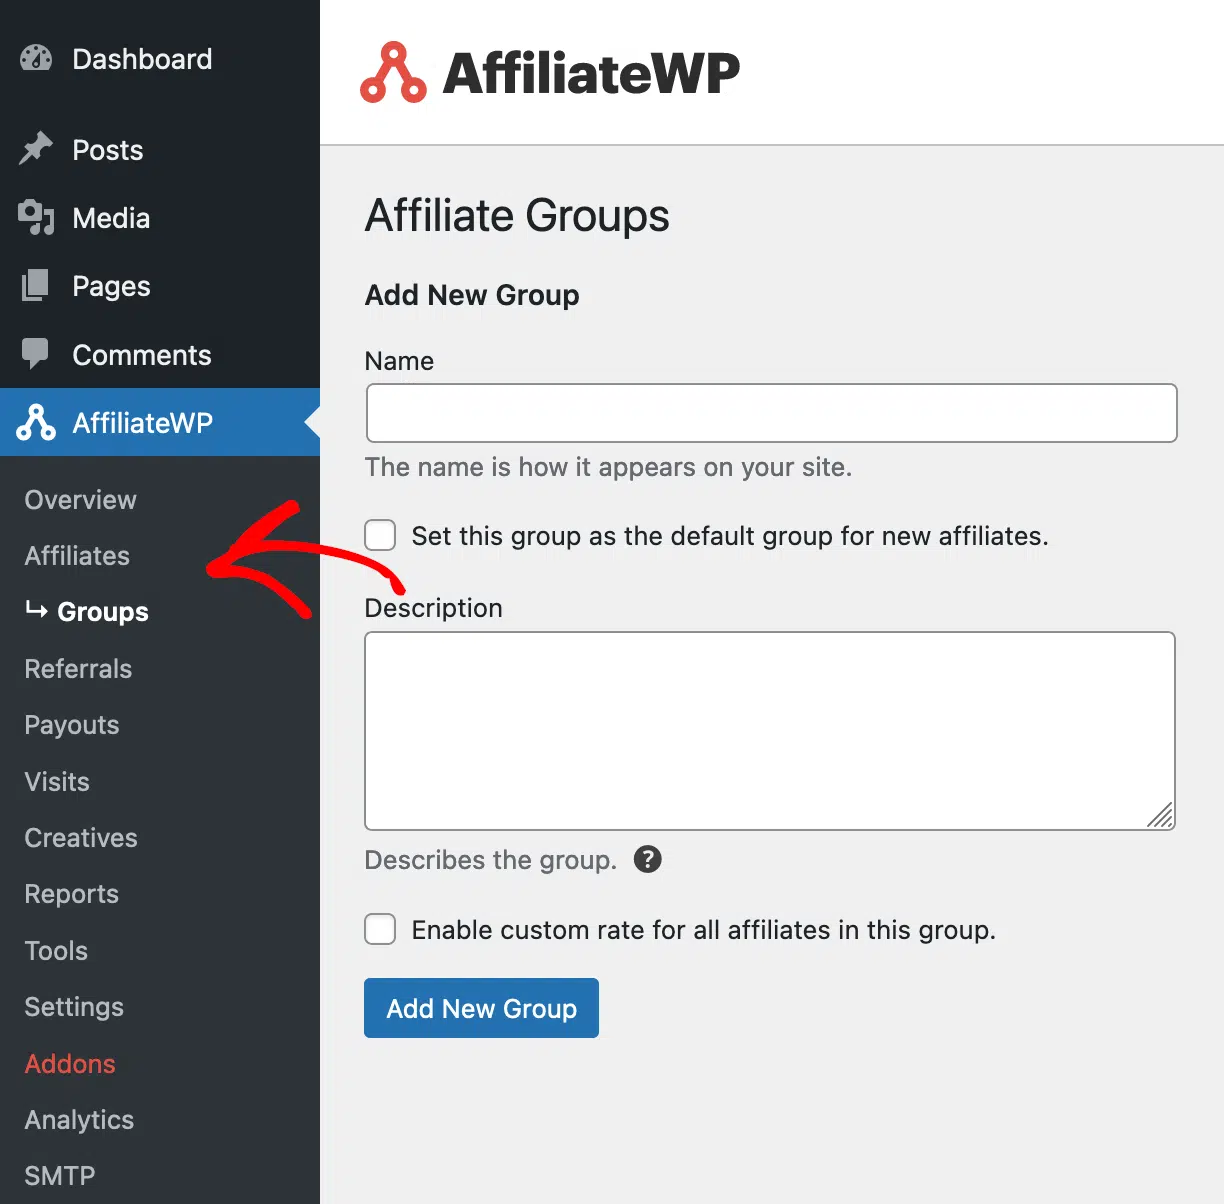
Next, click on Affiliates and then on the Groups tab. You will be presented with a simple form to fill out.
Enter a name for the group, which will be shown on the site.
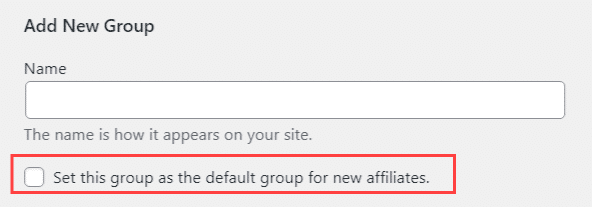
If you want new affiliates to automatically join this group, check the box that says, Set this group as the default group for new affiliates.
Then, add a description for the group, which will only be shown in the admin area and is for your reference.

You can also enable a custom referral rate for all affiliates in this group by checking the box that says Enable custom rate for all affiliates in this group.

This will override the global and per-affiliate rate settings. When enabling the custom rate, you can set the referral rate and choose whether to use a percentage or a flat rate.
Once you have completed the form, click Add Group to create a group to start adding your affiliates. Once you have made and saved the new group, it will be shown in the list when navigating to AffiliateWP » Affiliates » Groups.
With your affiliate groups created, you can now add affiliates to them. To do this, go to your WordPress dashboard and click on AffiliateWP in the left menu.
Then, click on Affiliates to see the list of your affiliates. To add an affiliate to a group, find the affiliate you want to add and click on their name. This will take you to the edit screen for that affiliate.
You will find a Group selection below the Affiliate Status section on the edit screen.

Here, you can choose the appropriate affiliate group from the options in the dropdown menu.
Note: Affiliates can only be associated with one group at a time and cannot be assigned to multiple groups.
After selecting the desired group, click Update Affiliate to save your changes.
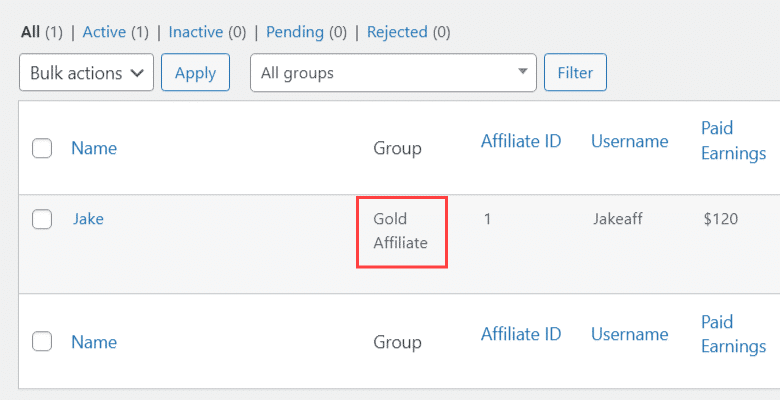
Once affiliates have been added to their respective group(s), you will see which group an affiliate belongs to when viewing the main affiliates screen at AffiliateWP » Affiliates.
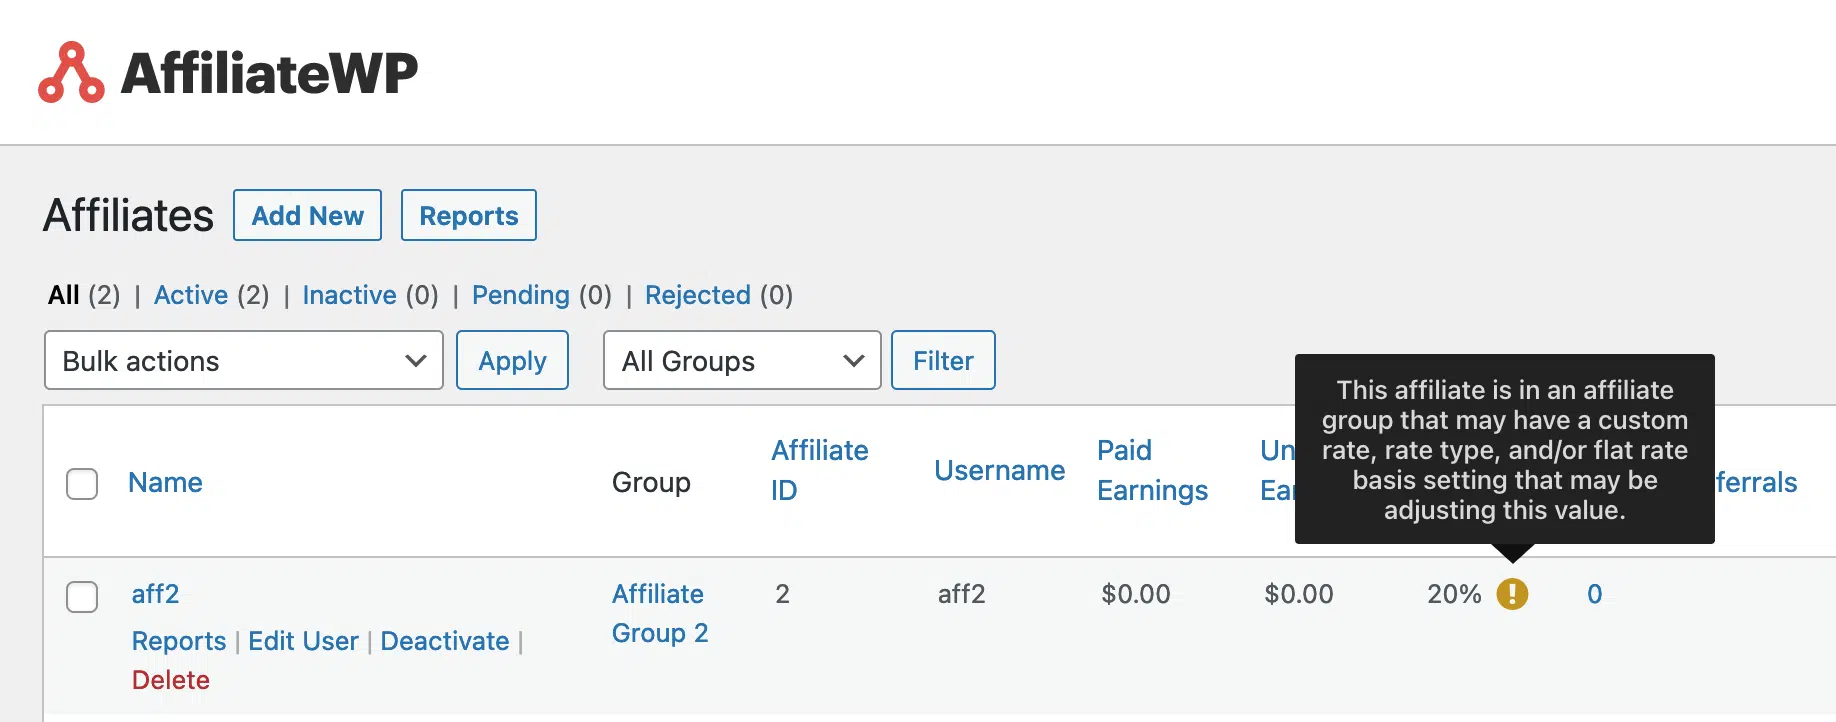
There will also be a notice bubble next to the affiliate rate, indicating that the affiliate is part of an affiliate group and that the rate shown for the affiliate may be changed based on the group they are part of.
And that’s all. Now you can put your affiliates into groups and set custom rates for each more specific group.
Now that you know how to create and assign affiliate groups, you can manage your affiliate program more effectively, thanks to AffiliateWP.
Organizing your affiliates in groups allows you to set more granular custom rates for those groups, offering maximum flexibility for your business.
Remember, you can set a default group for new affiliates, ensuring they are automatically assigned to a group upon registration. Furthermore, each group can have its referral rate and the rate type, giving you control over your affiliate program’s commission structure.
Need help managing your affiliate program? Here are some helpful resources for you:
Get AffiliateWP today and group your affiliates seamlessly without any hassle!
Disclosure: Our content is reader-supported. This means if you click on some of our links, then we may earn a commission. We only recommend products that we believe will add value to our readers.
Launch your affiliate program today and unlock a new revenue channel to grow your business faster.
We use cookies to improve your experience on our site. By using our site, you consent to cookies.
Manage your cookie preferences below:
Essential cookies enable basic functions and are necessary for the proper function of the website.
Statistics cookies collect information anonymously. This information helps us understand how visitors use our website.
Marketing cookies are used to follow visitors to websites. The intention is to show ads that are relevant and engaging to the individual user.
It would be great, if we could create a group which has lifetime commission, and a group which has one-time commission.
Is this possible?
Hey Alex. That isn’t possible right now but it’s something we can look at adding in a future update. Thanks.
I still miss the multi-level affiliate, to be able to commission affiliates for the group’s sales. Will you ever think in sales teams??
We are looking to add 2 different types of affiliates. Each type will earm commision on different products. Is there a way to do that?
Hey Haley – While we have the option to assign group specific referral rate, at the moment, we don’t have a built-in feature that allows assigning different commission rates for specific products based on affiliate groups. However, I’ve added your request to our internal feature tracker so our team can review it for future consideration.