Are you ready to install the AffiliateWP plugin on your WordPress site? After you’ve purchased a license, the next step is to install the plugin so you can start growing your business through affiliate marketing.
In this step by step guide, we will walk you through how to install and activate the AffiliateWP plugin.
Downloading the AffiliateWP Plugin
To get started, first log into your AffiliateWP account. Once you’ve logged in, go ahead and click on the Downloads tab.

This will show you a page with all of your available downloads, including the core AffiliateWP plugin. To download the plugin, click on the Download AffiliateWP button. This will save a zipped file of the AffiliateWP plugin to your computer.
In some cases, this file may unzip as you download it, and instead appear as a regular folder. However, the folder must be zipped to use the WordPress plugin uploader.
Installing AffiliateWP on Your site
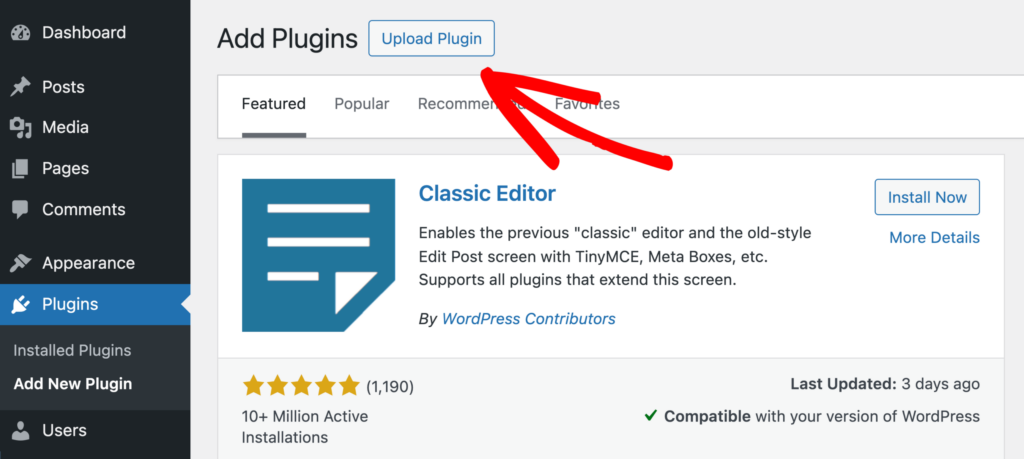
Once you’ve downloaded your zip file, go ahead and navigate to the site where you’d like to install AffiliateWP. Then, inside the admin dashboard, go to Plugins » Add New Plugin and click the Upload Plugin button.

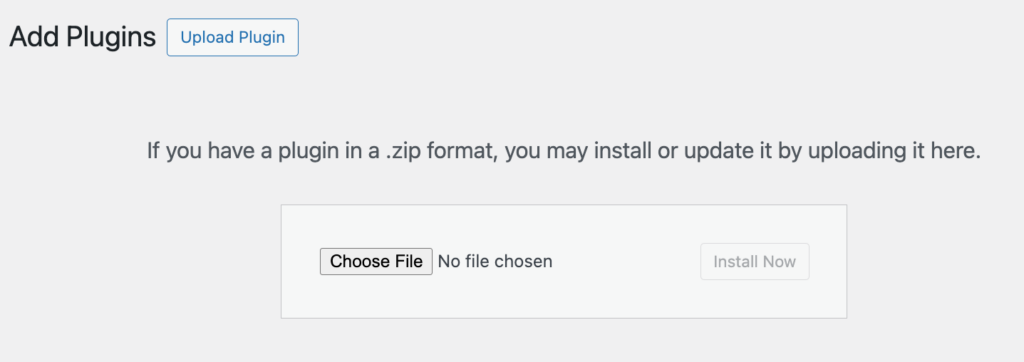
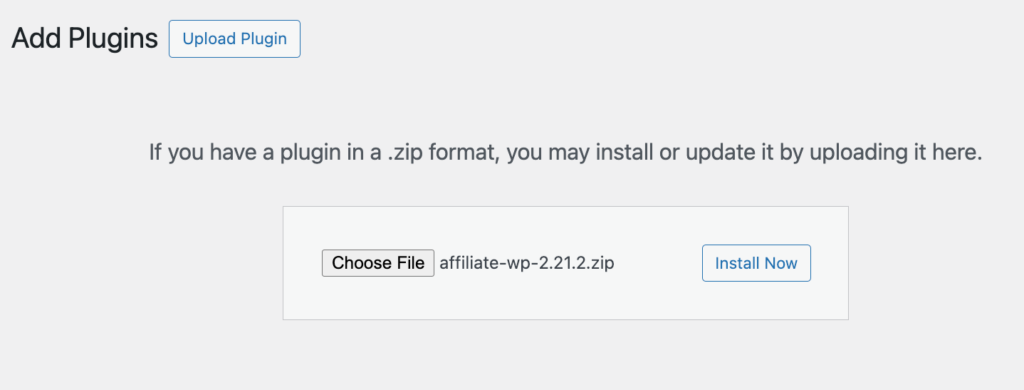
From here, you’ll see the option to upload the plugin. Click on the Choose File button and select the AffiliateWP zip file you just downloaded.

After your file is uploaded, go ahead and click on the Install Now button.

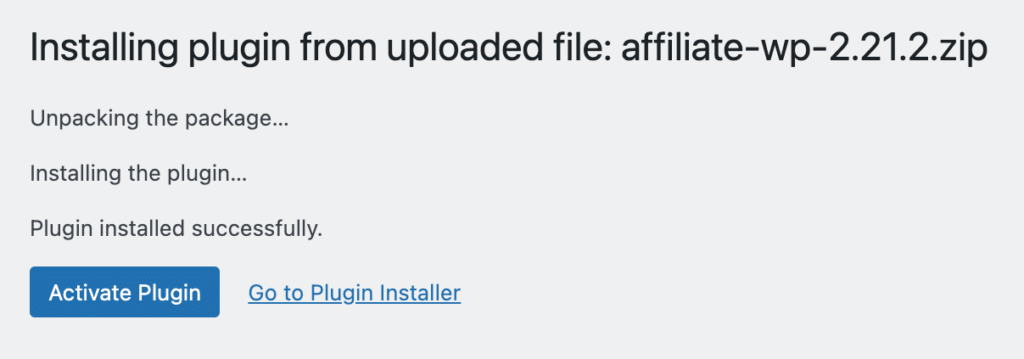
This will begin the installation process for you. Once the plugin is installed, click on the Activate Plugin button to activate AffiliateWP on your site.

After activating the plugin, be sure to verify your AffiliateWP license key to receive automatic updates and plugin support.
Frequently Asked Questions
Where can I find my AffiliateWP license key?
You can find your license key in your AffiliateWP account under the Licenses tab after logging in.
What should I do if the file downloads as a folder instead of a zip file?
If the file automatically unzips during download, simply re-zip the folder before uploading it to WordPress. WordPress requires plugins to be uploaded as zip files.
Can I install AffiliateWP on multiple sites?
The number of sites where you can install AffiliateWP depends on the license you’ve purchased. Check your AffiliateWP account to see how many sites your license supports.
How do I update AffiliateWP after installation?
Once your license key is verified, you will receive automatic updates directly in your WordPress dashboard. You can update AffiliateWP like any other WordPress plugin.
That’s it! You’ve successfully installed and activated the AffiliateWP plugin on your WordPress site. By following these simple steps, you’re now ready to start managing your affiliate program and growing your business through affiliate marketing. Be sure to keep your license key verified to receive ongoing updates and support.