Would you like to learn more about all the settings available in AffiliateWP? In addition to providing comprehensive affiliate management, AffiliateWP offers a wide range of plugin-wide options. These options include customizing affiliate registration, setting up commission rates, configuring email notifications, integrating with various platforms, and more.
In this documentation, we will walk you through each setting, ensuring you can fully optimize your affiliate program to suit your needs.
Accessing AffiliateWP Settings
To access the settings in AffiliateWP, go to AffiliateWP » Settings in your WordPress dashboard. This will open the General settings tab by default, but you can click on any tab along the top of the page to access additional settings.
General Settings
The General Settings section provides essential options to get you started with AffiliateWP.
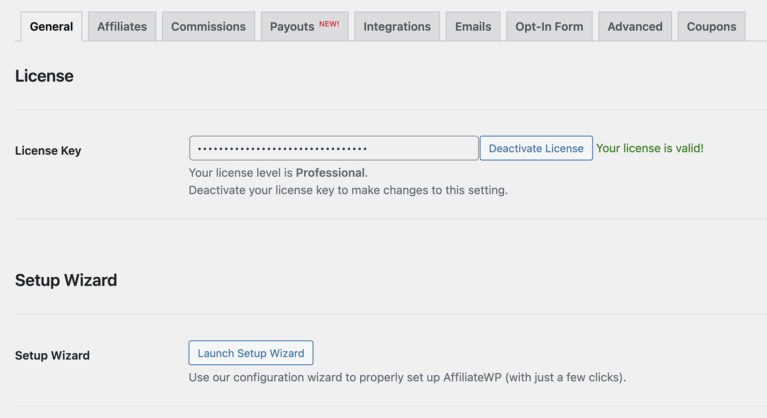
License Key
Enter the license key you received when you purchased AffiliateWP, and click Activate License. This ensures you receive automatic plugin updates and any addons available with your license level. It also allows us to provide support for you more swiftly should you need it. For detailed guidance on locating and adding your license key, refer to our license verification documentation.

Setup Wizard
Click the Launch Setup Wizard button to be guided through the most popular settings, helping you get up and running quickly with AffiliateWP.

Affiliates Settings
The Affiliates Settings section allows you to configure how affiliates register and manage their accounts on your site. Remember to click Save Changes at the bottom of the page after making any changes.
Registration & Management
Affiliate Account Page
Select the page where affiliates will manage their accounts from the drop-down menu. By default, this is set to the Affiliate Area page.

Affiliate Login Page
Select the page where the affiliate login form will appear from the drop-down menu. By default, this is set to the Affiliate Login page.

Affiliate Registration Page
Select the page where the affiliate registration form will appear from the drop-down menu. By default, this is set to the Affiliate Registration page.

Terms of Use Page
Most affiliate programs include a Terms of Use, Terms & Conditions, or Code of Conduct to set guidelines for affiliate behavior. To set up a Terms of Use page for your affiliate program, create one using a template, then select the page from the drop-down menu next to the Terms of Use Page setting. This adds a required checkbox to your affiliate registration form, prompting users to agree to your Terms of Use.

This setting only affects the [affiliate_area] and [affiliate_registration] shortcodes.
Allow Affiliate Registration
Initially, users cannot register as affiliates on your site, allowing you to set up your program first. Enable this setting to display AffiliateWP’s default affiliate registration form and start receiving applications.

Require Approval
By default, new affiliate registrations are automatically set to Active. Enable this setting to manually review and approve new affiliate applications, ensuring they meet your criteria before becoming active.

AI Review Instructions
Tailor the AI review process to your specific needs by providing custom instructions. By offering clear, detailed instructions, you empower the AI to make more accurate and relevant evaluations, streamlining your review process while maintaining your standards.

Starting Affiliate ID
This option allows you to set the ID for the first affiliate who registers, or the next affiliate for an existing program, giving the impression of a more established affiliate program.

Additional Registration Modes
The Additional Registration Modes setting can be used alongside the standard affiliate registration form to enhance your affiliate program’s functionality. The available options are:
- None: This is the default setting. When selected, new users will not be automatically registered as affiliates when creating an account on your site. They will need to complete the affiliate registration form to join your program.
- Automatically register new user accounts as affiliates: When this option is enabled, any new user account created on your site will be automatically registered as an affiliate. This streamlines the registration process, making it easier for new users to join your affiliate program without needing to complete a separate registration form.

Affiliate Links
Referral Variable
The referral variable identifies affiliate referral links (e.g., yoursite.com/?ref=123). You can customize this variable, ensuring it’s unique and doesn’t conflict with WordPress reserved terms. Examples include ref etc.

When setting your referral variable, make sure you do not use a reserved keyword or term in WordPress as it may conflict with core functionality. For example, you would not want to use “p” since it is reserved for pages and posts. View this link for the complete list: https://codex.wordpress.org/Reserved_Terms.
Default Referral Format
Set whether the default format for affiliate links uses the affiliate’s ID or username. Affiliates can use either format, but this setting determines the default display in the Affiliate Area.

Pretty Affiliate URLs
Enable this setting to create Pretty URLs (e.g., yoursite.com/ref/123) for affiliate links, which appear more professional. If you encounter 404 errors, visit the WordPress » Settings » Permalinks page to refresh the links.

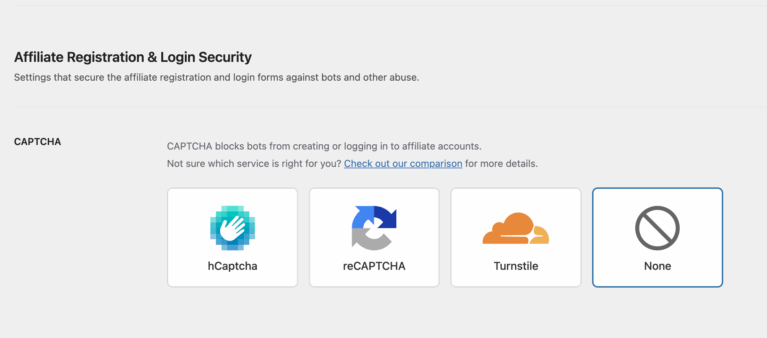
Affiliate Registration & Login Security
This section allows you to protect your affiliate registration and login forms from spam bots, credential stuffing, and other automated abuse by enabling CAPTCHA verification.
To enable this protection, select one of the available CAPTCHA services:
- hCaptcha: A privacy-focused CAPTCHA alternative to Google reCAPTCHA. hCaptcha presents users with a visual challenge to verify they’re human before submitting a form.
- reCAPTCHA: A widely used CAPTCHA service by Google that supports both checkbox-based (v2) and invisible (v3) verification methods.
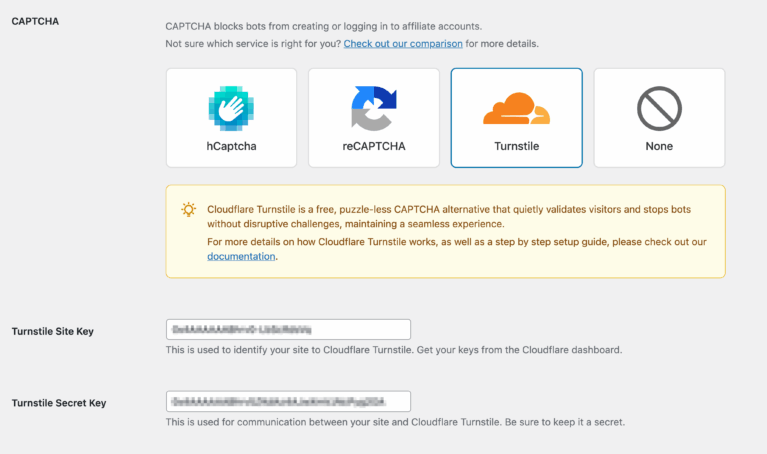
- Cloudflare Turnstile: A CAPTCHA-free solution provided by Cloudflare that automatically verifies users in the background, without requiring any challenges or interaction.
- None: Disable CAPTCHA entirely. No verification will be required for affiliate registration or login forms.
Once you select a CAPTCHA provider, additional fields will appear for you to enter the Site Key and Secret Key provided by that service. These keys are required for the CAPTCHA to function properly.
You’ll also see an option labeled Add CAPTCHA to Affiliate Login form. Enabling this checkbox applies CAPTCHA protection to the affiliate login form in addition to the registration form.

Affiliate Link Sharing
This option allows you to enable affiliate link sharing for your affiliates, providing them with a seamless way to promote their unique referral links. By selecting the sharing options—Facebook, LinkedIn, X (Formerly Twitter), Email, and QR Code – the affiliates can easily share their links across these platforms. Once enabled, share icons will appear below each affiliate’s link in their affiliate account, allowing them to share with a single click.

Affiliate UI
Logout Link
Enable this setting to display a logout link in both the Affiliate Area and the Affiliate Portal.

Affiliate Landing Pages
Enable the Affiliate Landing Pages to assign specific WordPress pages or posts to affiliates, allowing them to promote these pages instead of standard affiliate links.
Landing Pages

Affiliate Landing pages is a Pro license addon
Direct Link Tracking
Allow Direct Link Tracking
Select this option to enable direct link tracking for all affiliates in your program. When Direct Link tracking is enabled, affiliates can link directly to your site without needing to use an affiliate link, simplifying their promotional efforts. If you wish to manage direct link tracking on a per-affiliate basis, leave this option unchecked to enable it only for specific affiliates.
Commissions Settings
The Commissions Settings section allows you to customize how commissions are calculated and distributed to affiliates. Configuring these settings ensures that your affiliates are rewarded accurately and fairly for their efforts.
Referral Rate Type
You can choose between either a Percentage, or a Flat Amount referral rate type. The referral rate type you select here as your default will apply to all purchases/conversions that take place on your site.
- Percentage: Calculates a percentage of the product price or total cart value.
- Flat Amount: Assigns a specific dollar value per conversion or sale.

Flat Rate Referral Basis
When Flat is selected for the referral rate type, the Flat Rate Referral Basis settings section will be displayed.
There are two options to choose from when using Flat rate referrals.
- Per Product Sold: This is the standard behavior of flat rate referrals and is selected by default. If a customer is referred by an affiliate, and purchases multiple products in the same order, the affiliate is awarded once for every product sold, regardless of the quantity purchased of each product.
- Per Order: If a customer is referred by an affiliate and purchases a variety of products in the same order, the affiliate is awarded with a single commission value for the entire order.

Flat rate commissions on a per order basis are only available for Easy Digital Downloads and WooCommerce. If your integration is not supported, the standard Flat Rate Commission Per Product Sold option will be applied.
Referral Rate
Set the default commission rate or amount for affiliates. This rate is a percentage if the Referral Rate Type is set to Percentage, or a flat amount if set to Flat USD. For example, a 20% commission rate or a $10.00 flat rate per sale. Referral rates can also be set individually for each affiliate.

Cookie Expiration
Enter the number of days the referral tracking cookie should be valid. This determines how long a referral will be credited to an affiliate after the initial visit.

Credit Last Referrer
Enable this option to award commission to the last affiliate who referred a purchasing customer, rewarding the most recent referrer.

Exclude Shipping
Enable this setting to exclude shipping costs from commission calculations, ensuring commissions are based on the product price only.

Exclude Tax
Enable this setting to exclude tax costs from commission calculations, ensuring commissions are based on the product price only.

Reject Unpaid Referrals on Refund
Enable this setting to automatically reject unpaid referrals if the originating purchase is refunded or revoked, ensuring commissions are only paid on successful sales.

Ignore Referrals with Zero Amounts
Enable this setting to prevent tracking and saving zero-amount referrals. This can be useful for multi-price products that start at zero, or if a discount was used resulting in a zero amount. Note that if this setting is enabled and a visit results in a zero referral, the visit will be considered not converted.

Commission Holding Period
The Commission Holding Period is a feature that allows you to delay paying affiliate commissions for a set number of days after a referral is made. This helps protect your business from issues like refunds, chargebacks, or fraud, ensuring that affiliates are only paid for finalized sales.

You can set the number of days based on your refund policy or preferences. For example, if your refund period is 30 days, a holding period of 37 days adds a buffer for processing delays or disputes. Setting the value to 0 will enable immediate payouts.
Recurring Referrals
Enable Recurring Referrals
Check this box to enable referral tracking on all subscription payments. For more details, refer to the Recurring Referrals documentation.

Multi-Tier Commissions
Enable Multi-Tier Commissions to reward affiliates for referrals made by other affiliates they have referred, creating a multi-level structure of commissions. For more details, refer to the Multi-Tier Commissions documentation.

Multi-Currency
Enable the Multi-Currency to automatically detect transaction currency, calculate commissions, and convert them to your program’s currency. For more details, refer to the Multi-Currency addon documentation.

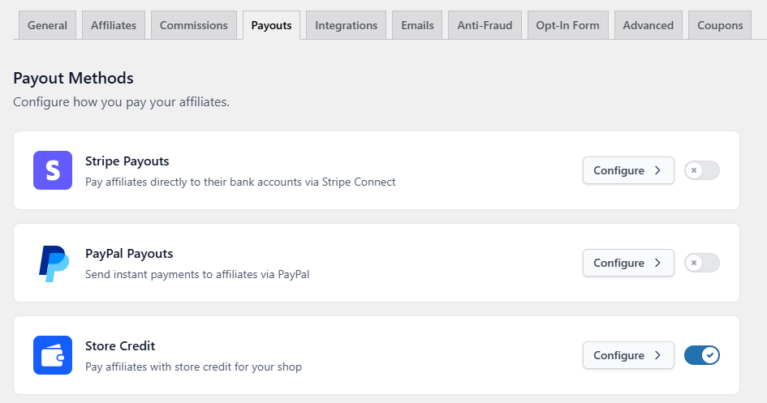
Payouts Settings
Affiliate programs succeed when commissions reach affiliates in a way that feels reliable, clear, and easy to manage.
So, AffiliateWP offers multiple payout options to suit your program: Stripe, PayPal, Store Credit making it easy to pay affiliates reliably and on time.
To learn everything about available payout methods, refer to the documentation here.
Integrations Settings
The Integrations Settings section allows you to enable and configure various integrations to work seamlessly with AffiliateWP.
Configuring Integrations
Navigate to the Integrations tab to choose which integrations to enable. By enabling these integrations, you can track affiliate referrals and conversions through various platforms and tools. To enable an integration, simply check the box next to the desired integration. This will allow AffiliateWP to track referrals and conversions through the enabled platforms.

To explore the full range of integrations available and learn how they can benefit your affiliate program, visit the AffiliateWP Integrations page
Opt-In Form Settings
The Opt-In Form Settings section allows you to display an opt-in form that creates a referral for the tracked affiliate and adds the subscriber to your email marketing platform: MailChimp, ActiveCampaign, or ConvertKit.
Opt-In Referral Amount
Enter the flat amount for each opt-in referral, or leave the default amount of 0.00.

Opt-In Referral Status
Select the default status for opt-in referrals:
- Pending
- Unpaid

Message Shown Upon Opt-In Success
Enter the message you would like to show subscribers after they successfully opt-in.

Platform
Select the opt-in platform provider:
- MailChimp
- ActiveCampaign
- ConvertKit
Click Save Changes to configure provider-specific settings.
Display
Place the shortcode [opt_in] on any page or post to display the opt-in form.
MailChimp Settings
MailChimp API Key
To connect AffiliateWP with your MailChimp account, enter your MailChimp API key in this field. If you’re unsure where to find your API key, you can refer to this guide on locating your MailChimp API key.
MailChimp Audience ID
Specify the ID for the MailChimp Audience where you want to add new subscribers. For assistance in finding your List ID, check out this article on locating your MailChimp Audience ID.
Double Opt-In
Enable this option if you want new subscribers to receive a double opt-in email from MailChimp. This ensures that subscribers confirm their interest before being added to your list. To learn more about the difference between single and double opt-in, visit this detailed explanation.

ActiveCampaign Settings
ActiveCampaign API URL
Enter your ActiveCampaign API URL to integrate with AffiliateWP.
ActiveCampaign API Key
Input your ActiveCampaign API key in this field. For details on how to find your API key, see this guide on locating your ActiveCampaign API URL and key.
ActiveCampaign List ID
Specify the List ID where you want new subscribers to be added. To understand more about opt-in lists and how to find your List ID, take a look at this information on opt-in lists.

ConvertKit Settings
ConvertKit API Key
Enter your ConvertKit API key to connect your account with AffiliateWP. You can locate the ConvertKit API key from the Settings » Advanced » API.
ConvertKit Form ID
Provide the ID of the ConvertKit form you want to use for subscribing contacts. For a beginner’s guide to using ConvertKit forms, refer to this resource on ConvertKit forms.

Email Settings
The Email Settings section provides robust email customization options to enhance your affiliate marketing communication.
General Email Settings
Email Logo
Upload or select a logo to display at the top of your emails. Click the Upload File button to add your image.
Email Template
Select the template for your email notifications. The Default Template is selected by default. For customization, see how to modify template files.

From Name
Enter the name that emails will come from. This is usually your site name.

From Email
Enter the email address to send emails from. This will act as the “from” and “reply-to” email address.

Affiliate Manager Email
You can specify an Affiliate Manager Email where all admin notifications will be sent. Adding more affiliate managers is also possible by separating each email address with a comma.

Affiliate Email Summaries
When this is enabled and fully configured, it enables you to automatically send monthly email summaries to your affiliates, keeping them informed about their performance and earnings.

AffiliateWP Emails
Affiliate Manager Emails
These emails are sent to the affiliate manager whenever a new affiliate registers or a new referral is created.
New Affiliate Registration
Enable the option to send emails to the affiliate manager when a new affiliate registers.

Email Subject
Add the subject line for the email sent to affiliate managers when new affiliates register. You can use template smart tags to customize the registration email subject.

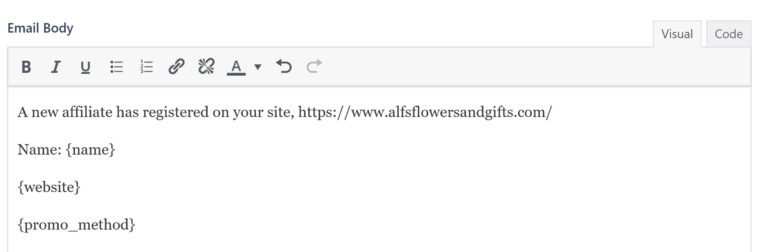
Email Body
Here you can write the email sent to affiliate managers when a new affiliate registers. HTML is accepted. You can also use template smart tags to personalize the content.
Templates Tags
You can utilize the following smart tags to dynamically personalize email subject lines and content for the Affiliate Registration emails.
Available Smart Tags:
- {name} – The display name of the affiliate, as set on the affiliate’s user profile
- {user_name} – The username of the affiliate on the site
- {user_email} – The email address of the affiliate
- {website} – The website of the affiliate
- {promo_method} – The promotional method used by the affiliate
- {affiliate_id} – The affiliate’s unique ID
- {affiliate_url} – The affiliate’s referral URL
- {login_url} – The affiliate login URL for your website
- {site_name} – Your website’s name
- {review_url} – The URL to the review page for a pending affiliate

New Referral
Enable the option to send emails to the affiliate manager when a new referral is created.

Email Subject
Include the subject line for the email sent to site affiliate managers when affiliates earn referrals. Leverage smart tags to customize the new referral email subject.

Email Body
Write the email that will be sent to site affiliate managers when new referrals are earned. You can use HTML and template smart tags for personalization.

Templates Tags
You can utilize the following smart tags to dynamically personalize email subject lines and content for the new referral email.
Available Smart Tags:
- {name} – The display name of the affiliate, as set on the affiliate’s user profile
- {amount} – The amount of a given referral
- {referral_url} – The URL to the review page for a pending affiliate
- {site_name} – Your website’s name
- {landing_page} – The URL the customer landed on that led to the referral being created
- {campaign_name} – The name of the campaign associated with the referral (if applicable)

Affiliate Emails
These emails are sent to affiliates when there’s a new referral or a change in their application status (Accepted, Pending, or Rejected).
New Referral
Enable the option to send emails to the affiliate when they earn a new referral.

Email Subject
Include the subject line for the email sent to site affiliate managers when affiliates earn referrals. Leverage smart tags to customize the new referral email subject.

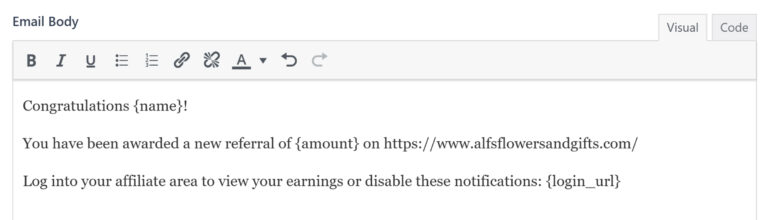
Email Body
Write the email that will be sent to site affiliate managers when new referrals are earned. You can use HTML and template smart tags for personalization.
Template Tags
You can utilize the following smart tags to dynamically personalize email subject lines and content for the new referral email.
Available Smart Tags:
- {name} – The display name of the affiliate, as set on the affiliate’s user profile
- {amount} – The amount of a given referral
- {referral_url} – The affiliate’s referral URL
- {login_url} – The affiliate login URL to your website
- {site_name} – Your website’s name
- {referral_rate} – The affiliate’s referral rate
- {landing_page} – The URL the customer landed on that led to a referral being created
- {campaign_name} – The name of the campaign associated with the referral (if any)

Application Accepted
Enable the option to send emails to the affiliate when their affiliate request is approved.

Email Subject
Set the subject line for accepted application emails sent to affiliates when their account is approved. You can personalize the subject line using template tags.

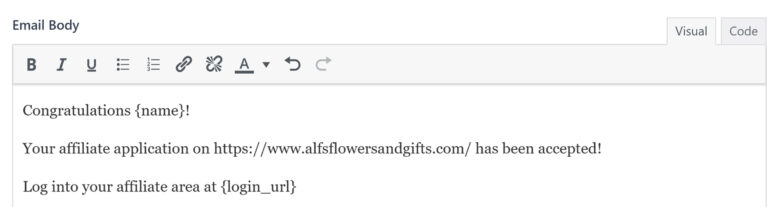
Email Body
Compose the email sent when an application is accepted. You can customize the email with a combination of template smart tags and HTML.
Templates Tags
You can utilize the following smart tags to dynamically personalize email subject lines and content for the application acceptance email.
Available Smart Tags:
- {name} – The display name of the affiliate, as set on the affiliate’s user profile
- {user_name} – The username of the affiliate on the site
- {user_email} – The email address of the affiliate
- {affiliate_id} – The affiliate’s unique ID
- {referral_url} – The affiliate’s referral URL
- {login_url} – The affiliate login URL to your website
- {site_name} – Your website’s name

Application Pending
The application pending email sections will only be visible if you have Require Approval enabled under Affiliates settings.
Enable this option to send emails to the affiliate when their application is received and is awaiting review.

Email Subject
Define the subject line for pending affiliate application emails. You can tailor your subject lines using template smart tags.

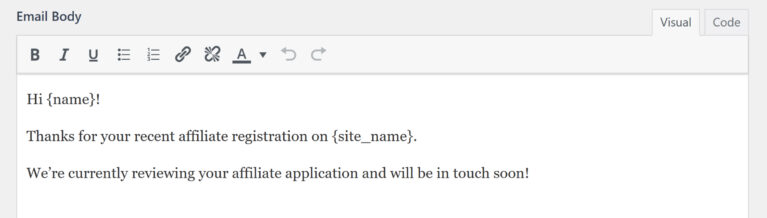
Email Body
Compose the email that gets sent when an application is pending. You can uniquely personalize email content using template smart tags and HTML in combination.
Templates Tags
You can utilize the following smart tags to dynamically personalize email subject lines and content for the application pending email.
Available Smart Tags:
- {name} – The display name of the affiliate, as set on the affiliate’s user profile
- {user_name} – The username of the affiliate on the site
- {user_email} – The email address of the affiliate
- {site_name} – Your website’s name

Application Rejected
The application rejection email sections will only be visible if you have Require Approval enabled under Affiliates settings.
Enable this option to send emails to the affiliate if their application is declined.

Email Subject
Here you can specify the subject line for rejected affiliate application emails. Additionally, you can add a personal touch to your subject lines by including template smart tags.

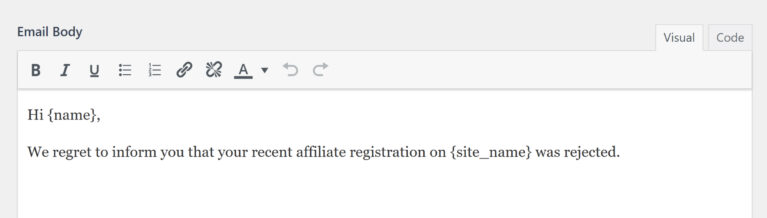
Email Body
Enter the email content for rejected affiliate application emails. HTML is accepted, and various template tags are available to customize the content.
Templates Tags
You can utilize the following smart tags to dynamically personalize email subject lines and content for the application rejected email.
Available Smart Tags:
- {name} – The display name of the affiliate, as set on the affiliate’s user profile
- {user_name} – The username of the affiliate on the site
- {rejection_reason} – The reason an affiliate was rejected
- {site_name} – Your website’s name

Preview & Test
With AffiliateWP, you can preview and test the emails before sending them to make sure everything looks and works correctly.
Preview Email
The Preview Email shows a live preview of the email within the system, letting you see how it will appear without sending it. It ensures that the email look professional, all links and formatting appear correctly, and avoid sending mistakes.

Test Email
The Test Email feature lets you send a copy of the email to your chosen email inbox so you can see in real time how it will appear to your affiliates/affiliate managers.

You will also find a placeholder where you can enter the email address you want the test email sent to.

Stripe Payout Emails
Stripe payout emails are sent when affiliate manager processes payouts through Stripe. These emails inform affiliate manager and affiliates about key payout events, such as when a transfer is created, completed, failed, etc.
These emails notify affiliate manager and affiliates about Stripe payout events, such as successful transfers or payout updates.
To enable and customize the Stripe Payouts email, you will need to enable the Stripe Payouts option under AffiliateWP > Settings > Payouts. For more detailed you can refer to the guideline Stripe Payouts
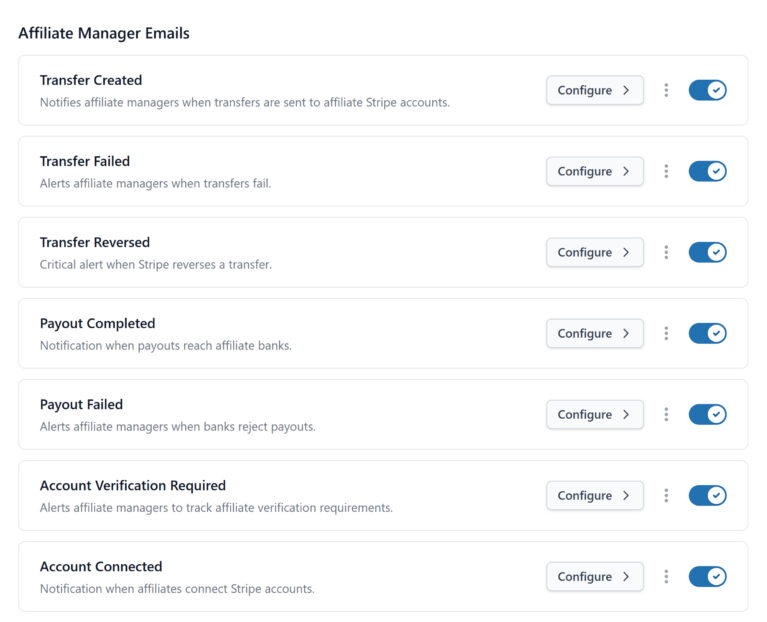
Affiliate Manager Emails
Affiliate Manager receive email when transfers are created, fail, or are reversed, as well as when payouts successfully reach an affiliate’s bank or fail due to a bank issue. They are also alerted when an affiliate needs to complete Stripe account verification and when an affiliate successfully connects their Stripe account, helping ensure payouts are tracked and managed smoothly.
To send emails to the affiliate manager, enable notifications for the relevant events and customize the email subject and body as needed.
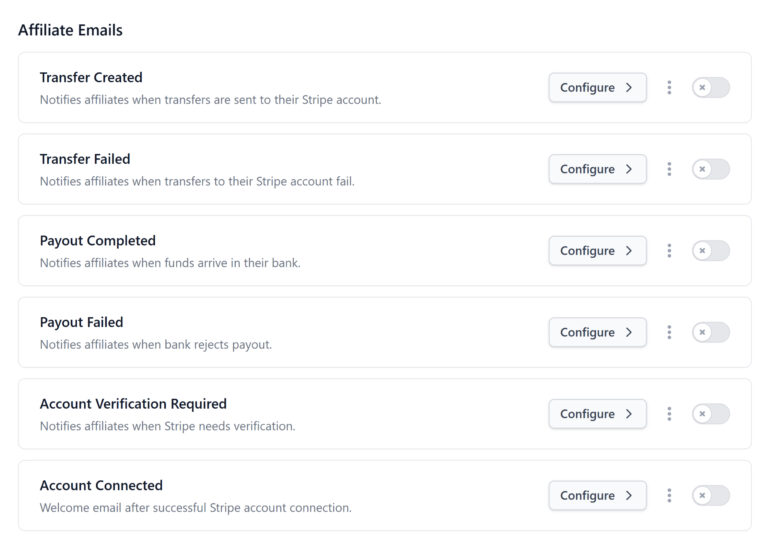
Affiliate Emails
Affiliates receive email when transfer is sent to their Stripe account or if a transfer fails, when funds successfully arrive in their bank or if a payout is rejected by the bank, and when Stripe requires additional account verification. A confirmation email is also sent when an affiliate successfully connects their Stripe account, helping them stay aware of their payout setup and progress.
To send emails to the affiliates, enable notifications for the relevant events and customize the email subject and body as needed.
Advanced Settings
The Advanced Settings section provides more in-depth options to fine-tune your affiliate program. Remember to click Save Changes at the bottom of the page after making any adjustments.
Currency Settings
Currency
Choose which currency will be shown to all affiliates in the Affiliate Area. Only one currency can be chosen, and it is not possible to show currency based on the affiliate’s location at this time.

Currency Symbol Position
Show the currency symbol before or after the affiliate’s earnings in the Affiliate Area in relation to your chosen currency.

Thousands Separator
Choose which thousands separator you would like your affiliates to see in the Affiliate Area in relation to your chosen currency.

Decimal Separator
Choose which decimal separator you would like your affiliates to see in the Affiliate Area in relation to your chosen currency.

Tracking
Cookie Sharing
Enable this option to share cookies with sub-domains when using a WordPress multisite installation. This setting helps maintain affiliate tracking across different sub-domains within your network. For more details, you can read how AffiliateWP works with multisite.

Default Referral URL
By default, the referral URL shown to affiliates in the Affiliate Area is your primary domain URL. If you wish to change the default referral URL shown in the Affiliate Area, enter your preferred default URL in this field.

Referral URL Blacklist
If you wish to block specific affiliates’ websites or pages from generating referrals for any reason, enter the URL of the website or page to block in this input field. Enter one URL per line if entering multiple URLs.

This will only apply to new visits from a website after the URL has been saved.
Template File / Shortcode Settings
Terms of Use Label
The Terms of Use Label assists site owners with compliance regarding the European GDPR regulation changes. Enter the text you would like to show describing the Terms of Use checkbox. The text shown for the Terms of Use checkbox applies when using the [affiliate_area]or[affiliate_registration] shortcodes.

Affiliate Area Forms
This setting allows you to choose which forms you would like visible or hidden on the Affiliate Area page when using the [affiliate_area] shortcode.

This is especially useful in numerous instances:
- If you have created a custom affiliate registration form and wish to hide the default AffiliateWP affiliate registration form
- If you have a different login page or different registration page for affiliates
- If you have a closed affiliate program, and only want to show an affiliate login form
- If you would like to show no forms on the Affiliate Area page, because you have placed them elsewhere on your site using the
[affiliate_login]and/or[affiliate_registration]shortcodes.
The default affiliate registration form will only be visible if Allow Affiliate Registration is enabled in Affiliates settings. The affiliate login form will only be visible when you are logged out.
Required Registration Fields
By default, certain fields on the AffiliateWP default affiliate registration form are required when a user is submitting an affiliate application.
The required fields are:
- Your Name
- Username
- Account Email
- Website URL
- Password (and Confirm Password)
The following fields are optional by default:
- Payment Email
- How will you promote us?
In this setting, you can choose which (if any) of the four following fields you wish to make required, or optional:
- Your Name
- Payment Email
- Website URL
- How will you promote us?
For example, you could make just the Website URL optional if you do not require affiliates to provide this information. Uncheck the boxes next to the field you wish to make optional. Similarly, check the box next to any field you wish to make required.

These field settings only apply when using the [affiliate_area] or [affiliate_registration] shortcodes. The Username and Account Email form fields are always required. The Password (and Confirm Password) form fields will be removed if not required.
Email Summaries
Disable Email Summaries
Checking this box will disable the monthly email summaries sent to the affiliate manager email address.

Privacy & Logging
Disable IP Address Logging
When checked, this setting will disable logging of the customer IP address that is normally displayed in the AffiliateWP » Visits entries.

Enable Debug Mode
When you first set up AffiliateWP, we recommend testing everything is working so you can see exactly how the system works. AffiliateWP provides a Debug Assistant to help you identify potential issues while you are testing the system. Check the box next to Enable Debug Mode to turn on error logging for the visit and referral process. This will add a new tab called Debug Assistant under AffiliateWP » Tools. The Debug Assistant will log both successful and unsuccessful referral processes, as well as plugin update routines, and will help you capture any issues should they arise while testing.

Data Management
Remove Data on Uninstall
Enable this setting if you are wanting to completely remove all of the AffiliateWP data from your website’s database. With this setting enabled, the removal of all data occurs if you deactivate the core AffiliateWP plugin on your website’s main Plugins page, then delete the plugin as well.

Troubleshooting
Use Fallback Referral Tracking Method
This setting uses an alternate method of tracking. We recommend leaving this setting disabled unless you or your developer understand JavaScript errors which can eventually be fixed, or you have been instructed to enable this setting by AffiliateWP support.
If you are having issues with referral commissions or visit entries/tracking not working as expected, please view our troubleshooting article.
Frequently Asked Questions
What is the purpose of the AffiliateWP Setup Wizard?
The Setup Wizard guides you through the most popular settings to help you configure and launch your affiliate program quickly.
What are the options for setting referral rates in AffiliateWP?
In the Commissions Settings, you can choose between a Percentage or a Flat Amount referral rate type. The selected rate type will apply to all purchases or conversions on your site globally.
What advanced settings are available for currency display?
In the Advanced Settings, you can choose the currency to display to all affiliates, set the currency symbol position, and define the thousands and decimal separators as per your preference.
How do I manually approve new affiliate registrations?
Enable the “Require Approval” setting in the AffiliateWP Settings » Affiliates to manually review and approve affiliate applications before they become active.
How do I enable CAPTCHA in AffiliateWP?
Go to AffiliateWP » Settings » Affiliates, then scroll to Affiliate Registration & Login Security. Select a CAPTCHA provider, enter your keys, and optionally enable CAPTCHA for the login form.
That’s it! By configuring these settings, you can optimize your affiliate program to ensure it runs smoothly and efficiently, while providing affiliates with the necessary tools and information to succeed.