
New in RewardsWP: Points, Redesigned Rewards Widget & More
RewardsWP now includes Points, a redesigned Rewards Widget, and new tools to launch, run, and measure loyalty and referrals in one place.
Continue Reading →
RewardsWP now includes Points, a redesigned Rewards Widget, and new tools to launch, run, and measure loyalty and referrals in one place.
Continue Reading →
Are you finding it hard to get more from your affiliate program?
If your WordPress affiliate registration form is too basic, you’re likely missing out on valuable information that could help personalize and strengthen your relationships with affiliates. This lack of detail can lead to a less active and less motivated affiliate network, which ultimately hampers your sales.
In this guide, we’ll walk you through the steps to add custom fields to your WordPress affiliate registration form.
This step will help you better understand and engage your affiliates, leading to more active participation and increased sales.
Let’s get started!
Without detailed custom fields, your affiliate registration form may not capture essential information.
This can lead to a lack of insight into who your affiliates are and what they need.
As a result, your affiliate program might struggle, slowing down your sales growth.
By adding custom fields, you enable your business to collect specific information like marketing strategies, locations, and areas of expertise.
For example, adding a custom field like “Preferred Promotion Methods” lets you know whether an affiliate excels in email marketing, social media, or blogging.
This information allows you to tailor your resources and support to match their strengths, boosting their effectiveness.
You can then tailor your communication and support to their needs, making it easier for them to succeed.
When your affiliates thrive, they drive more sales, helping your business grow.
Adding custom fields to your affiliate registration form is super simple with AffiliateWP.
Just follow the below steps and get started:
Creating a powerful affiliate registration form and adding custom fields is simple with AffiliateWP.
AffiliateWP lets you quickly set up a comprehensive affiliate program right within WordPress.
To start, just visit our pricing page and select the plan that fits your needs. We recommend choosing the Pro plan if you want to scale your affiliate program with tools like Multi-Tier Commissions, Affiliate Link Discounts, and more.
If you encounter any issues downloading the plugin, this detailed guide will help you through each step.
After downloading AffiliateWP, navigate to the AffiliateWP tab on your WordPress dashboard and click on Settings. At the bottom of the settings page, you’ll find a Launch Setup Wizard button. Click it to begin.
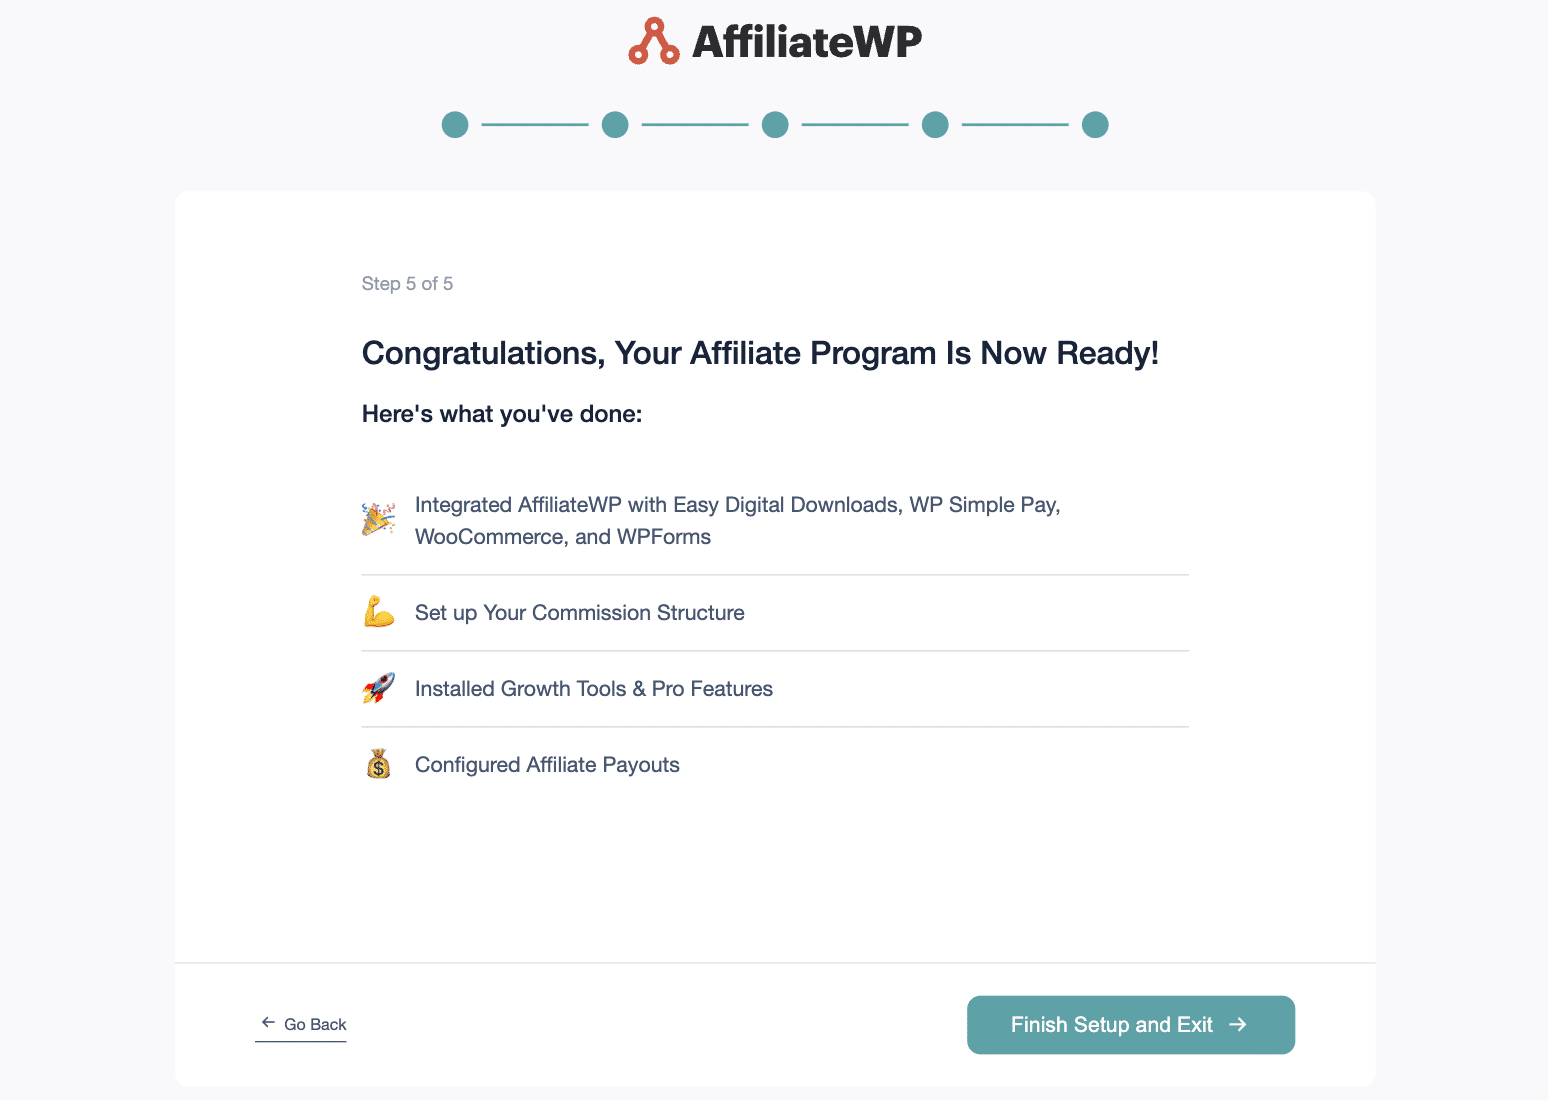
The setup wizard makes it easy to integrate your e-commerce store with popular WordPress plugins such as:
You can quickly define your commission structure and set your cookie duration with a few clicks.
Once you complete the setup wizard, your affiliate program will be active and ready to start scaling your business.
When you launch your affiliate program using AffiliateWP, it automatically creates an Affiliate Area page.
This page serves as the portal where affiliates sign up and log in to their accounts.
It’s important to differentiate this from the affiliate registration form itself. The Affiliate Area page includes both the affiliate registration form for new signups and the login form for existing affiliates.
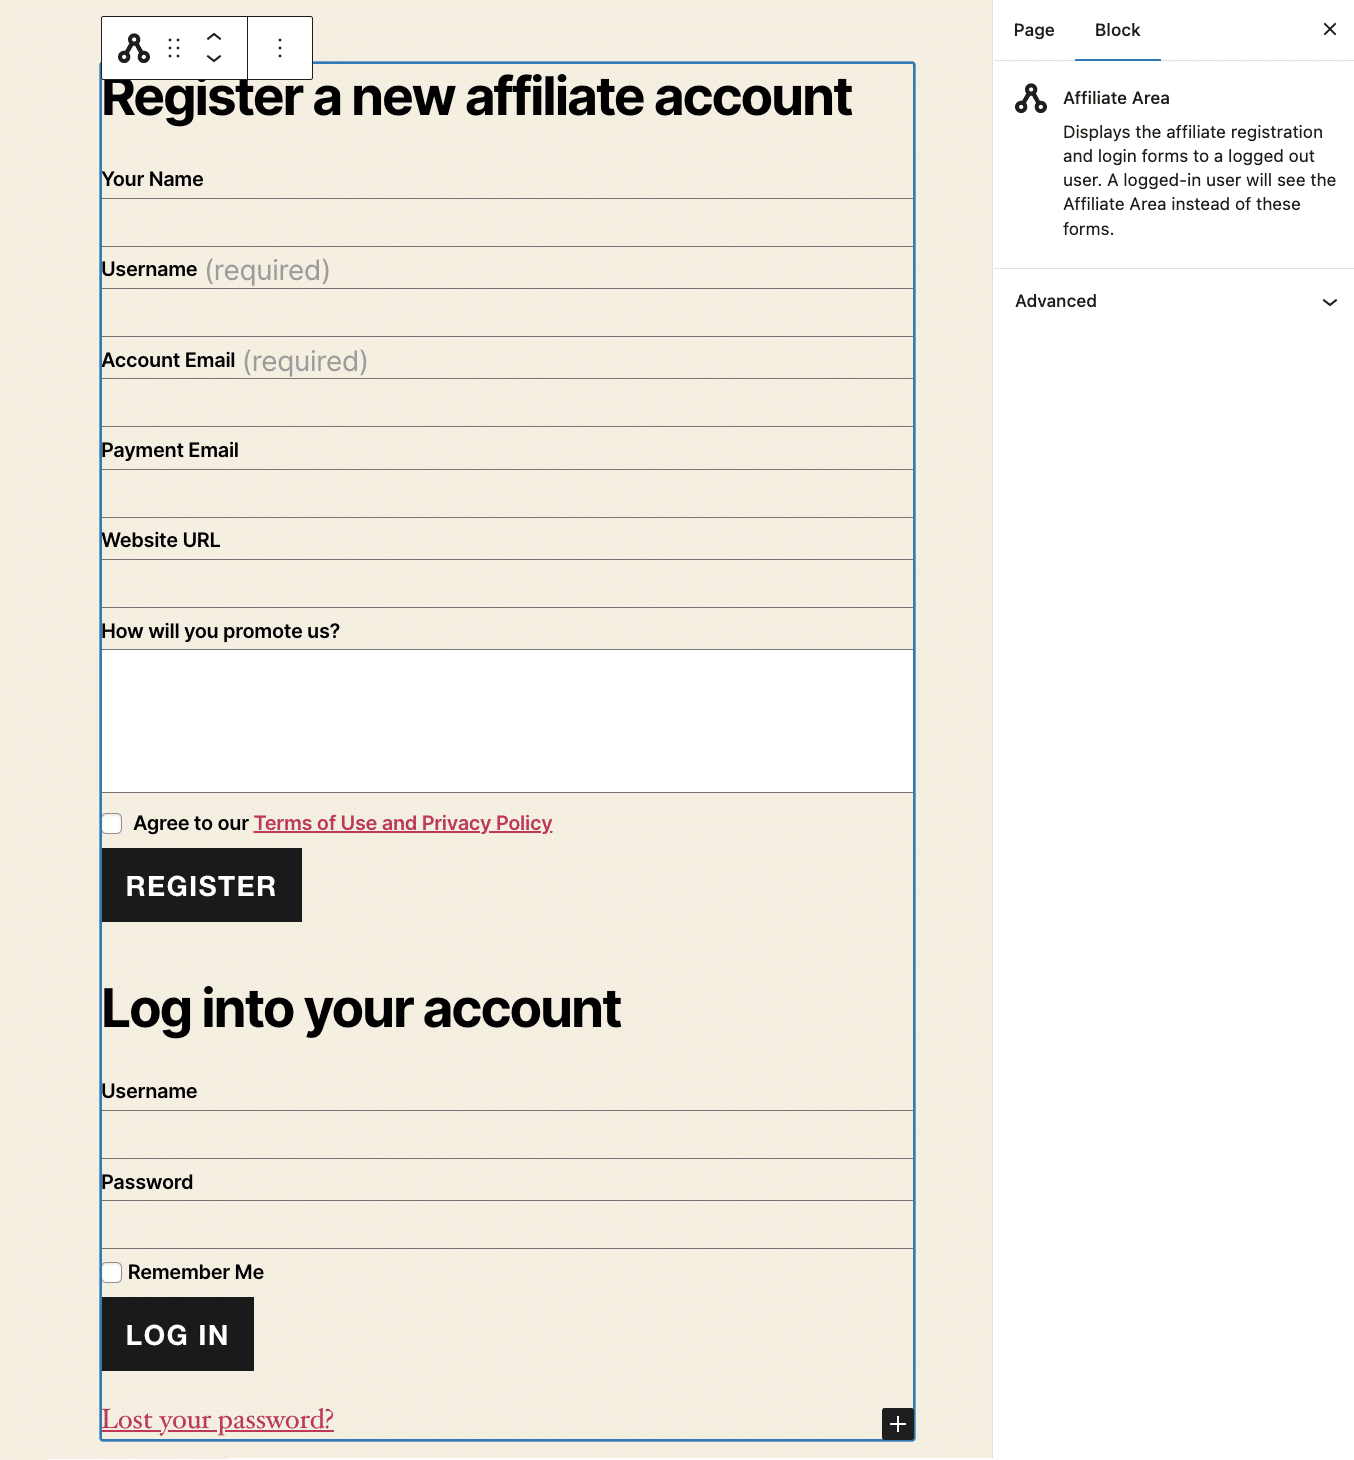
You can use the default Affiliate Area page as your signup page, or you can create a customized landing page in WordPress.
If you opt to modify the Affiliate Area page, simply navigate to your AffiliateWP settings, and under the Affiliate Area tab, select a different page from the dropdown menu.
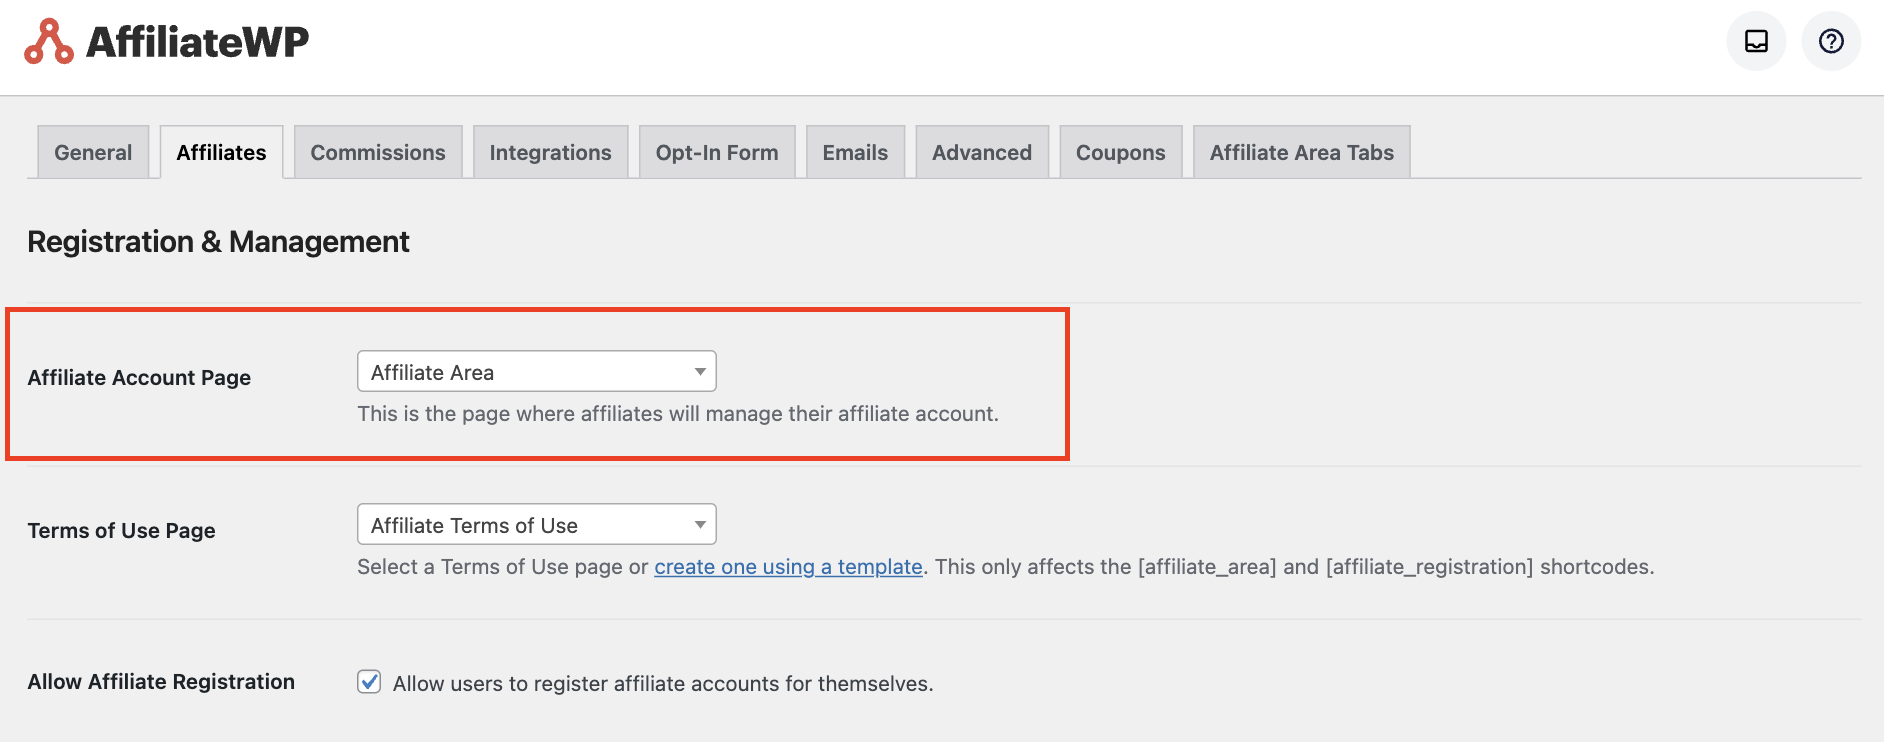
This gives you full control over your affiliate signup page, allowing you to make it as engaging and effective as possible.
Once your form is ready, add a custom field by selecting the parent block, the Affiliate Registration form block.
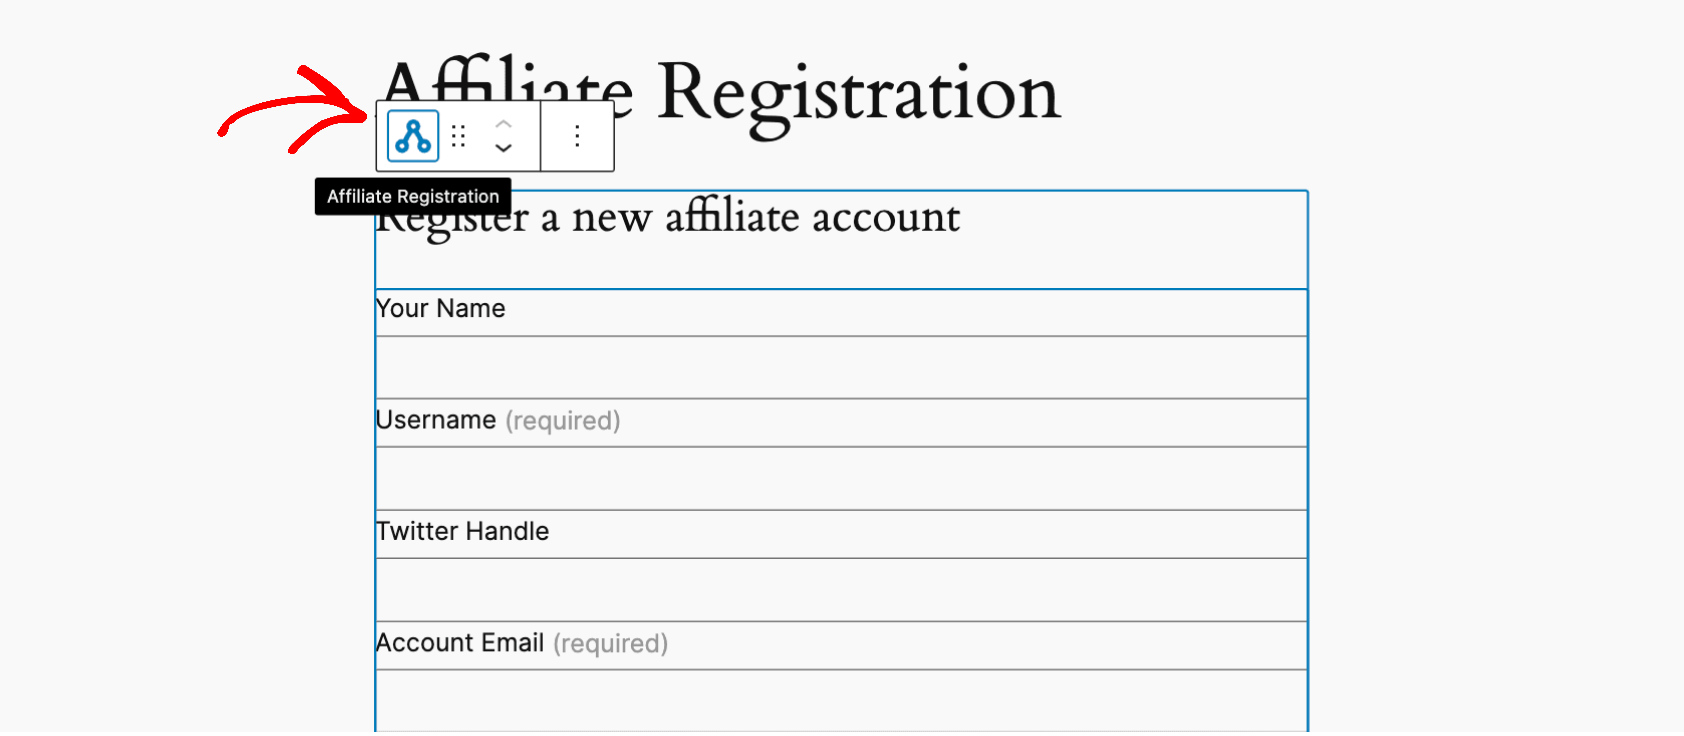
From here, locate the plus sign (+) at the bottom right of the block. Clicking this will display a list of available fields you can add to your form. You can add any custom field like password, email, phone number, location, etc.
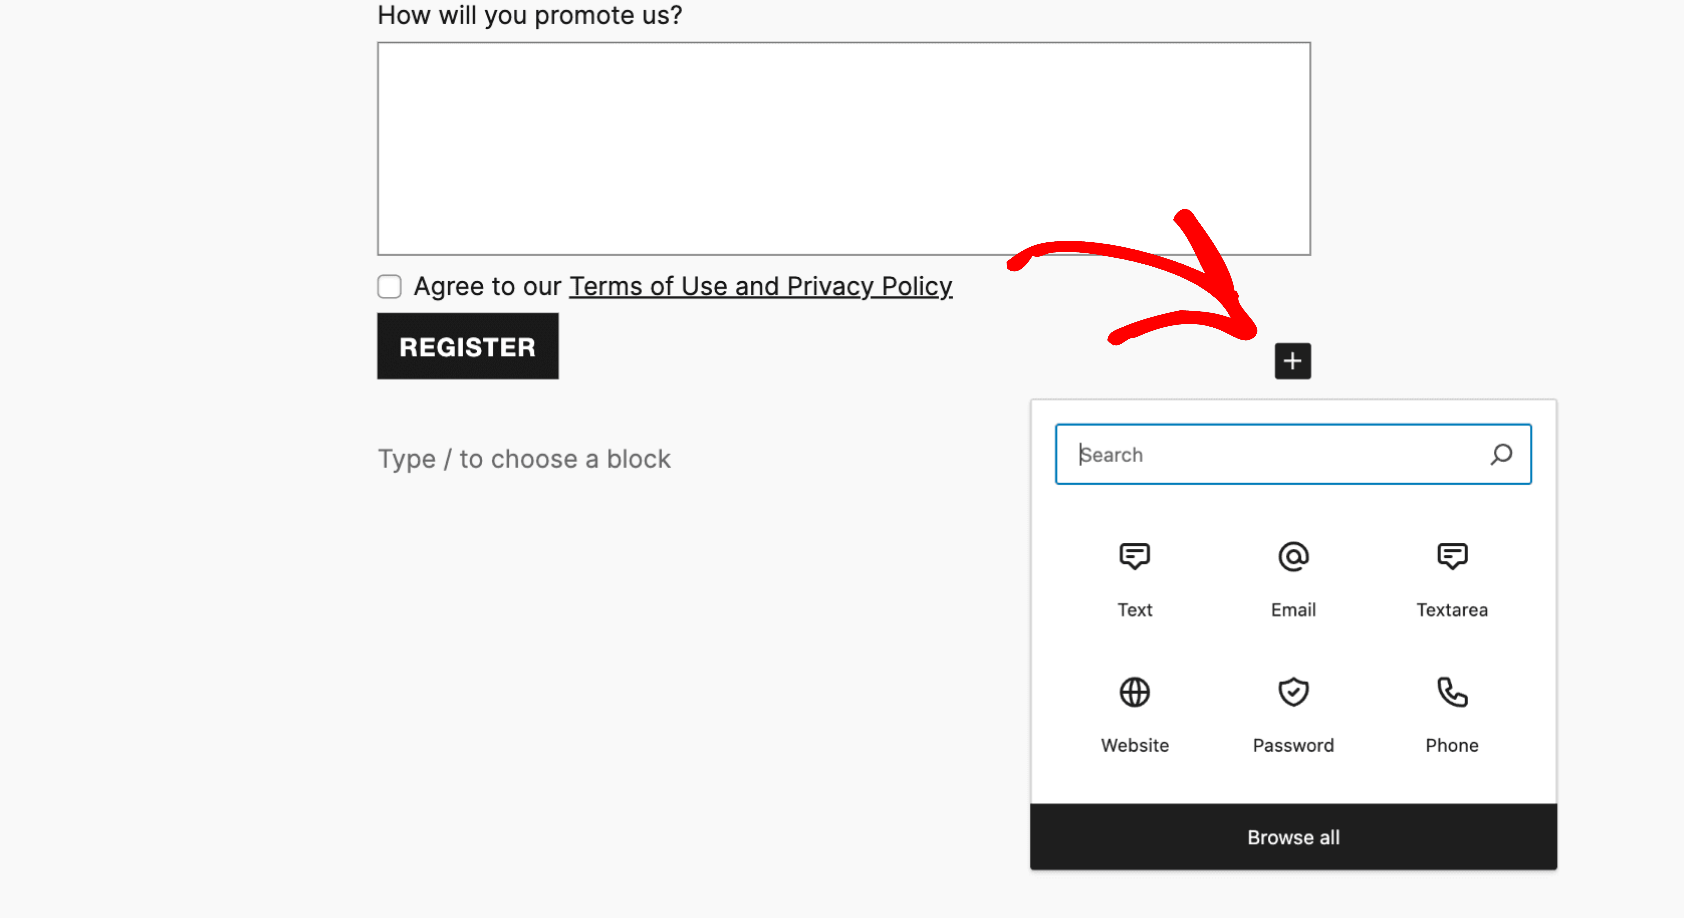
For example, you want to include an Instagram Handle field, select a text field from the available options, and add it to your form.
After adding the field, use the directional arrows to position it appropriately within the form, ensuring it fits seamlessly with the other information you collect.

Finally, save your changes to ensure the new field is included in the affiliate registration form.
Once a new affiliate registers through your customized form, you can view the submitted data, including any custom fields like the Instagram Handle in our example.
To access this information, navigate to AffiliateWP » Affiliates in your WordPress dashboard.

From here, select the affiliate whose data you want to review by clicking on their name.
This action will take you to the Edit Affiliate screen. On this screen, look for the Additional Registration Info section.
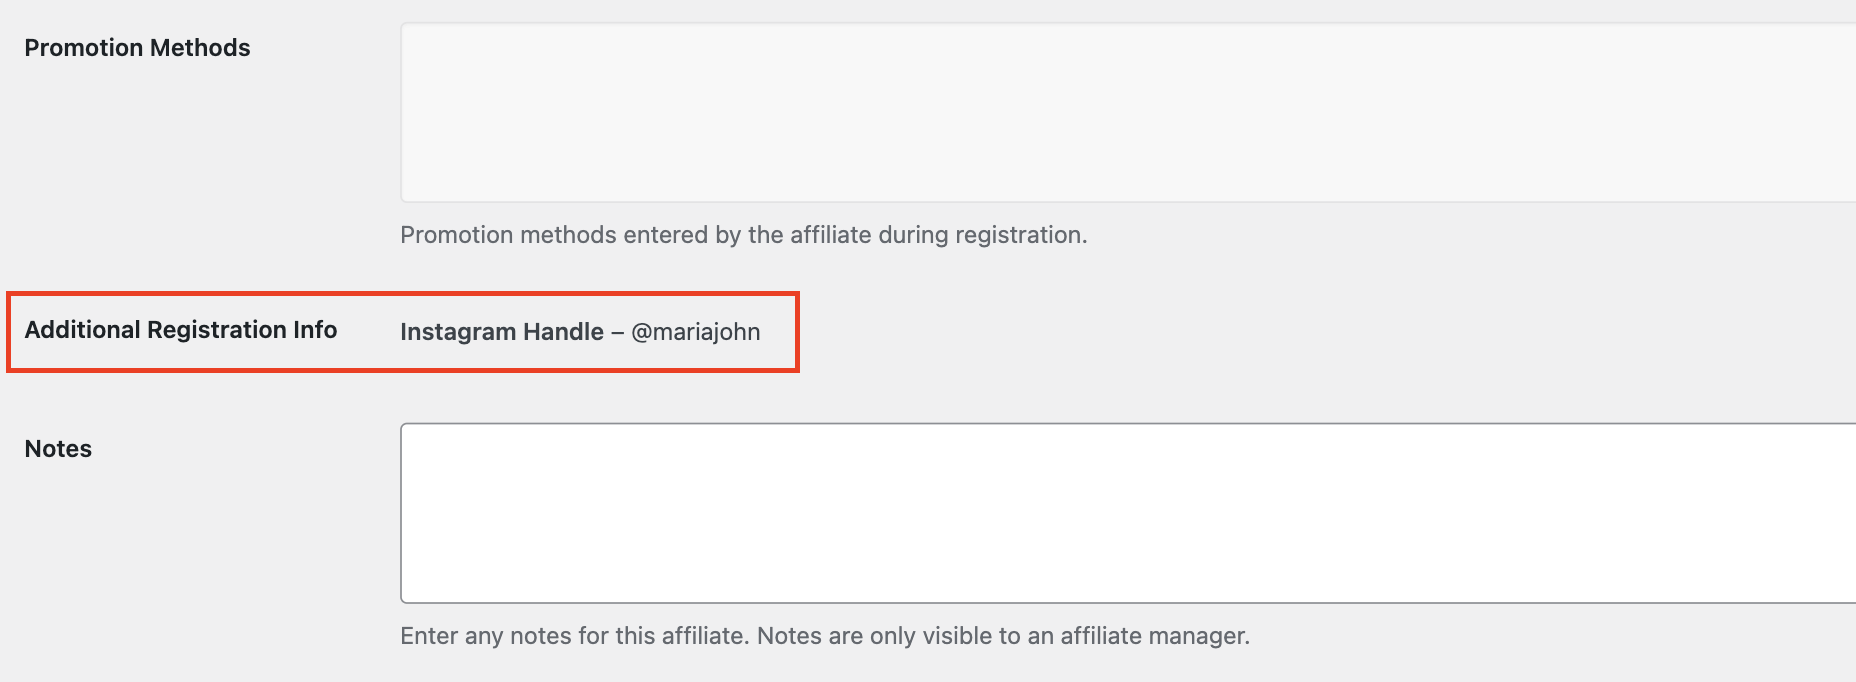
This section will display all the extra information the affiliate provided during registration, including any custom fields added to the form.
It’s time to take your affiliate program to the next level.
Adding custom fields to your affiliate registration forms allows you to capture more relevant information for deeper engagement and more effective collaboration with your affiliates.
This approach can significantly boost your sales and extend your marketing reach.
So, don’t overlook the power of detailed data to drive your affiliate program’s success.
Here are a few more resources to further refine your approach:
Ready to enhance your affiliate program?
Start with AffiliateWP today and discover the impact of well-crafted registration forms on your business’s growth.
Disclosure: Our content is reader-supported. This means if you click on some of our links, then we may earn a commission. We only recommend products that we believe will add value to our readers.
Launch your affiliate program today and unlock a new revenue channel to grow your business faster.
We use cookies to improve your experience on our site. By using our site, you consent to cookies.
Manage your cookie preferences below:
Essential cookies enable basic functions and are necessary for the proper function of the website.
Statistics cookies collect information anonymously. This information helps us understand how visitors use our website.
Marketing cookies are used to follow visitors to websites. The intention is to show ads that are relevant and engaging to the individual user.