AffiliateWP offers powerful tools for exporting and importing data, allowing you to back up your affiliate program, migrate records, and share configuration settings seamlessly.
This guide walks you through each export and import option in AffiliateWP > Tools > Export/Import and provides detailed steps for using these features effectively.
Before we get started, be sure to install and activate AffiliateWP on your WordPress site.
Exporting Data
The Export tools in AffiliateWP allow you to save important affiliate data in CSV format, making it easy to analyze, transfer, or back up your records. Each export option—affiliates, referrals, payouts, visits, and settings—offers specific filters to ensure you’re only exporting the information you need.
Exporting Affiliates
To export affiliate records, start by navigating to AffiliateWP > Tools > Export/Import and locate the Export Affiliates section. This tool enables you to export a CSV file containing a list of affiliates, each record presented as an individual line item.
You can filter affiliates by status using the dropdown menu labeled Status. Here, you can select from options such as All Statuses, Active, Inactive, Pending, and Rejected, depending on which affiliates you’d like to include in your export.
If you want a complete record of all affiliates, select “All Statuses.” Once your filter is set, click the Export button to generate the CSV file.

Exporting Referrals
To export referral records, scroll down to the Export Referrals section. This tool provides options for filtering referral data based on affiliate name, date range, and referral status.
Begin by entering an affiliate’s name in the Affiliate Name field to export referrals for a specific affiliate.

If you want to export referrals for all affiliates, leave this field blank. Set a date range by filling in the From and To fields, which specify the start and end dates for the export. Next, choose a status from the dropdown menu, which includes options such as Paid, Unpaid, Rejected, and Pending.

After configuring these filters, click the Export button to download your CSV file with an itemized list of referral records.
Exporting Payouts
In the Export Payouts section, you can export payout data based on affiliate, date range, and payout status. To narrow your export to a specific affiliate, enter their name in the Affiliate Name field; otherwise, leave it blank to include all affiliates.
Next, specify the date range for the export using the From and To fields. Then, choose the appropriate status from the dropdown, with options for Processing, Paid, and Failed.

Once your filters are set, clicking Export will generate a CSV file containing each payout record as a separate line item.
Exporting Visits
To export visit data, locate the Export Visits section. Here, you can filter visits by affiliate name, date range, and referral status. If needed, enter an affiliate name to export visits specifically related to that individual, or leave it blank for all affiliates.

Define a date range by entering values in the From and To fields. Finally, use the referral status dropdown to choose between Converted and Unconverted visits, or select “All” to include both types. Click Export to download a CSV with each visit record on its own line.
Exporting Settings
To export your AffiliateWP configuration, find the Export Settings section at the bottom of the Export/Import page. This feature exports a JSON file containing your AffiliateWP settings, which you can later import into another AffiliateWP installation to replicate your setup.

Simply click Export to download the JSON file, which can be used to seamlessly apply the same configurations on a different site.
Importing Data
AffiliateWP’s import tools let you import settings, affiliate records, and referral data directly from CSV or JSON files, making it easy to populate or transfer data between sites.
Importing Settings
In the Import Settings section, you can import configuration settings from another AffiliateWP installation using a JSON file. Start by clicking Choose File to select the JSON file you exported previously.

Once selected, click Import to apply the settings.
This feature is useful for quickly setting up a new site with the same configurations as an existing AffiliateWP installation.
Importing Affiliates
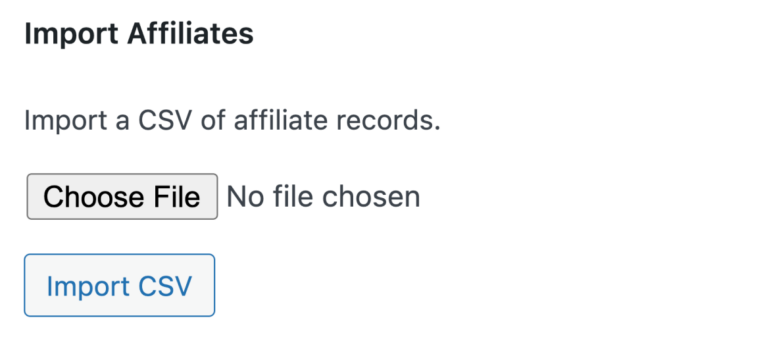
To import affiliates, navigate to the Import Affiliates section and select your CSV file by clicking Choose File. After selecting your file, click Import CSV to upload it.

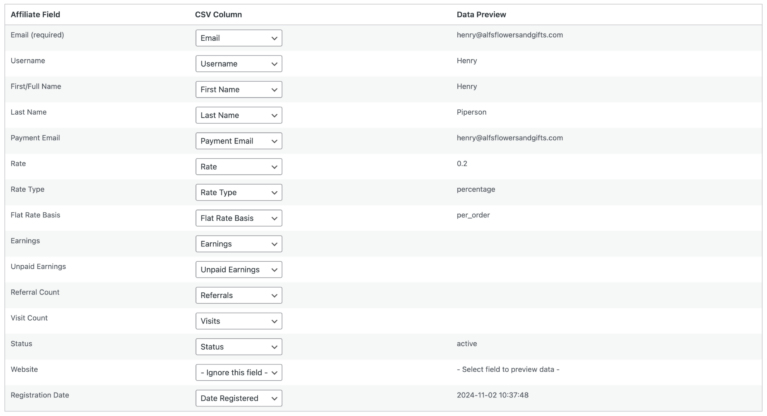
The mapping interface will appear, displaying each AffiliateWP field with a dropdown menu populated by the CSV columns, allowing you to match data accurately. For each field, a data preview from the first row of the CSV will appear to the right, aiding in correct mapping.
As you proceed with mapping, remember that the Email field is mandatory for the import to work. Other fields, such as Username, First/Full Name, and Rate, can be added to enhance the affiliate records but are optional.

Here’s a quick reference of the expected data types for each field, which ensures compatibility with the AffiliateWP system:
| Affiliate Field | Expected Data Type |
| A valid email address. | |
| Username | Plain text string, often letters, numbers, or underscores. For systems using email as a username, map to the Email field instead. |
| First/Full Name | Plain text string, representing the first or full name. If the Last Name field is empty, First Name is treated as the full name. |
| Last Name | Plain text string, typically the affiliate’s surname. Used with First Name. |
| Payment Email | A valid payment email address, different from the primary Email if applicable. |
| Rate | Numeric value with up to two decimal places. |
| Rate Type | Plain text, typically “percentage” or “flat.” |
| Earnings | Numeric, representing earnings paid out (e.g., 1.00). |
| Unpaid Earnings | Numeric, representing earnings not yet paid out (e.g., 1.00). |
| Referral Count | Numeric value, counting referrals. |
| Visit Count | Numeric value, counting visits. |
| Status | Affiliate status, defaulting to “Pending” if not mapped. |
| Website | A valid URL. |
| Registration Date | Any standard date format. |
Importing Referrals
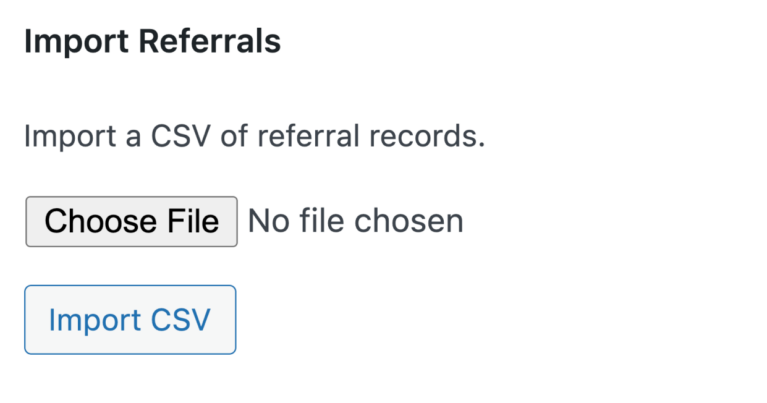
The Import Referrals tool allows you to bring in referral data from a CSV file, providing a straightforward process to match each column with the relevant AffiliateWP referral fields.

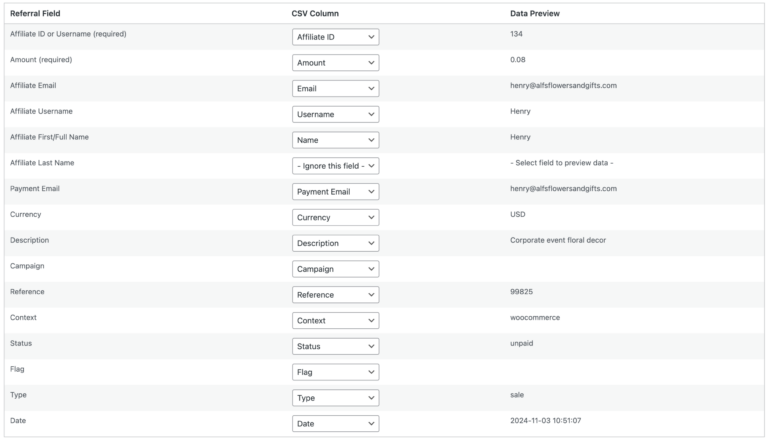
After selecting your file with Choose File and clicking Import CSV, the mapping interface will appear, showing the fields to be mapped. You’ll find a dropdown list for each field, pre-filled with columns from your CSV file, allowing for accurate data mapping. As you select each field, a preview of data from the first row of the CSV file appears on the right to help verify that mappings are correct.

For a successful referral import, ensure the Affiliate ID or Username and Amount fields are mapped, as these are essential.
Below is a quick guide to the expected data types for each referral field, making it easy to organize and prepare your CSV in advance:
| Referral Field | Expected Data Type |
| Affiliate ID or Username (required) | Numeric ID or plain text username. If the ID is an email, map it to the Email field instead. |
| Amount (required) | Currency amount as plain text. |
| Affiliate Email | Valid email address. |
| Affiliate Username | Plain text, similar to Affiliate ID or Username. |
| Affiliate First/Full Name | Text, representing first or full name. |
| Affiliate Last Name | Text, representing last name. |
| Payment Email | Payment email, if different from primary Email. |
| Currency | Currency abbreviation (e.g., USD). |
| Description | Text describing the referral. |
| Campaign | Text for campaign name. |
| Reference | Typically used for transaction ID or order number. |
| Context | Text, usually referring to the payment system (e.g., WooCommerce). |
| Status | Referral status (e.g., Unpaid, Paid), defaults to “Pending” if not mapped. |
| Date | Any standard date format. |
Frequently Asked Questions
Can I export data for a specific period or status?
Yes, you can filter data for affiliates, referrals, payouts, and visits by specifying parameters such as status, date range, or affiliate name before exporting. This flexibility allows you to retrieve only the most relevant data for analysis or transfer.
What file format is required for importing data?
AffiliateWP requires CSV format for importing affiliate and referral data. The file should be comma-separated, with fields enclosed in double quotes. During the import process, you’ll be able to map each column to the appropriate field.
Are there any required fields for importing data?
Yes. For importing affiliates, the Email field is required, while for referrals, Affiliate ID or Username and Amount fields are necessary. Mapping these fields correctly ensures a successful import.
What happens to affiliate IDs when importing data between sites?
If you import affiliates from one AffiliateWP site to another, the affiliate IDs will change. This may disrupt references to past transactions or statistical data. For a seamless migration, it’s best to perform a full database migration instead of using the export/import tools.
That’s it! AffiliateWP’s Export/Import tools make it simple to manage, back up, and migrate your affiliate program’s data. With options to export affiliates, referrals, payouts, and visits in CSV format, you can easily retrieve the data you need. The import feature allows you to map data accurately from CSV files, helping you integrate or restore records seamlessly.