Would you like your affiliates to share their tracked coupon codes more easily and help drive more sales? The Vanity Coupon Codes addon for AffiliateWP allows affiliates to request custom names for their assigned coupons directly from the Affiliate Area or Affiliate Portal. This personalized approach can motivate affiliates to promote your products more effectively.
In this guide, we’ll show you how to install and use the Vanity Coupon Codes addon for AffiliateWP.
Requirements: You will need a Professional license level or higher to access the Vanity Coupon Codes addon.
Installing the Vanity Coupon Codes Addon
Before we get started, be sure to install and activate AffiliateWP on your WordPress site.
Once you’ve got AffiliateWP installed and your license is verified, you’ll be able to quickly install and activate the Vanity Coupon Codes add-on.
That’s it! Affiliates can now request a new name for any coupons assigned to them.
Supported Integrations
The Vanity Coupon Codes addon works with the following plugins:
Using Vanity Coupon Codes
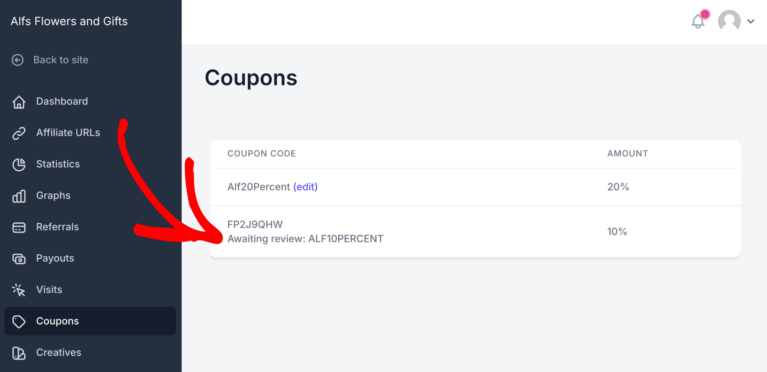
After activating the Vanity Coupon Codes addon, affiliates will see the Coupons tab within the Affiliate account. Under this tab, affiliates can view their assigned coupons and request a custom name for any of them.
When an affiliate submits a request to change a coupon name, it will show as Awaiting review until the site admin approves or rejects the request.
Reviewing Vanity Coupon Code Requests
In the AffiliateWP » Vanity Coupon Codes section of your WordPress dashboard, you will find a list of all pending coupon name requests submitted by your affiliates.
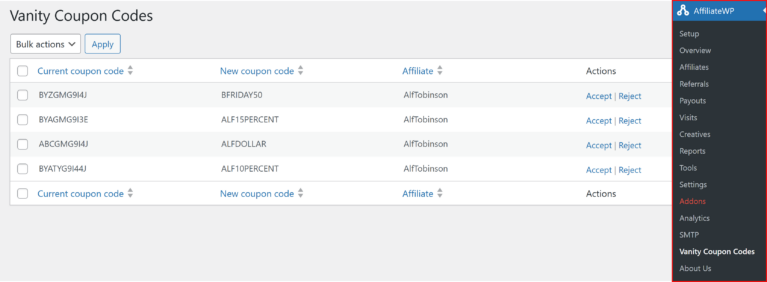
To approve a custom coupon name, simply click the Accept button in the Actions column next to the request.

Once approved, the affiliate will receive an email notifying them that their requested coupon name has been accepted.

If you need to reject a coupon name request, click the Reject button in the Actions column.

After rejecting the request, the affiliate will be notified via email that their requested coupon name was not approved.

Frequently Asked Questions
What is the Vanity Coupon Codes addon used for?
The Vanity Coupon Codes addon allows affiliates to request custom names for their assigned coupons, making it easier for them to personalize and share their coupon codes. This feature helps affiliates promote your products more effectively.
How do affiliates request a custom coupon name?
After the Vanity Coupon Codes addon is activated, affiliates can request custom names by visiting the Coupons tab in the Affiliate Area or Affiliate Portal. They will see an option to submit a custom name request for any assigned coupon code.
How can I manage affiliate requests for custom coupon names?
As an admin, you can review and manage requests by navigating to AffiliateWP » Vanity Coupon Codes in your WordPress dashboard. From there, you can either accept or reject requests. Affiliates will be notified of your decision via email.
Will affiliates be notified if their coupon name request is accepted or rejected?
Yes, affiliates will automatically receive an email notification when their coupon name request is either accepted or rejected.
The Vanity Coupon Codes addon gives your affiliates a personalized way to promote your products by requesting custom coupon names. This flexibility can encourage affiliates to share their coupons more widely, increasing sales for your business. With easy management in your dashboard, you stay in control while providing affiliates with a powerful promotional tool.