Would you like to connect AffiliateWP to a third-party service that doesn’t yet have an addon? Uncanny Automator enables you to create “recipes” to send data from your affiliate activities to other services, automatically take certain actions when affiliates perform specific actions, and more.
This tutorial will show you how to set up and use Uncanny Automator with AffiliateWP.
What Is Uncanny Automator?
Uncanny Automator is a WordPress plugin that lets you set up “triggers” and “actions” to automate certain workflows on your site.
For example, you can set up a trigger when an affiliate makes a referral and create a new row in a Google Sheets file as its corresponding action. Every time an affiliate makes a referral, a new row will appear in your spreadsheet. You could also send data from the referral to populate the row.
You can create almost endless workflows (called “recipes”) in Uncanny Automator. It lets you make connections between different WordPress plugins and between your site and third-party services and apps.
The free version of Uncanny Automator is available to download from the WordPress Plugin Directory. However, it has some limitations as to which integrations and actions you can use.
To access more options, you’ll need to upgrade to a paid license. Visit Uncanny Automator’s Pricing page for details.
Installing Uncanny Automator
Before you continue with this tutorial, make sure AffiliateWP is installed and activated on your site. You’ll also need to verify your license key. Then ensure your affiliate settings are configured to suit your needs.
To install the free version of Uncanny Automator, go to your WordPress dashboard, navigate to Plugins » Add New, and search for Uncanny Automator.
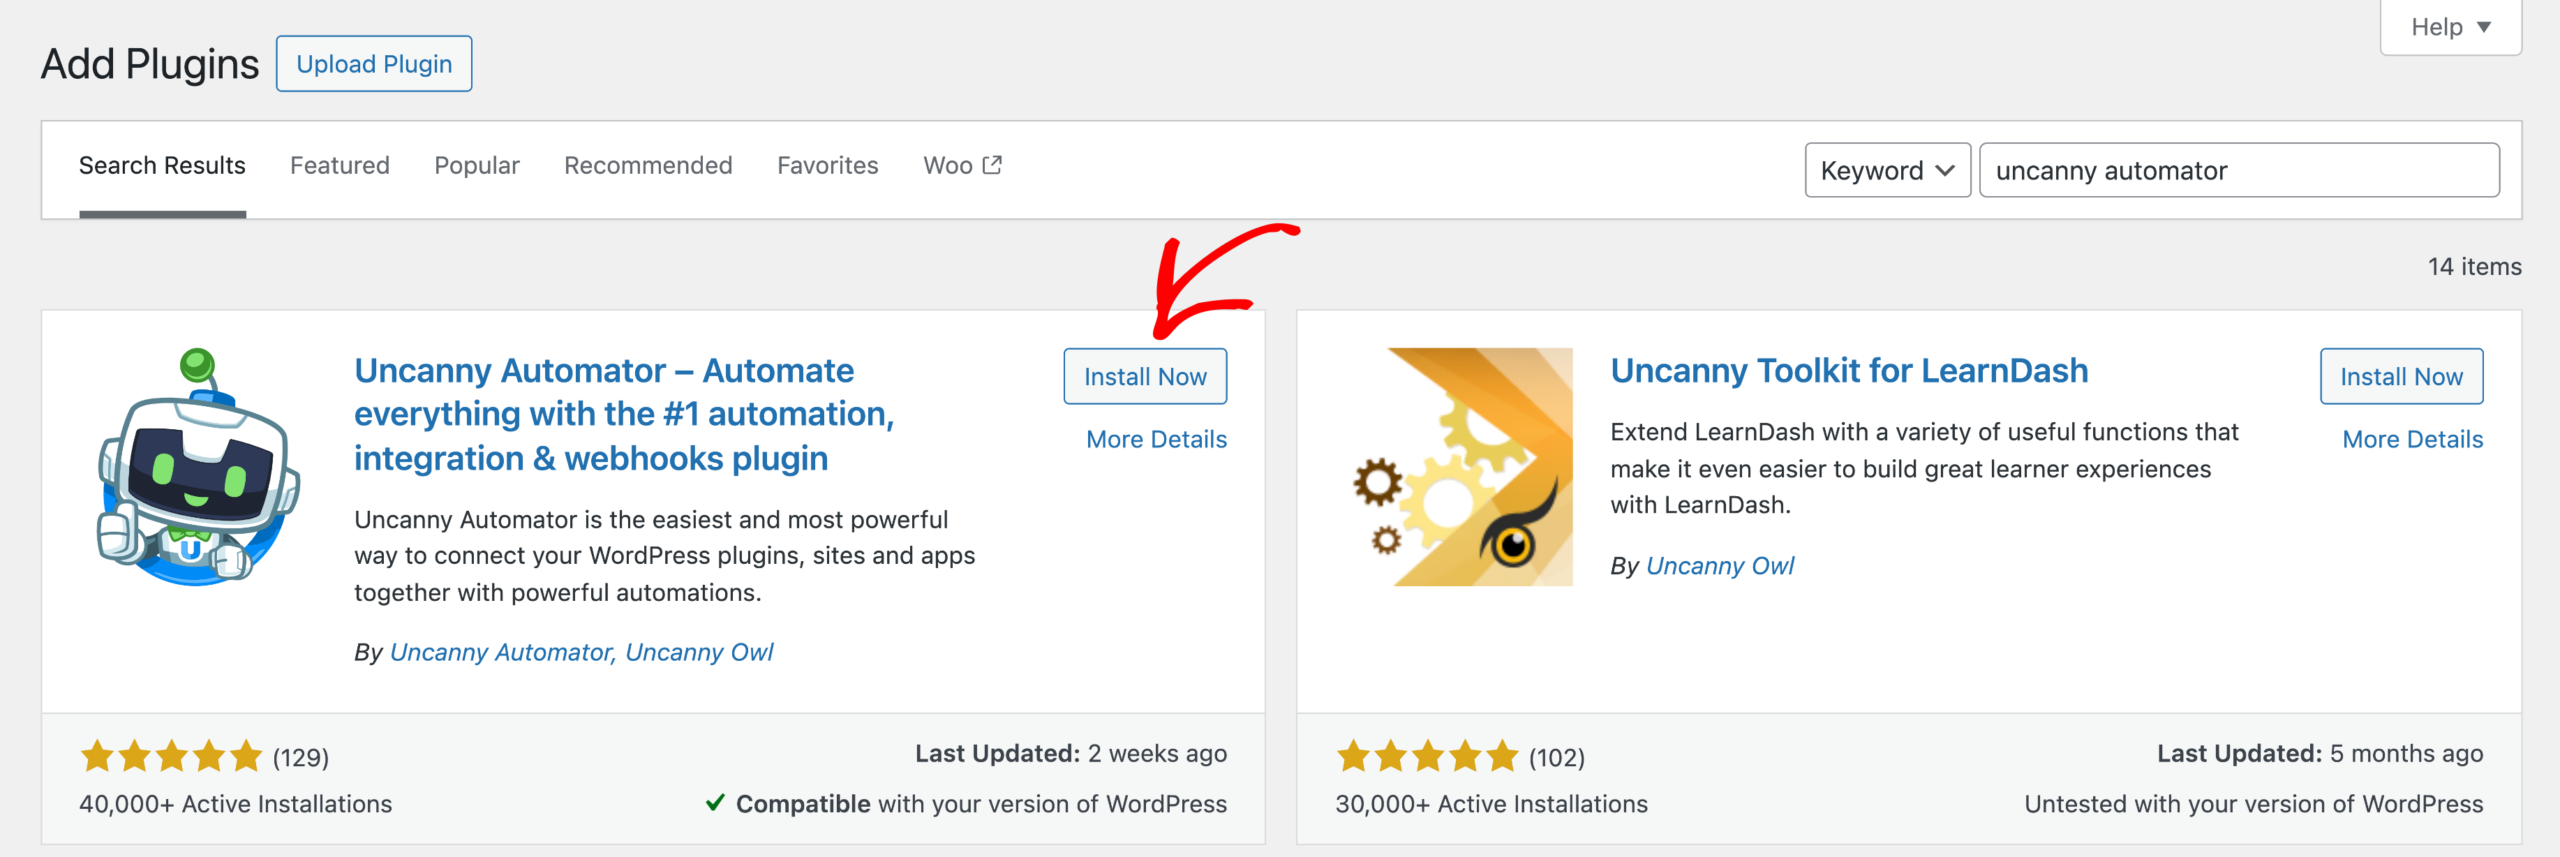
Click on the Install Now button and then activate the plugin.
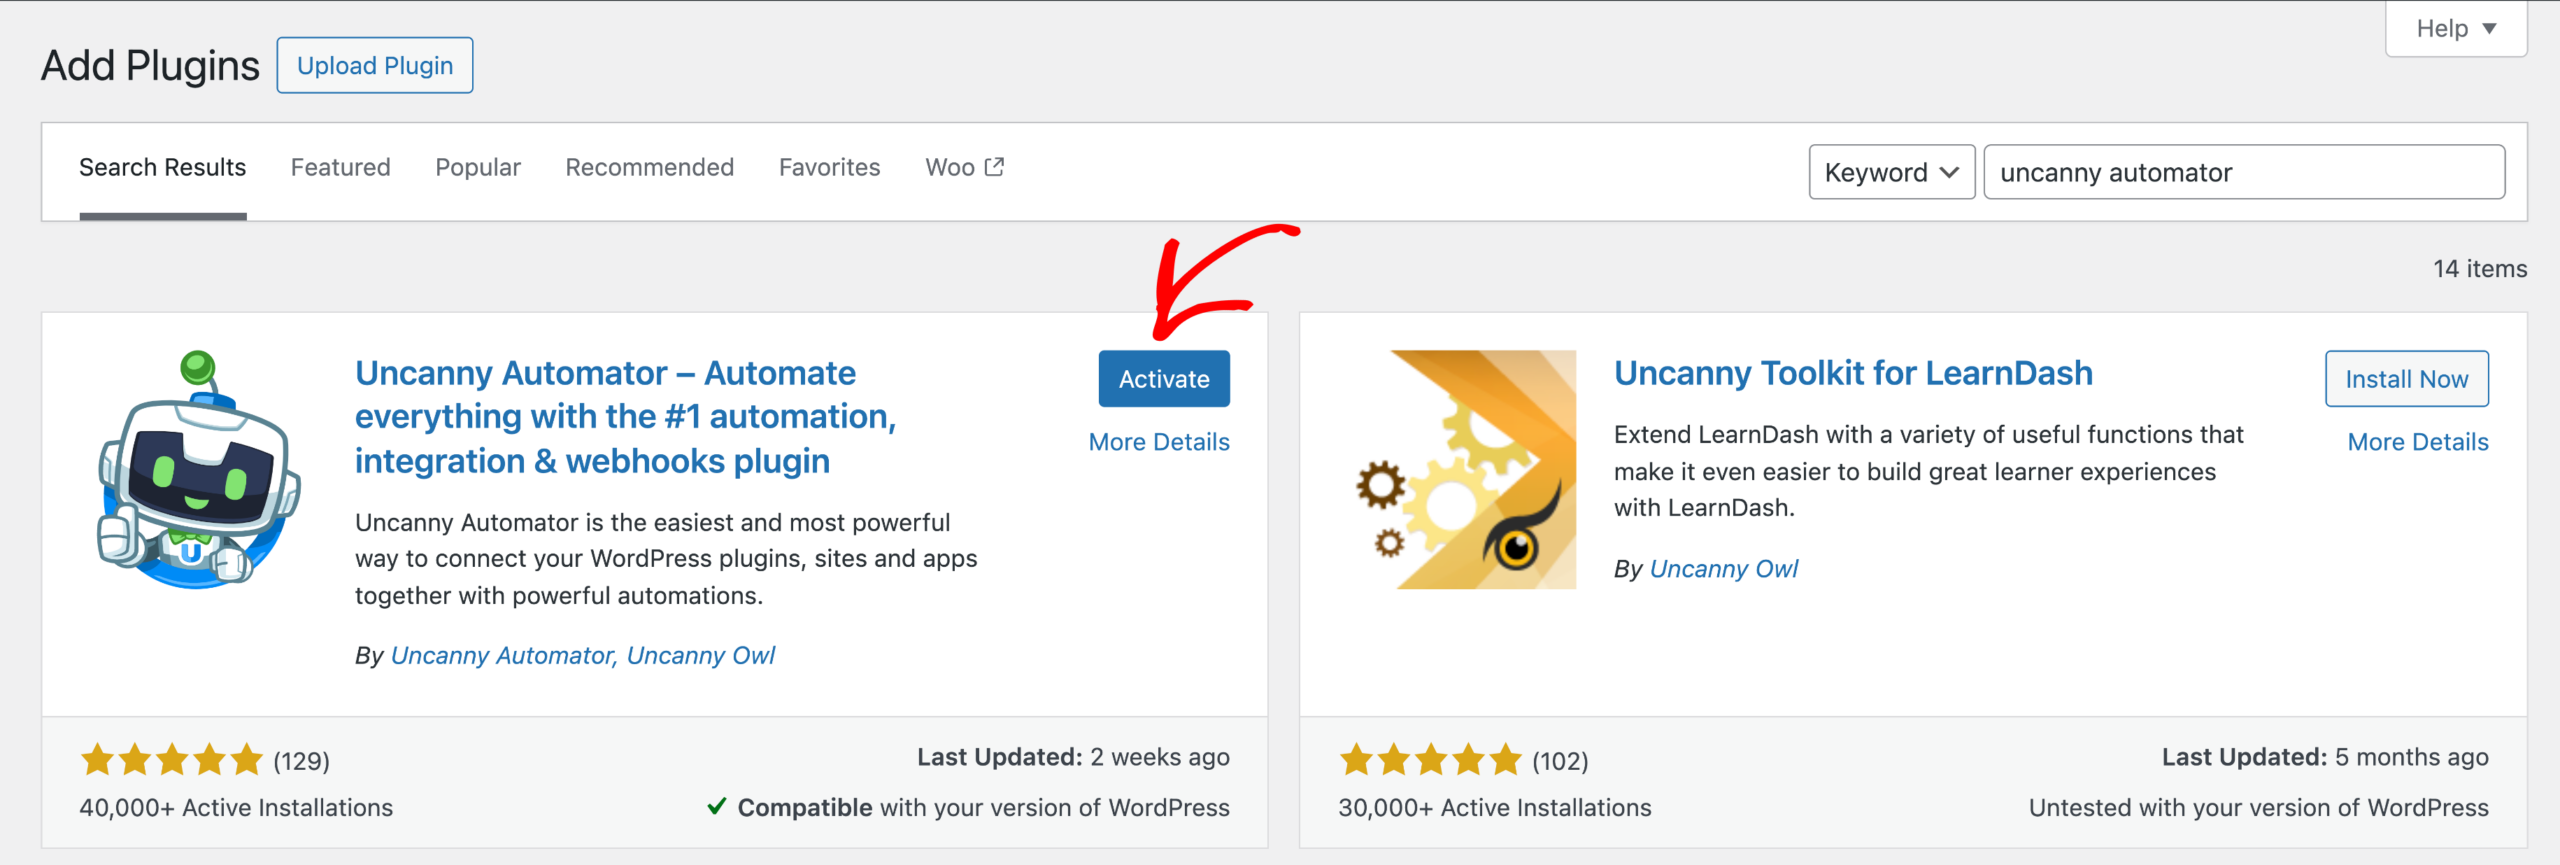
After activating the plugin, you’ll need to refresh your dashboard to continue.
Upgrading to an Uncanny Automator Paid License
The free version of Uncanny Automator does not allow you to connect to all of the available triggers, third-party services, apps, and plugins.
The paid version of the plugin lets you set up more detailed triggers for AffiliateWP, such as referrals that meet specific criteria or when a user purchases a WooCommerce product using an affiliate URL.
If you would like to upgrade to a paid license for Uncanny Automator, navigate to the Automator » Upgrade to Pro. This will take you to the Uncanny Automator Pricing page, where you can purchase your paid license. Then simply install it like any other plugin.
Creating an Uncanny Automator Recipe
Once Uncanny Automator and AffiliateWP are up and running on your site, you can create a new recipe. Go to Automator » Add New to get started.

Here, title your recipe. You can add any name you like to help you recognize this connection when it’s listed in your admin dashboard.
Configuring Your Trigger
To integrate AffiliateWP with Uncanny Automator, you need to select AffiliateWP as your integration and choose a trigger from the available options.
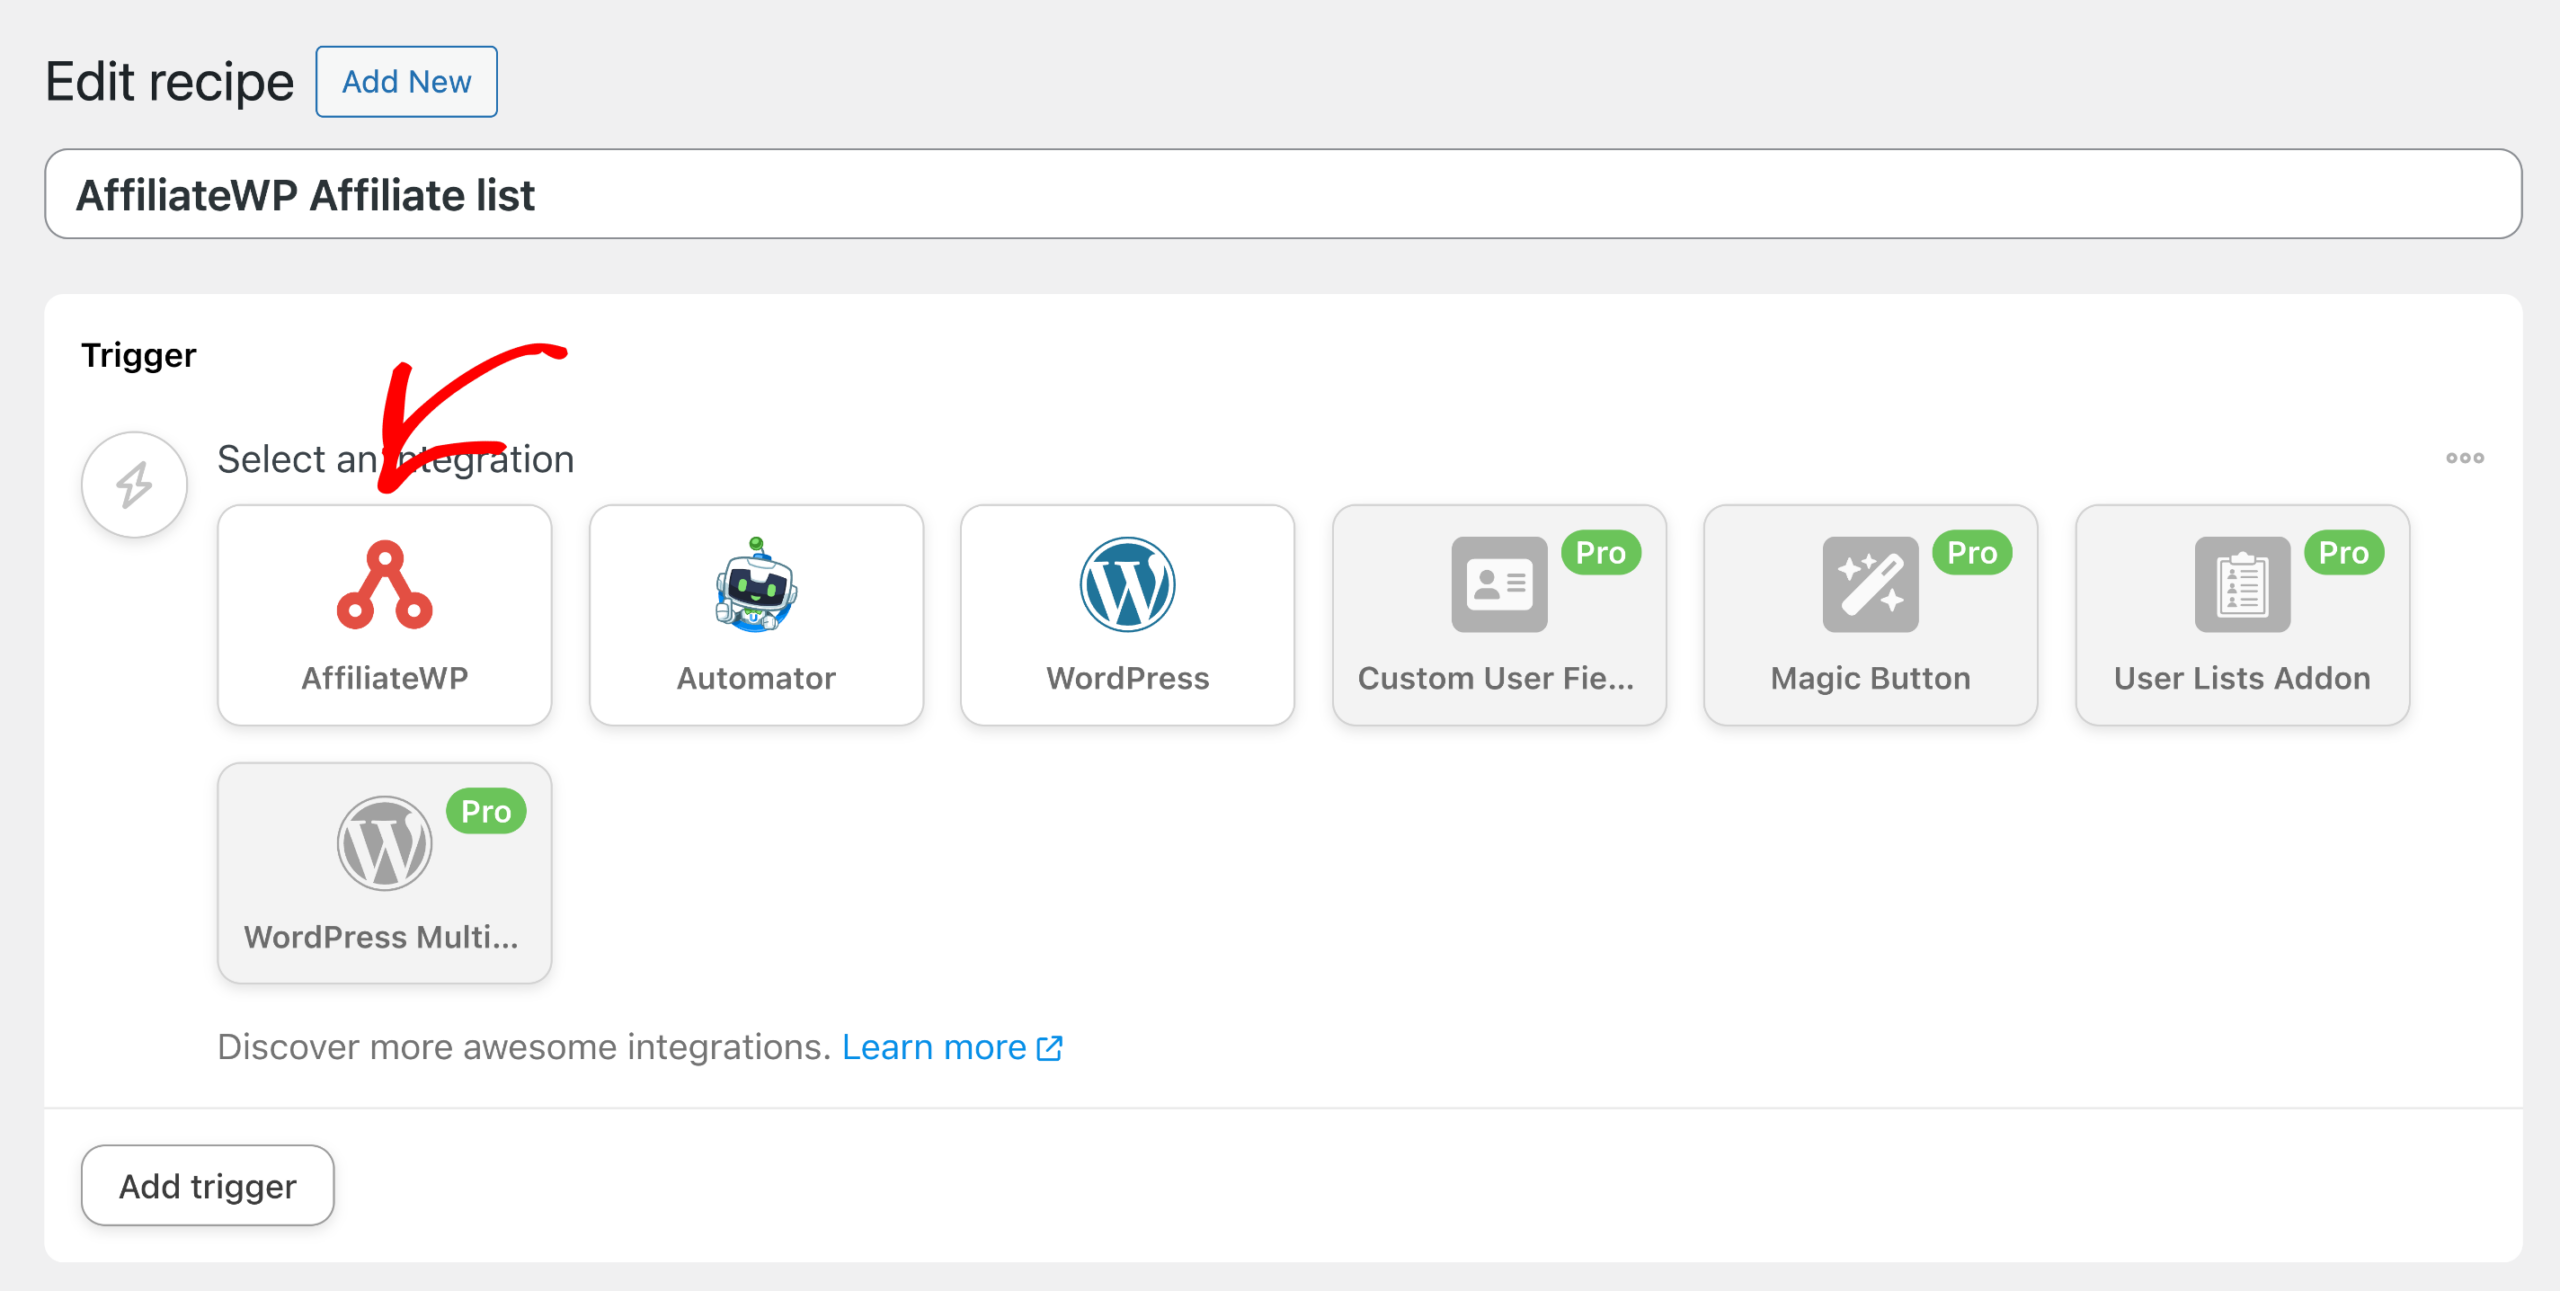
For instance, you can choose “A new affiliate is approved” or “A user becomes an affiliate” to initiate automated workflows.

Once you’ve made your selections, be sure to save your trigger to ensure the integration is set up correctly.
Setting Up Your Action
Now it’s time to define what happens after the trigger fires. Click “Add Action” to get started.

Uncanny Automator lets you connect AffiliateWP with various apps and services. For this example, let’s say you want to update a Google Sheet. From the “Action Integration” menu, choose Google Sheets.

This will prompt you to connect your Google account. Click the “Connect account” button, and a new window will open where you can sign in with your Google account.
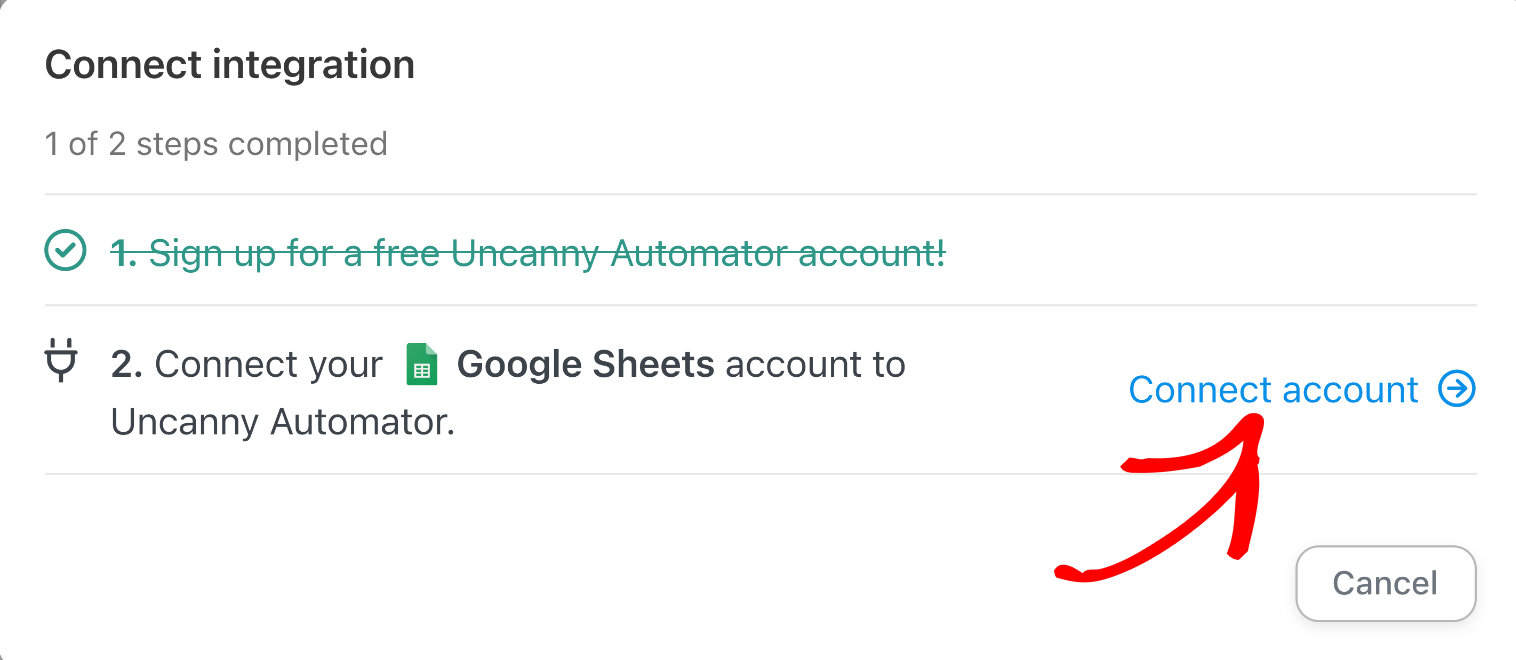
Select the Google account you wish to use and grant the necessary permissions by clicking “Allow”. Next, select the specific action you want to perform, like “Create a row in a Google Sheet.”

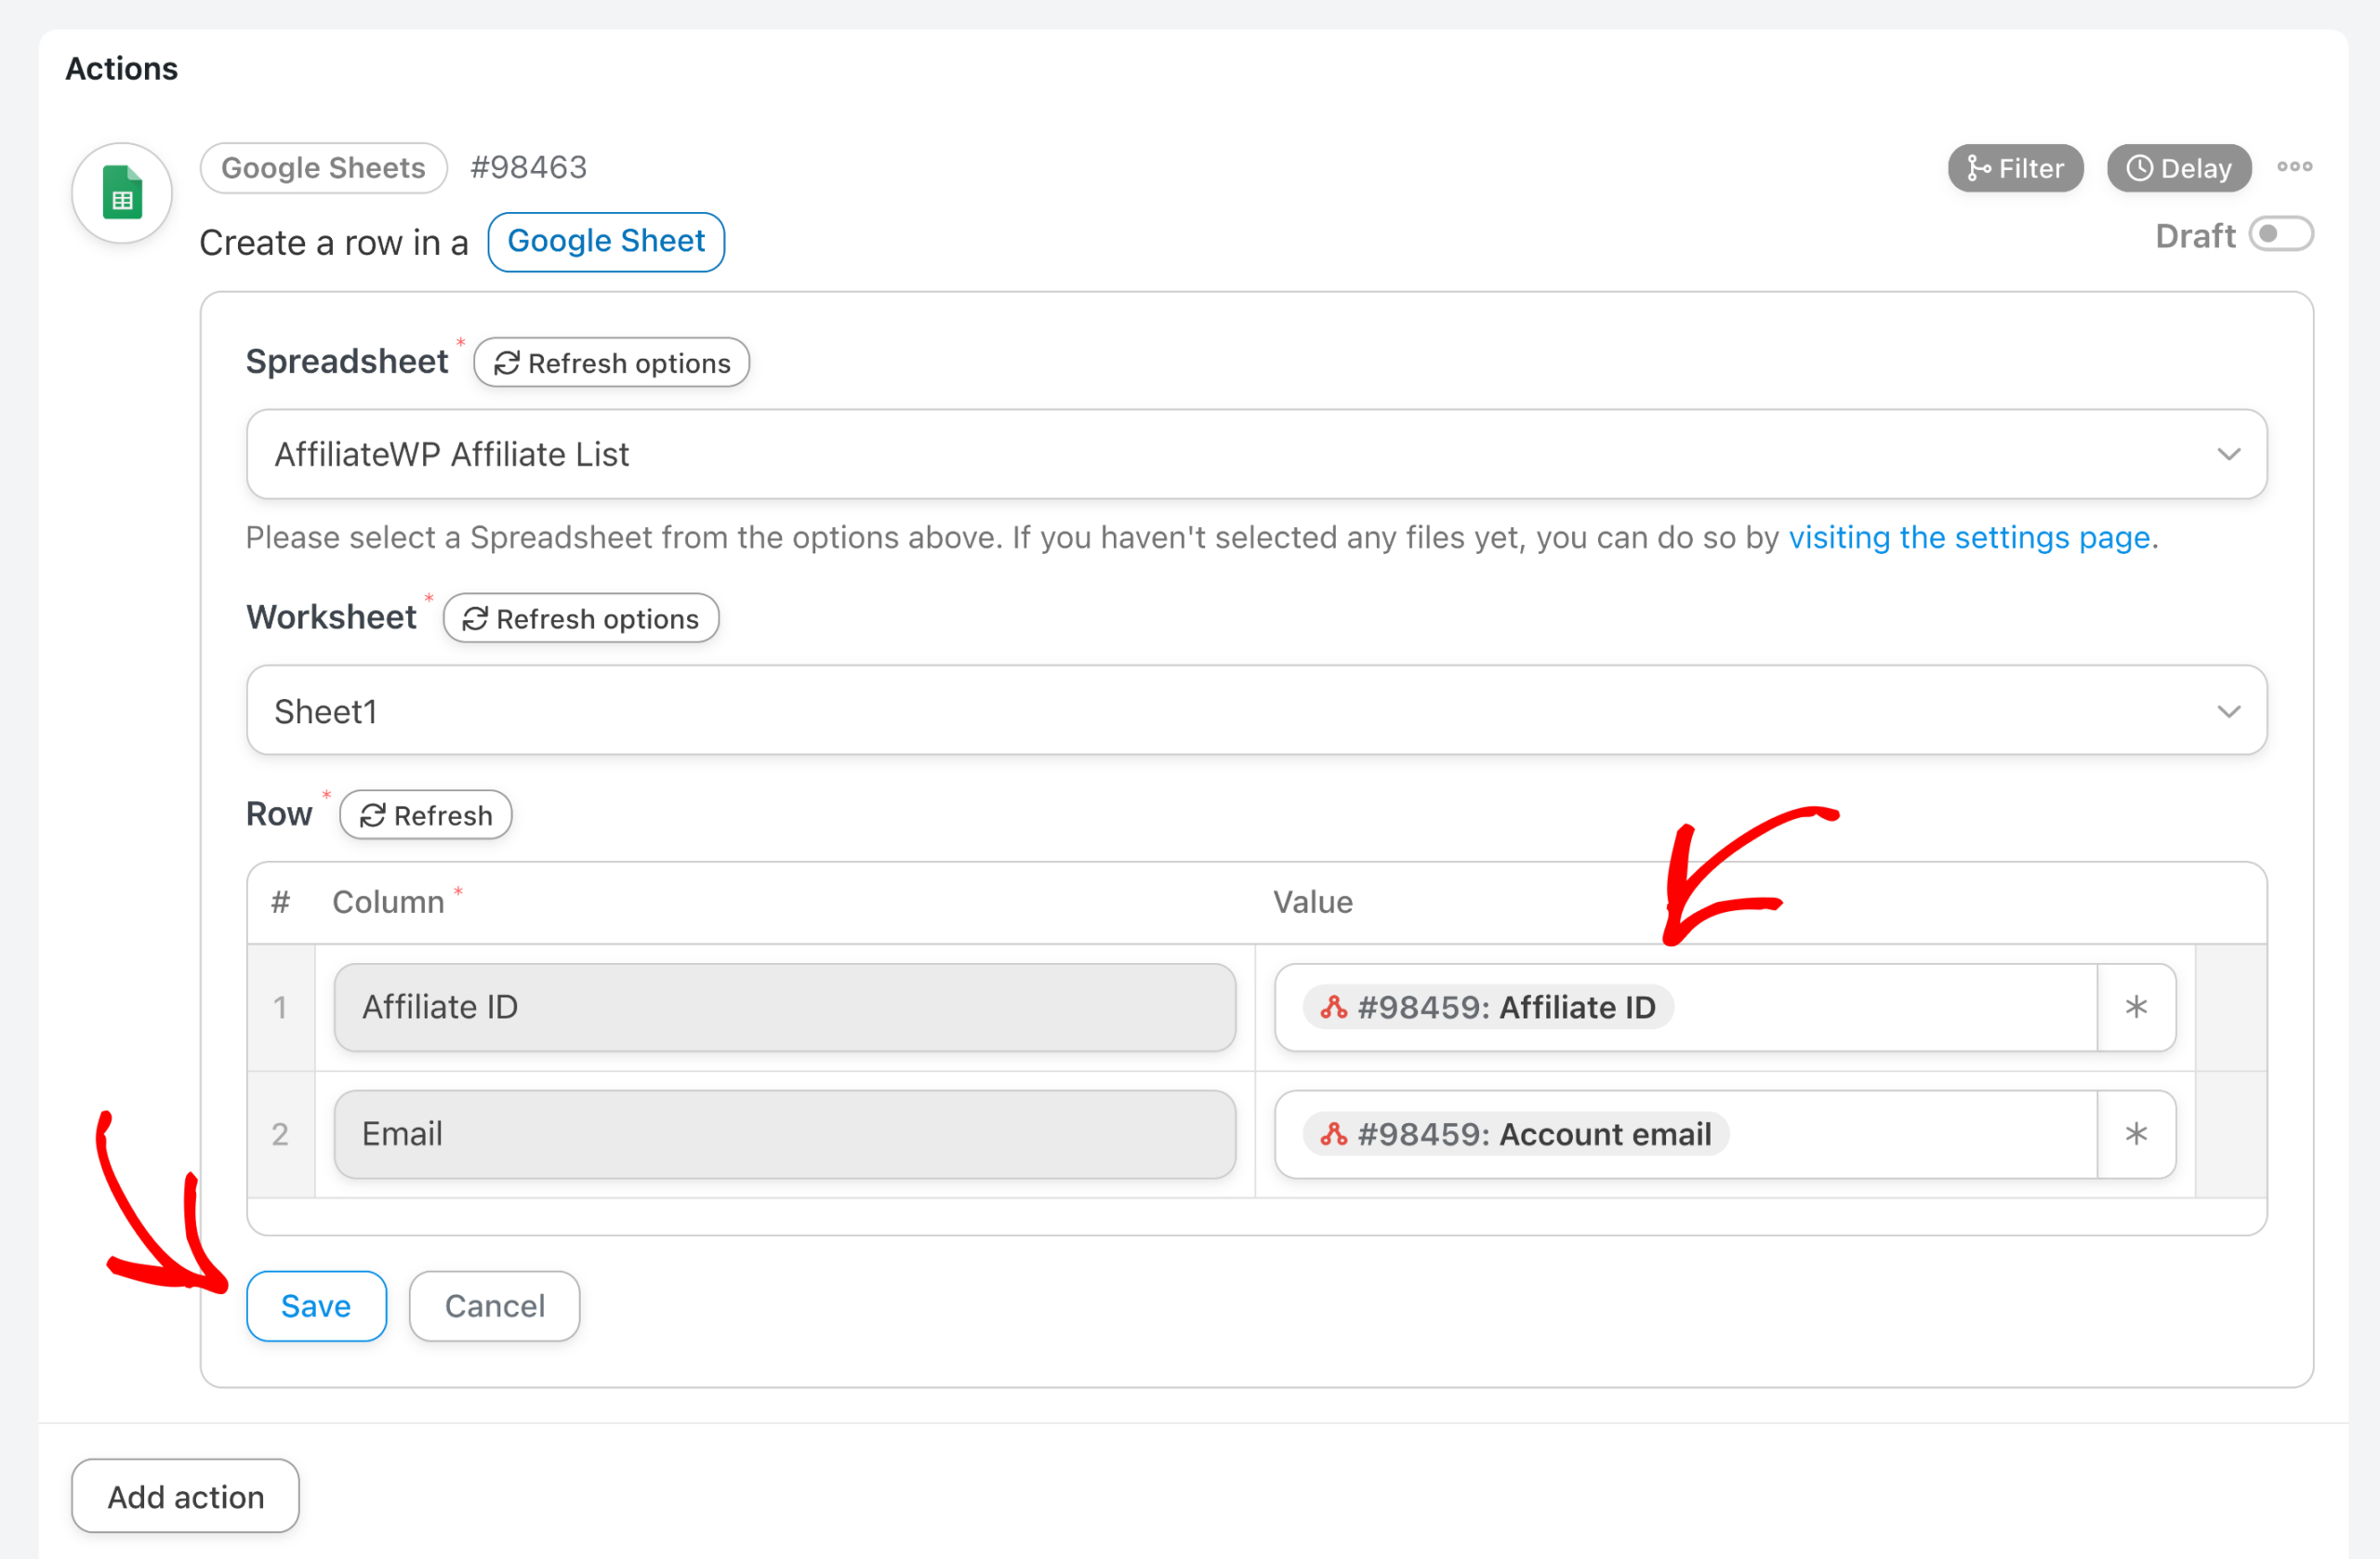
The “Action Configuration” section lets you tailor how the data flows. For Google Sheets, you’d choose the specific spreadsheet, and worksheet you want to populate.
Finally, map the relevant AffiliateWP data (like affiliate id or account email) to the corresponding columns in your spreadsheet. Once everything’s set up, click “Save” to activate your automated action.
You can add multiple actions for a single trigger by simply clicking “Add Action” again and repeating these steps. This allows you to create powerful automated workflows that streamline your affiliate management process.
Making Your Uncanny Automator Recipe Live
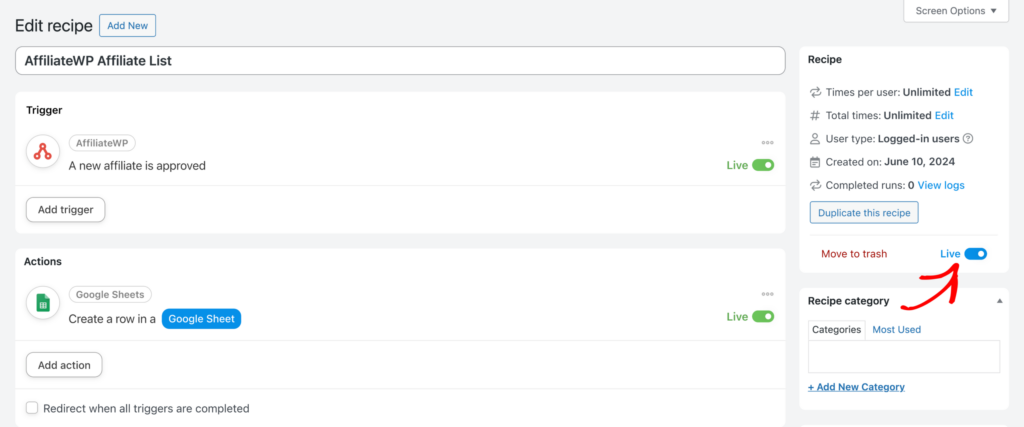
Once you’ve configured your trigger and action, change your recipe from Draft to Live mode using the toggle in the top right portion of the recipe creation screen.
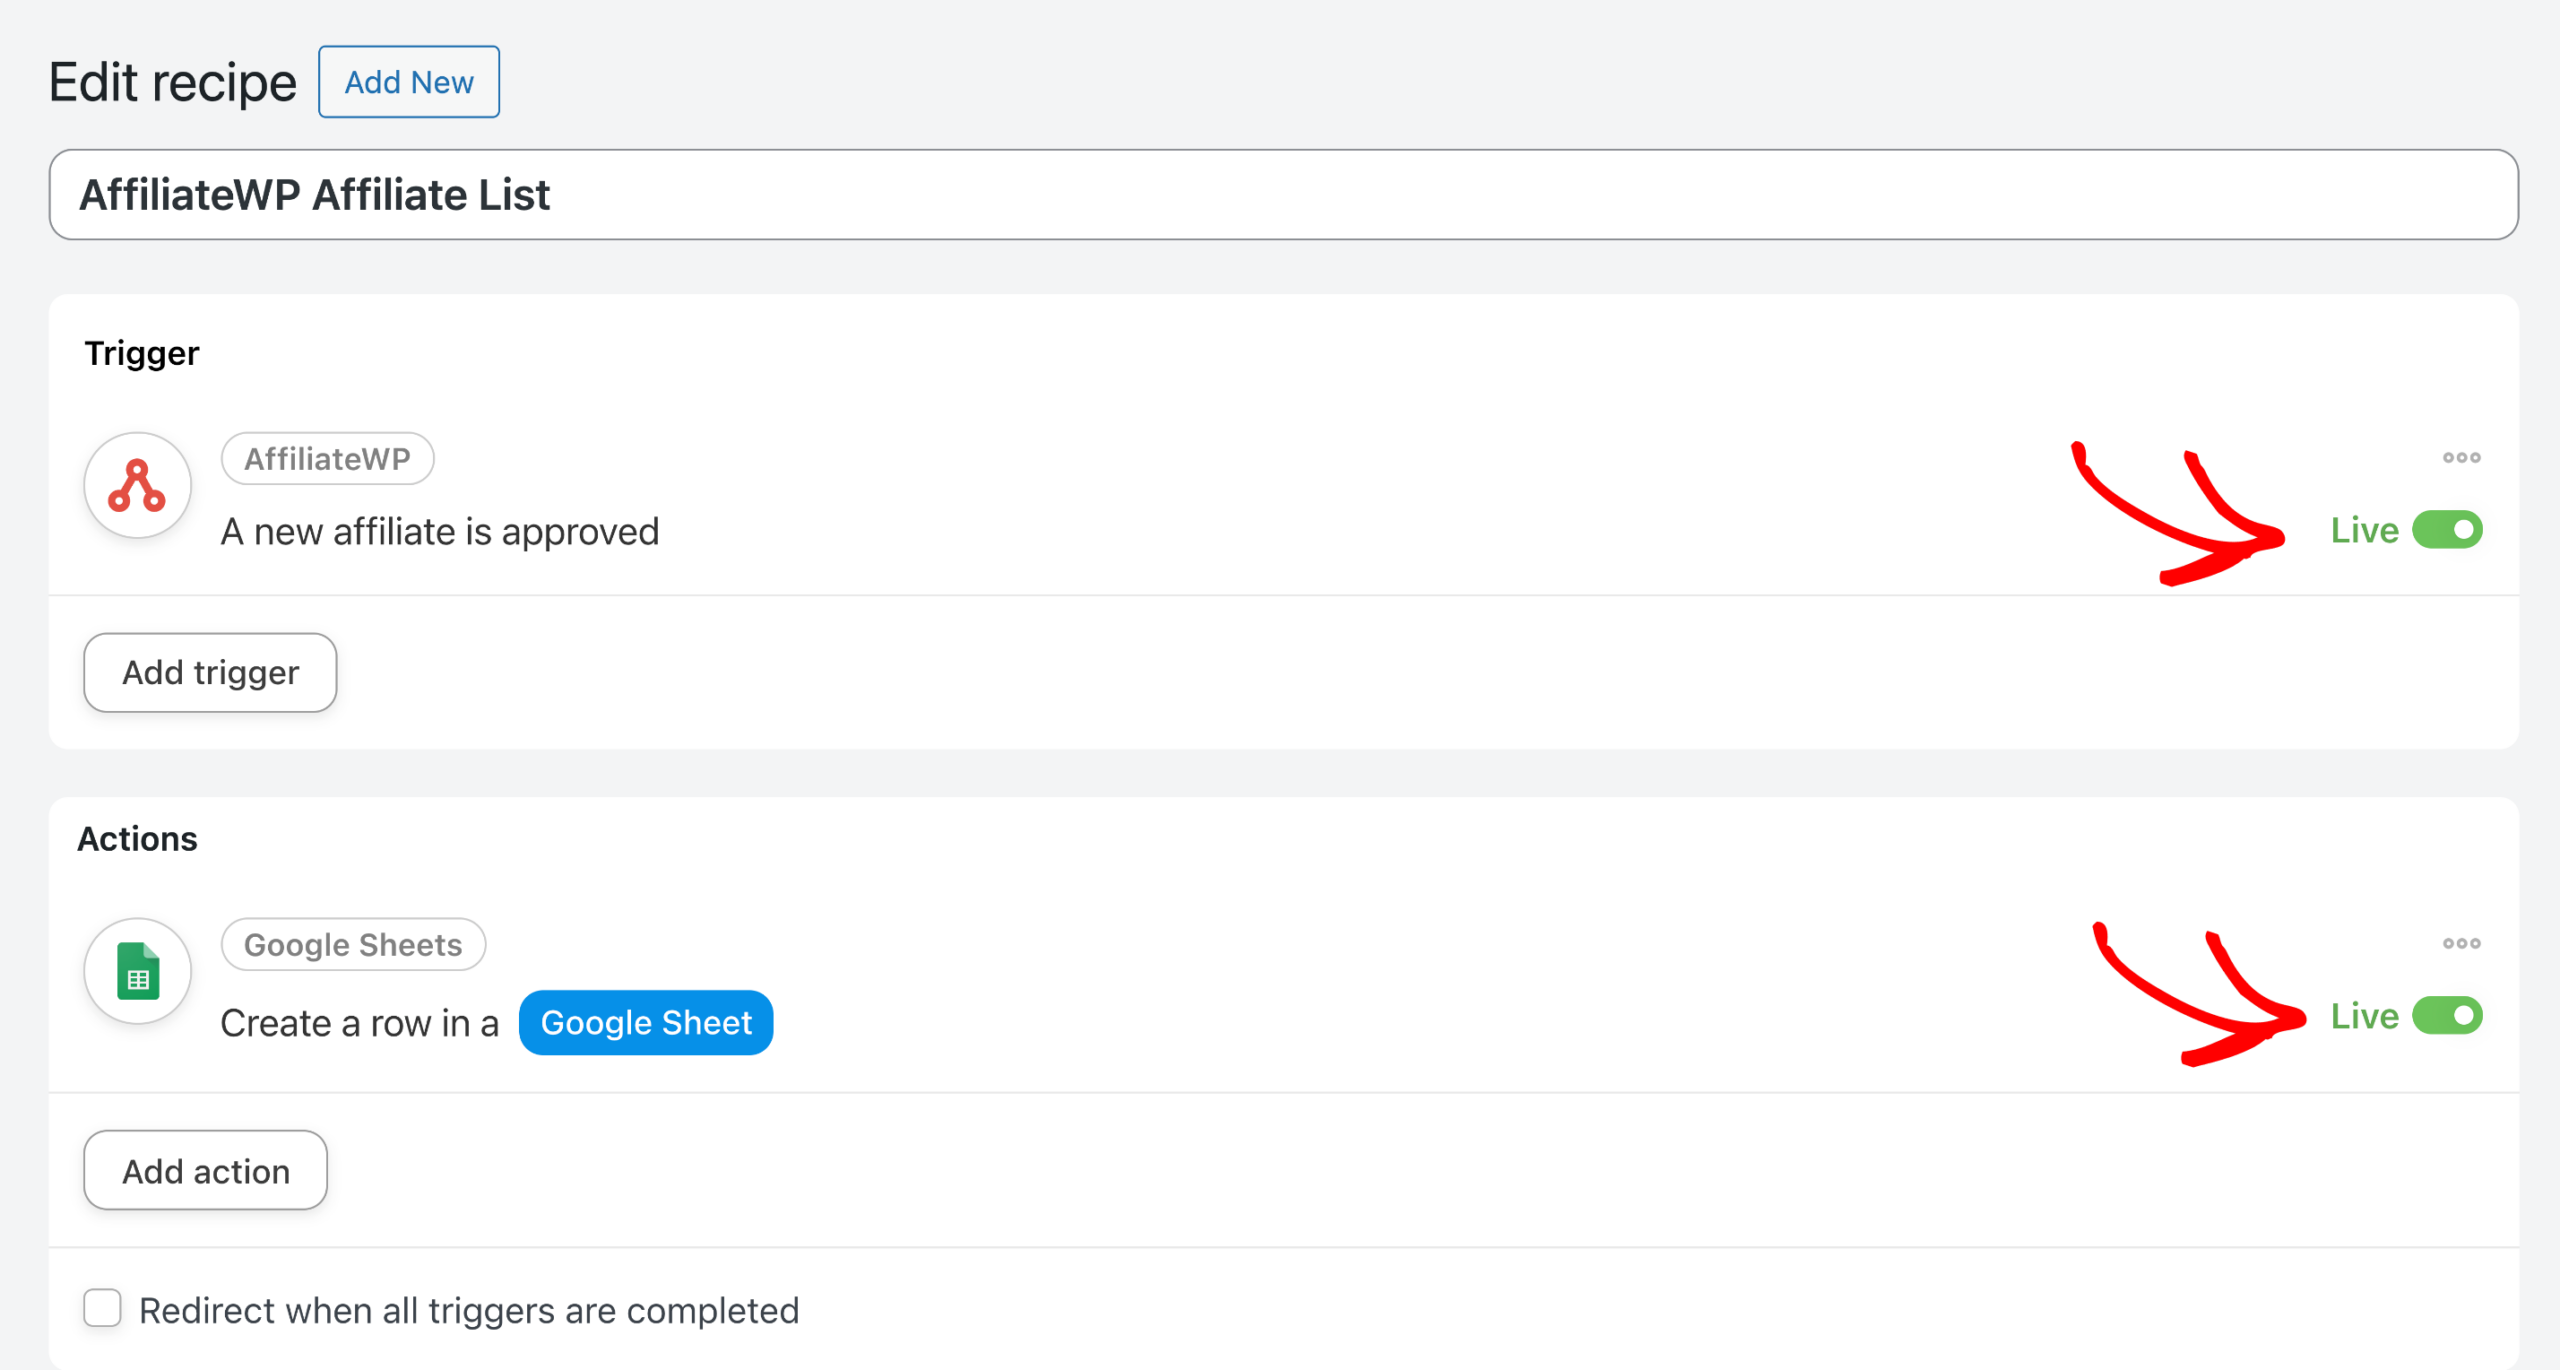
Additionally, make sure your trigger and action(s) are live using the toggles on the right side of each section.
Your recipe should now run automatically whenever an affiliate triggers it. We recommend testing your setup to ensure it works as expected.
Frequently Asked Questions (FAQs)
What is a “recipe” in Uncanny Automator?
A “recipe” in Uncanny Automator is a combination of triggers and actions. When a trigger condition is met, one or more actions are executed automatically. For example, a trigger could be an affiliate making a referral, and the action could be sending the referral details to a Google Sheet.
How do I troubleshoot if my recipe is not working?
First, ensure that both Uncanny Automator and AffiliateWP are installed and activated correctly. Check that your triggers and actions are configured properly and set to live. If issues persist, consult the Uncanny Automator documentation or contact their support for further assistance.
Can I create multiple actions for a single trigger?
Yes, you can create multiple actions for a single trigger. Simply click on Add Action again after setting up your first action and repeat the steps to configure additional actions.
What are some popular third-party services I can connect to with Uncanny Automator?
Uncanny Automator supports a wide range of third-party services, including Mailchimp, Slack, Zoom, and more. The exact services available depend on whether you are using the free or paid version of the plugin.
That’s it! Now you know how to automate actions based on affiliate activities with Uncanny Automator. This powerful combination can help streamline your affiliate management and enhance your site’s functionality.