New in RewardsWP: Points, Redesigned Rewards Widget & More
RewardsWP now includes Points, a redesigned Rewards Widget, and new tools to launch, run, and measure loyalty and referrals in one place.
Continue Reading →
RewardsWP now includes Points, a redesigned Rewards Widget, and new tools to launch, run, and measure loyalty and referrals in one place.
Continue Reading →
Welcome to the third and final tutorial in our short series on using AffiliateWP for incentivized opt-in marketing and lead generation on your WordPress site!
This time we’re looking at Ninja Forms, and in this post we’ll walk you through how to:
We’ll also look at how you can use Ninja Forms’ add-ons for email marketing services to collect and instantly add sign-ups or potential leads to a specific mailing list.
Ready? Let’s do this!
UPDATE 3/20/2017: This post relates to Ninja Forms version 2.9.58 and earlier.
In your WordPress admin, go to the Affiliates → Settings → Integrations tab. Check the box next to Ninja Forms, and click Save Changes.
When a visitor clicks on an affiliate’s referral link and lands on your website, then proceeds to complete and submit this form, the affiliate who referred them will receive a $0.00 referral.
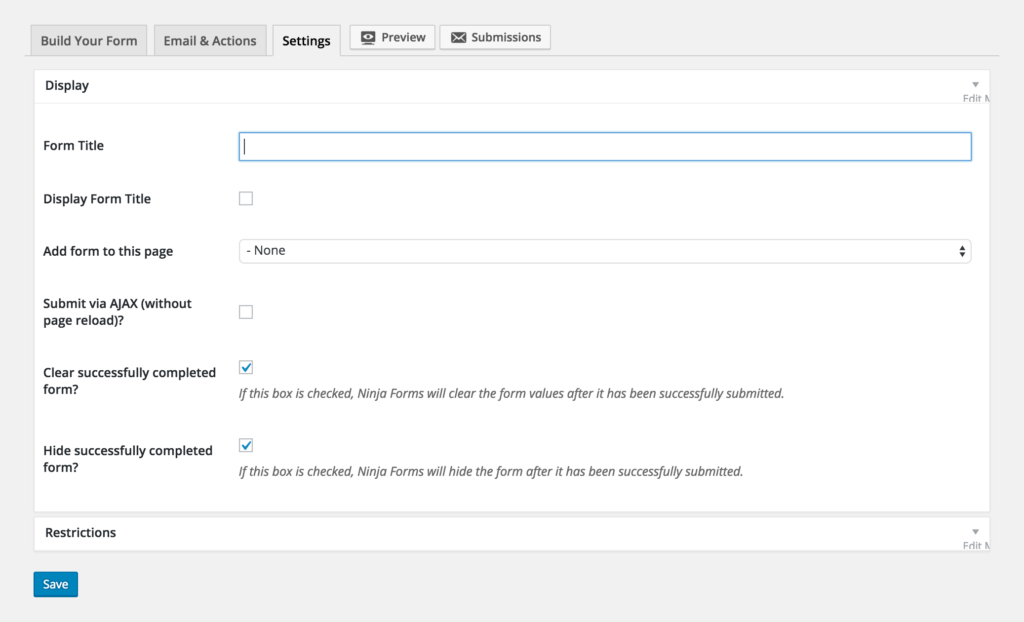

TIP: Which fields should you add to your form? You’ll want to collect some contact details from your site visitor who is opting-in, or who is a potential lead. We suggest adding some User Information fields such as Name, Phone, Address, and Email.
And you’re done! You’ve created a lead generation or opt-in contact form that generates referrals for your affiliates. Easy, right?
In some cases, you may want to reward your affiliates with a monetary commission for the opt-ins they sign-up, and the leads they generate. Using Ninja Forms, you can set an amount (a “cost”) for the form, which will generate a commission for the affiliate who referred the prospect. If a visitor successfully submits their contact and other details via this form, your affiliate receives a referral with a value (i.e. $2.00 for every opt-in or lead they generate). Note: You need to be using a percentage referral rate type to use Ninja Forms in this way if you’re also selling products on your site.
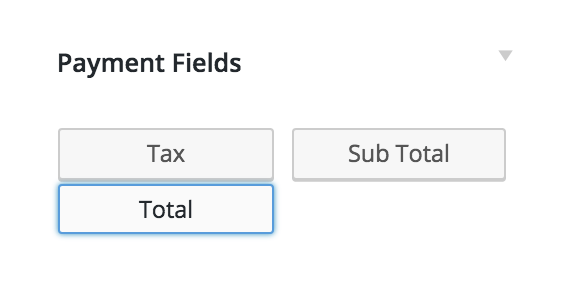
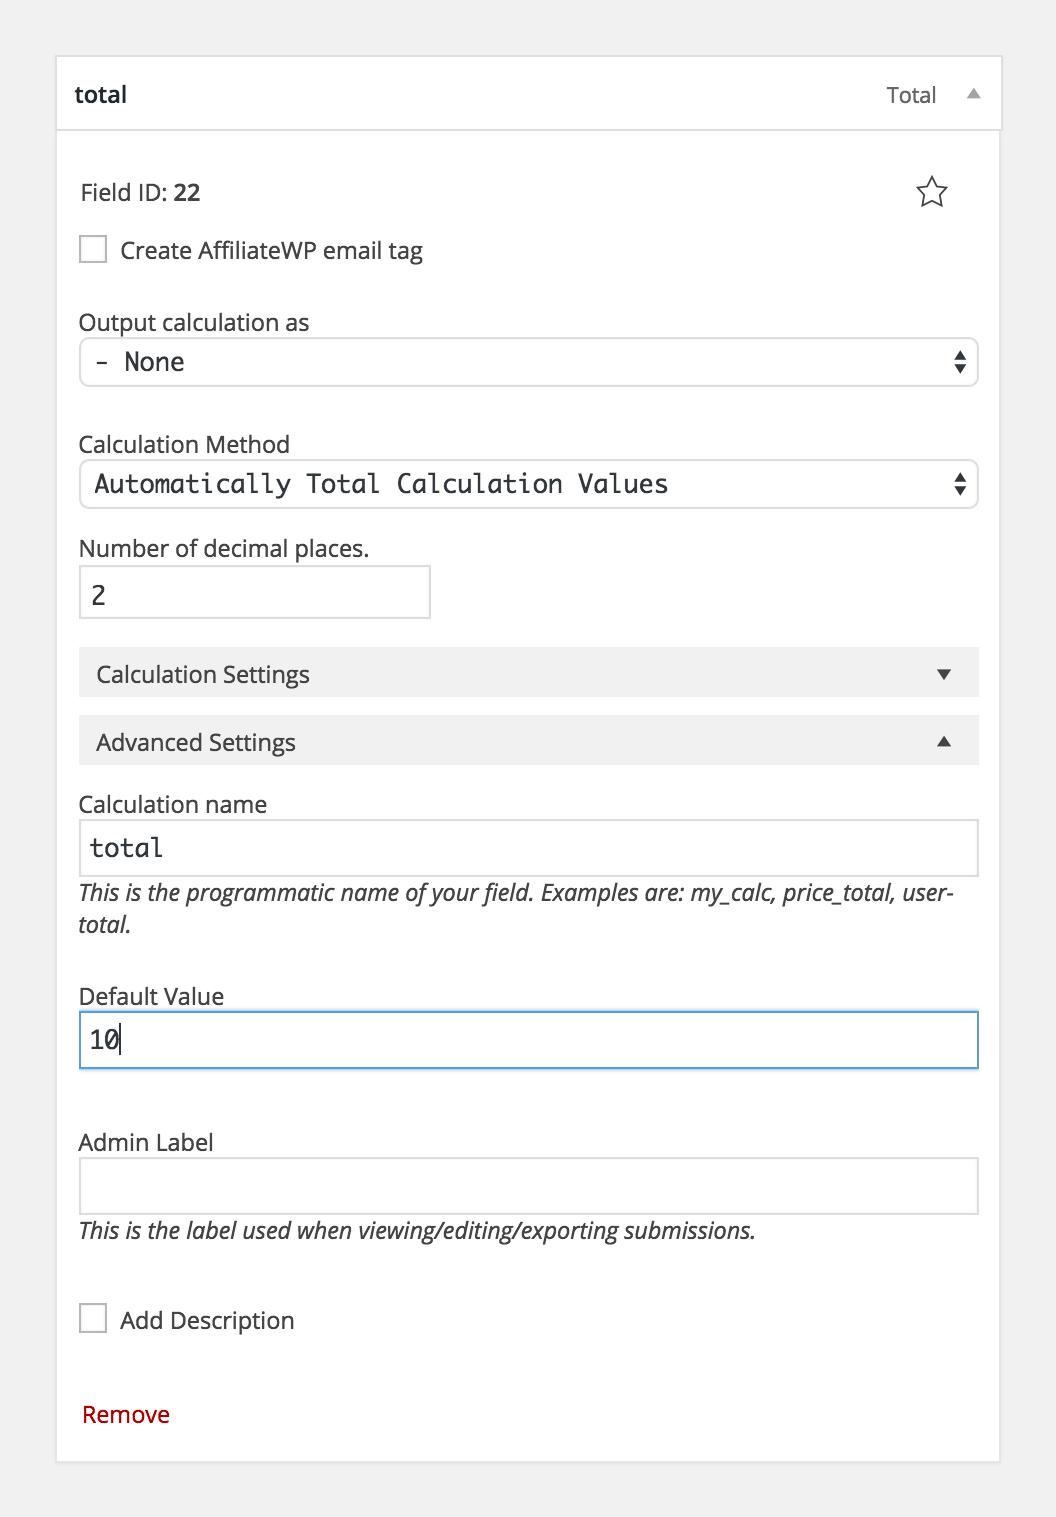
If you’re only generating leads or collecting opt-ins on your website (and not selling products as well), you can use a Flat Rate global referral rate type, and set the rate to what you wish to pay your affiliates per successful opt-in/lead (i.e. $1.50 per lead). You simply need to ensure referrals have been enabled for that form.
NOTE: If set, per-affiliate rates will override the global referral rate.
The Affiliate Forms for Ninja Forms pro add-on is exceptionally useful, allowing you to build a completely custom affiliate registration form using Ninja Forms.
NOTE: You can only have one affiliate registration form.
As part of AffiliateWP’s standard integration with Ninja Forms, you can also enable referrals for this custom registration form. When an existing affiliate shares a link to the form, and a new affiliate registers, the referring affiliate will be awarded a $0.00 referral or a monetary commission for signing up a new affiliate.
The steps below show you how to use Affiliate Forms for Ninja Forms to incentivize your affiliates to sign-up new affiliates.
When you install and activate the Affiliate Forms for Ninja Forms pro add-on, you can create a form and set it to be your affiliate registration form. This form will then appear on the Affiliate Area page, where the [affiliate_area] shortcode is used, plus anywhere on your site where the [affiliate_registration] shortcode is used.
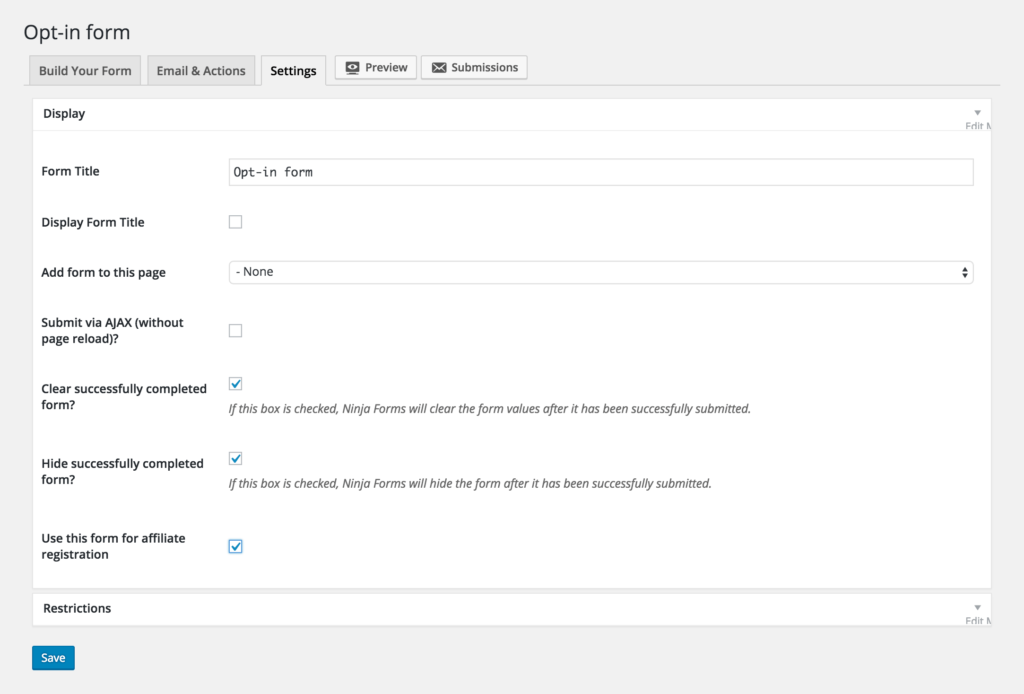
By following the steps above to add a hidden Total “cost” field to a form, you can generate a referral with a dollar amount, to reward your affiliates for recruiting a new affiliate. This currently supports a global percentage referral rate type which you can set in the Affiliates → Settings → General tab. Here’s an example of how you can set it up; if your global referral rate is 20%, and you want to reward your affiliates $0.50 for every new affiliate registration they bring to your site, you would set the Value (cost) on the form to calculate the correct final commission amount. In this example, the Value you would input on the form would be $2.50 (20% of $2.50 is $0.50), therefore, $0.50 is the amount that would be awarded to an affiliate for a referred affiliate registration.
When a user registers to become an affiliate through your affiliate registration form on the Affiliate Area page, AffiliateWP automatically performs several actions:
If you use the [affiliate_registration] shortcode to place the affiliate registration form on another page, you will need to set up a redirect so affiliates land on a page that makes sense for your site. We recommend redirecting affiliates to the Affiliate Area, however you may prefer they land on a custom success page. This could, for example, include a button or link to the affiliate area, and also show the affiliate their referral URL so they can instantly start sharing their link and promoting your site.
To set up a redirect in Ninja Forms, go to the Emails & Actions tab in your affiliate registration form and click Add New to add a new action to the form. Change the Type of action to a Redirect, and you’ll see the below screen.
Give your action a name, such as “Affiliate registration redirect” in the Action Name field, and enter the page URL you want your affiliates to be redirected to in the Url field. Click Save, and you’re ready to roll!
As we mentioned in our last post, collecting contact details is absolutely crucial to successful lead generation, so you can follow up with qualifying prospects at a later point. Thankfully Ninja Forms’ have created integration add-ons with numerous email marketing services to make email collection incredibly easy.
These add-ons allow you to place contact forms on your website which then add potential leads to a specific email list once the form is submitted. No more fishing through entries or manually adding addresses to an email – easily connect with prospects directly from your email marketing system when you’re ready to get in touch with them. Or, add your opt-in audience to a particular mailing list for seamless email communication and marketing.
You’ll need Ninja Forms, and a license or account with one of the supported email marketing services (listed below). When you have registered with one of these services, you’ll get access to your account or API details for the email marketing platform – these are required to set up and use the respective Ninja Forms integration add-on.
Once the add-on is set up and ready to go, you can build a form which you’ll use to collect contact information. In your email marketing service, simply set up a mailing list with a relevant title which is easily identifiable, and using the add-on, connect the form to your chosen mailing list so the data can be automatically saved to the list when the form is submitted.
You can also use your Affiliate Forms for Ninja Forms custom registration form if you’d like to quickly and seamlessly collect your new affiliates’ email addresses in your mailing list service.
The Ninja Forms email marketing system add-ons can be purchased directly from Ninja Forms’ website. Here’s a list of the email marketing add-ons they’ve created:
Check out the Ninja Forms website to find out more about the functionality of these add-ons, or take a look at Ninja Forms’ documentation.
TIP: You can also use these add-ons, along with your custom affiliate registration form (using the Affiliate Forms for Ninja Forms pro add-on) to collect your affiliates’ contact details and add them to a dedicated mailing list, so you can quickly and easily email your affiliates at any time.
Take your lead-generation or opt-in program to the next level with Ninja Forms and AffiliateWP. Make it easier for your affiliates to bring in more prospects, more loyal readers and followers, and more sales. Incentivize affiliates to work harder by using the steps outlined in this tutorial to create forms that reward them for bringing in leads and opt-ins. Ready to get your affiliate marketing program kicking serious butt? Hai-YAH!
Disclosure: Our content is reader-supported. This means if you click on some of our links, then we may earn a commission. We only recommend products that we believe will add value to our readers.
Launch your affiliate program today and unlock a new revenue channel to grow your business faster.
We use cookies to improve your experience on our site. By using our site, you consent to cookies.
Manage your cookie preferences below:
Essential cookies enable basic functions and are necessary for the proper function of the website.
Statistics cookies collect information anonymously. This information helps us understand how visitors use our website.
Marketing cookies are used to follow visitors to websites. The intention is to show ads that are relevant and engaging to the individual user.
Hey Lisa,
This is really helpful info. Thanks for sharing this article. I already started using WPForms Lite. It is one of the best contact form plugin. You should check it out:
https://wordpress.org/plugins/wpforms-lite/
Love your plugin but can it make the cart success page into an affiliates sign up? They’ll already be members. Auto affiliatize new customers with*?Love your plugin but can it make the cart success page into affiliates sign up? Auto affiliatize new customers with *yourls*? From skimming this well written howto, it seems it could, except for my own private short URL, preferably not bit.ly.
My dream cart success page would say… ‘Thanks for buying… Etc.. Use this short link to the *product name* for life time commission. Email to your mates, share it forever [links]. Your message is this: “I just bought product name/image, from Steve you should too. Lol. Pass it on.” Short and sweet. Mate, you’ll have life time of up to 10% as the love grows. Cool, huh!’
My new customers will all be gained from my friends. If your plugin could do this, that would be fab.
Can it? Huh? Can it?
If I study your howto, could I set up my shop site to be a social affiliate community?
Be happy for ever,
Steve
Hi there Steve!
There are a couple of ways you can do this:
1. If your eCommerce system automatically registers users on your site when they purchase, AffiliateWP has an option that allows you to automatically register these new users as affiliates. Go to Affiliates -> Settings -> Misc and enable the Auto Register New Users setting. You could then place the [affiliate_referral_url] shortcode on the purchase “Success” page and newly registered affiliates will instantly see their (full) referral URL so they can start sharing.
2. You could place the [affiliate_registration] shortcode on the purchase “Success” page, which will display the affiliate registration form – customers will then be able to register for your affiliate program after they have purchased. Alternatively, you could place a link on the purchase “Success” page to the Affiliate Area page on your site so customers can register for your affiliate program there.
As you’ve noted AffiliateWP doesn’t support YOURLS currently, however shortened URLs are on our radar as a potential feature in the future. 🙂
Hello, i try to buy the plugin now the 5th time, but it doesnt work. And your support Contact form is not visible on /contact site… can you pls check? thanks
I’m sorry to hear you’ve had trouble making the purchase? Could you please send a support request via our support page? We’ll be more than happy to help get it sorted out for you. https://affiliatewp.com/support