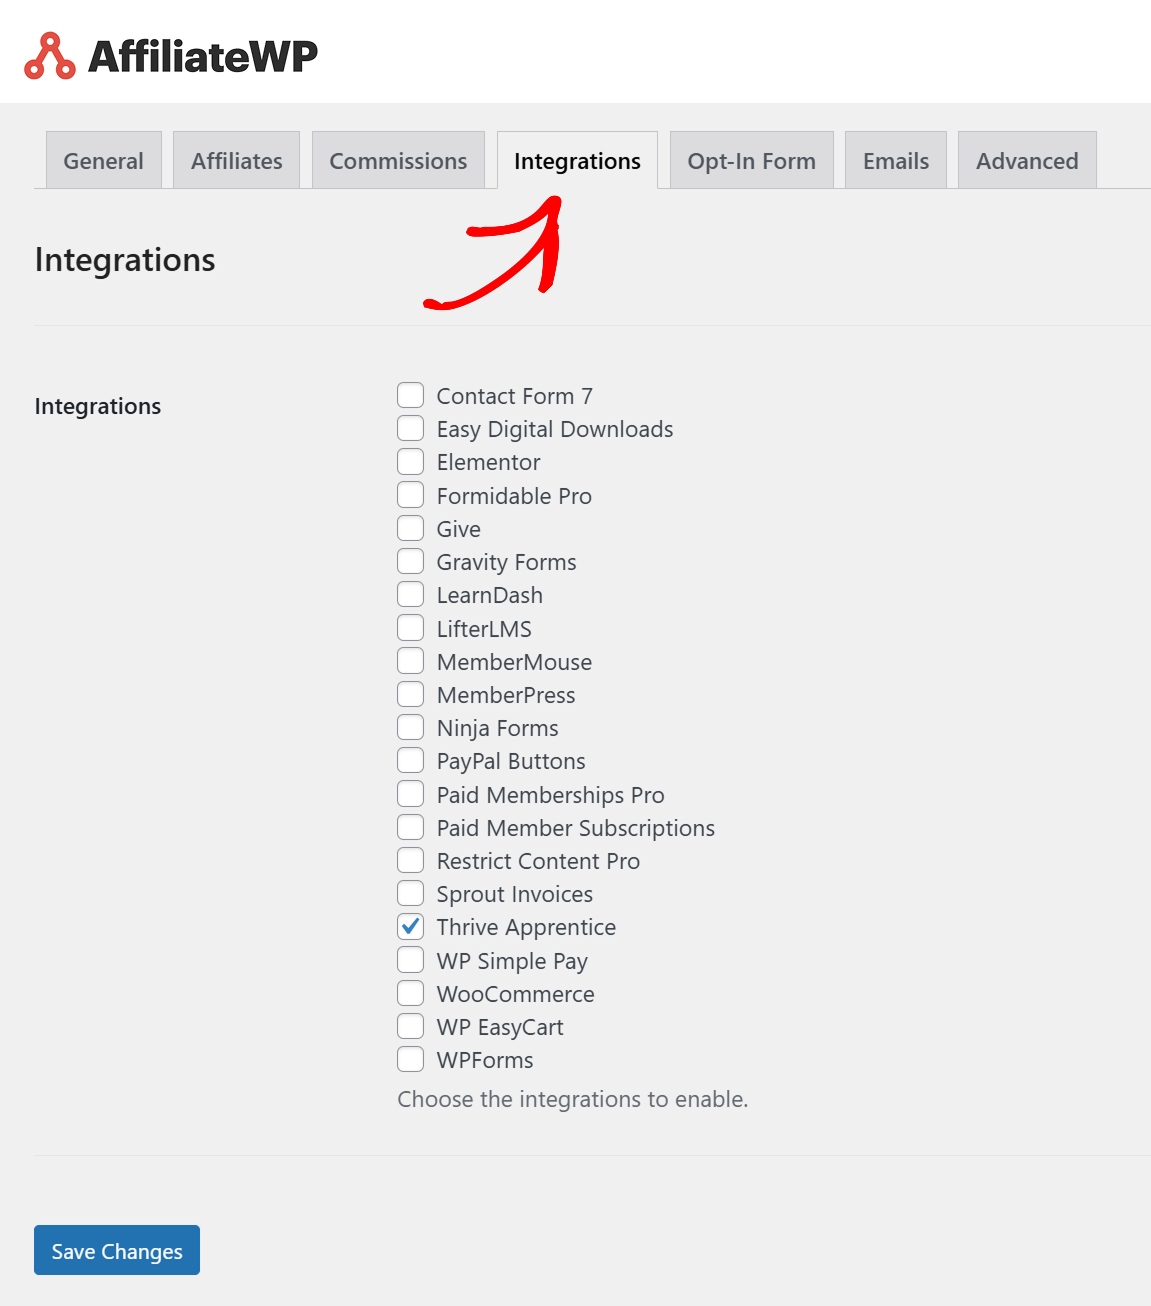
AffiliateWP enhances your WordPress site by integrating seamlessly with popular WordPress plugins for eCommerce, memberships, subscriptions, form-builders, and more. This guide will walk you through the steps to enable your chosen integration directly from the WordPress admin dashboard.
Accessing Integration Settings
Once you have installed AffiliateWP it’s incredibly easy to enable your chosen integration from the WordPress admin. Follow the below steps to enable your chosen integration.
- In your WordPress admin go to the AffiliateWP » Settings » Integrations tab
- Check the box or boxes next to the integrations you will be using with AffiliateWP
- Click Save Changes to enable your chosen integration(s).

That’s it! You can now configure your integration to your liking to enable referrals, set per-product rates, and more.
Frequently Asked Questions
How do I find documentation for specific integrations?
Each integration has detailed documentation available. You can read more on how to set up your specific integration by checking out its corresponding documentation.
Can I enable multiple integrations simultaneously?
Yes, you can select and activate multiple integrations at once depending on your business requirements. However, it isn’t necessary to enable all integrations. Whether you’re just using one, or you are using a few, you only need to enable the integration(s) you will be using.
Note: AffiliateWP doesn’t provide or sell any of the plugins we integrate with; they must be downloaded or purchased directly from the developer or company that create and distribute them.