Creatives are pre-made banners and image assets that affiliates can use to easily promote your products or services. Instead of requiring that affiliates create their own banner images, or affiliate URLs, you can make it easy for them by setting up a list of pre-made banner images of various sizes, or text links, that they can simply add to their own websites or email newsletters.
In this article, we’ll show you how to create creatives for your affiliates, including how to categorize, and assign the creative categories the affiliate/s will have access to.
How to add creatives
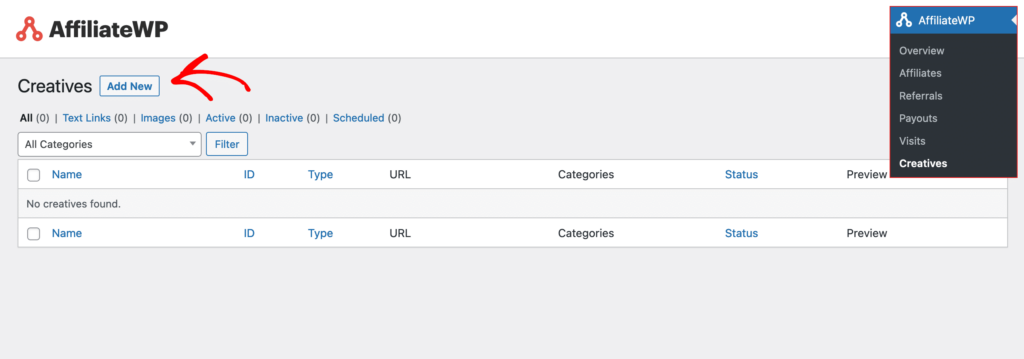
The Creatives are managed through the Creatives option under the main AffiliateWP menu in the WordPress admin.
To create a new creative, click the Add New button at the top of the screen.

Now you will be presented with a simple form to fill out.
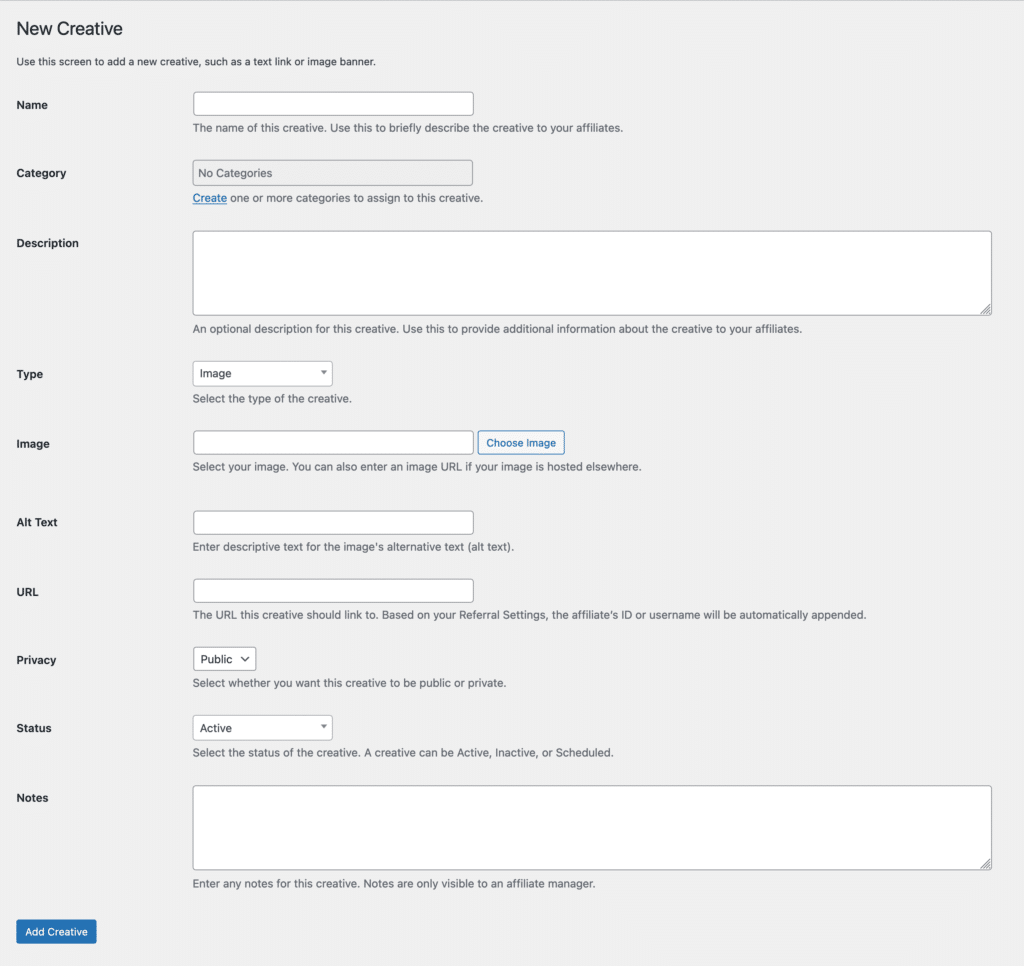
- Name – this is a name given to the creative that is visible to the affiliates.
- Category – this is the category or categories available to assign to the creative (if no categories exist, there is a Create link to get started).
- Description – this allows you to enter a description for the Creative. This is visible to affiliates and is displayed above the creative.
- Type – this is the type of creative such as an Image, QR Code, or Text Link entry.
- Image – this is the full URL to the image file to use if Image is selected as the Type
- Alt Text / Text – this is the text that is displayed to be attributed to the image, and is only shown if Image is selected as the Type. Otherwise it will show a Text field when Text Link is selected for the Type.
- URL – this is the URL that the creative will link to.
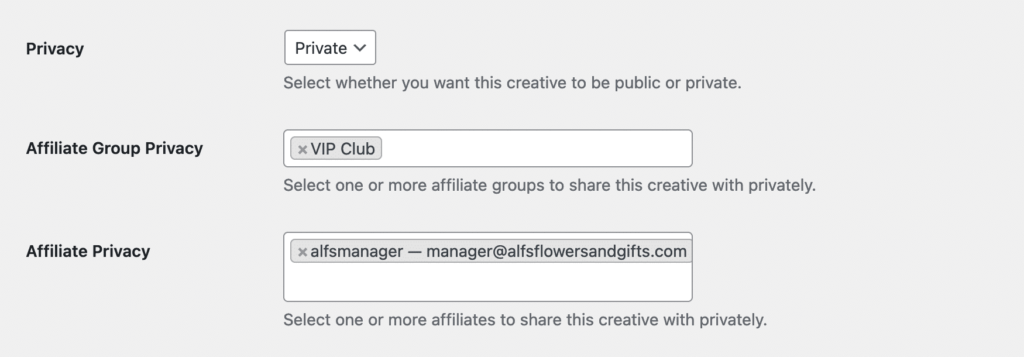
- Privacy – this allows you to share a creative privately with a group of affiliates and/or individual affiliates.
- Status – this is the status of the creative. Active means it can be seen by affiliates, Inactive means it is hidden, and Scheduled means it’s hidden until the scheduled start date.
- Notes – add notes for this creative – these are visible to the affiliates as well.
Users with a Professional license have the option to add a QR Code creative. When selecting the QR Code type, there will be more options available.
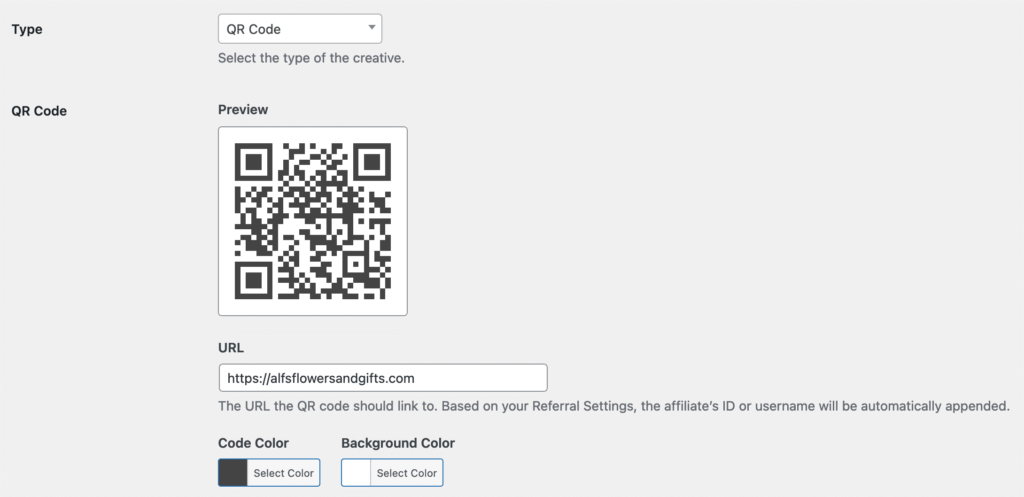
The URL field is where you’d like the visitor to be sent once the QR Code is scanned. You also have the option to adjust the background and code colors of the QR Code to match your site, a marketing campaign, etc.
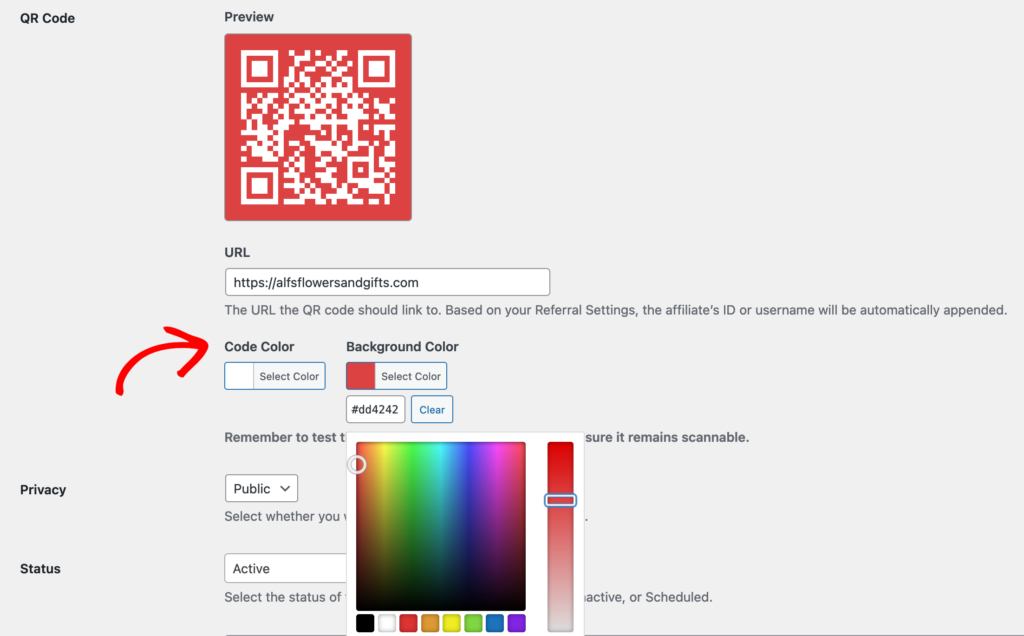
The QR Code will update automatically each time the URL is updated, and the colors will instantly change based on your selection(s).
Note: When adding a QR Code creative if you leave the URL field empty, a QR Code will still be displayed using the site URL as the default value after saving.
Note: The QR Code creative type is only available for Professional licenses, otherwise you will see a prompt to upgrade your license.

Once you have created and saved the new creative, it will be shown in the list of Creatives:
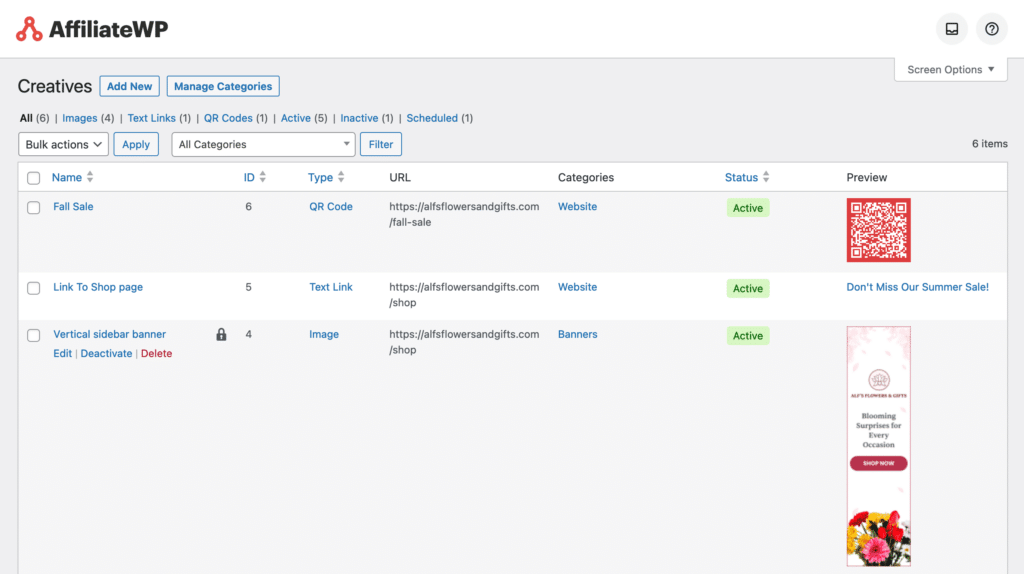
From the Creatives list, you can view the pertinent details of each Creative, change the status, add or remove from a category, add notes, and adjust privacy settings for what affiliates can see the creative.
How to Schedule Creatives
With an AffiliateWP Professional license, you have the ability to schedule when a creative will become available and for how long it will stay active.
Navigate to AffiliateWP » Creatives and click Add New. You can also edit an existing creative if needed.
To schedule a creative, click on the Status dropdown menu and select Scheduled.

Note: The Schedule Creatives functionality is only available for Professional licenses, otherwise you will see a prompt to upgrade your license. 
Once you select Scheduled, then you will see a start date and end date field. Select a start date if the creative needs to become Active on a future date and an end date if the creative needs to become Inactive at a later date.

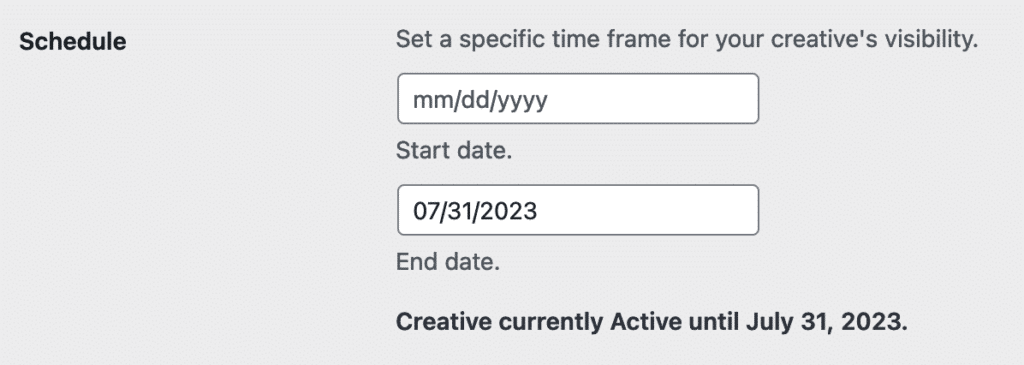
If you want the creative to be available immediately until a specific date choose the end date and leave the start date empty. This schedule will make the creative Active immediately and Inactive once it reaches the end date.
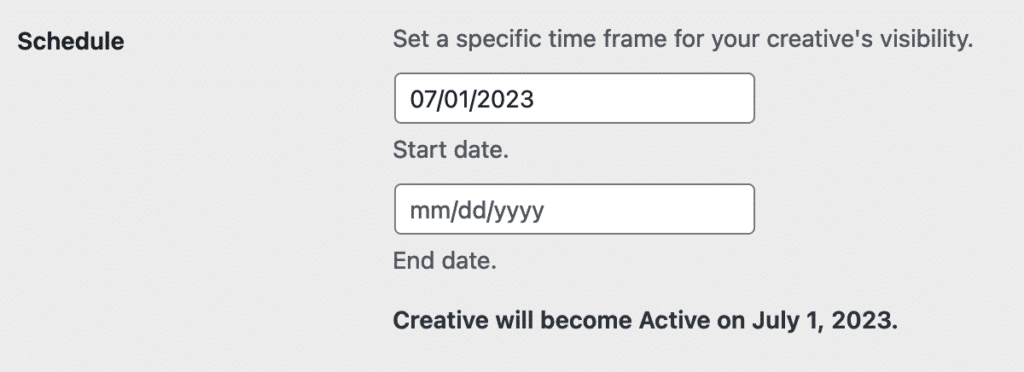
If you want the creative to become available on a future date and stay available forever, populate the start date and leave the end date empty. Doing this will make the creative Active on the start date and be available indefinitely.
If no dates are selected, the creative will be set to Active status immediately.
Note: Scheduled dates will be determined by the site’s timezone. This can be adjusted by navigating to Settings » General in your WordPress Dashboard.
When navigating to AffiliateWP » Creatives you will see status badges showing each creative’s status.
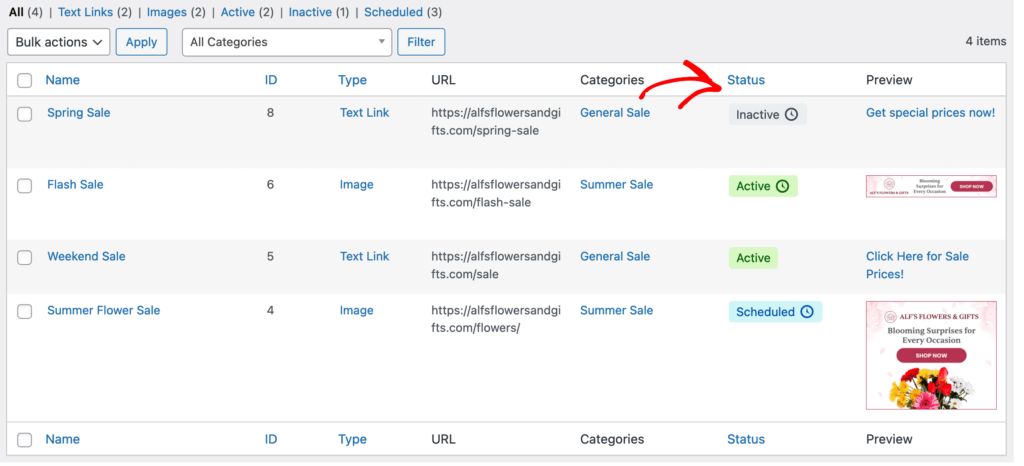
Active – This is a creative that’s currently active and has no schedule.
Active + Clock Icon – This is a creative that’s currently active but has a scheduled end date.
Inactive – This is a creative that’s currently inactive and has no schedule.
Inactive + Clock Icon – This is a creative that was previously scheduled and the scheduled end date was reached.
Scheduled + Clock Icon – This is a creative that has a scheduled start date that has not occurred yet.
You can sort Creatives by Status if needed, as well as clicking the Scheduled link which will show all scheduled creatives.
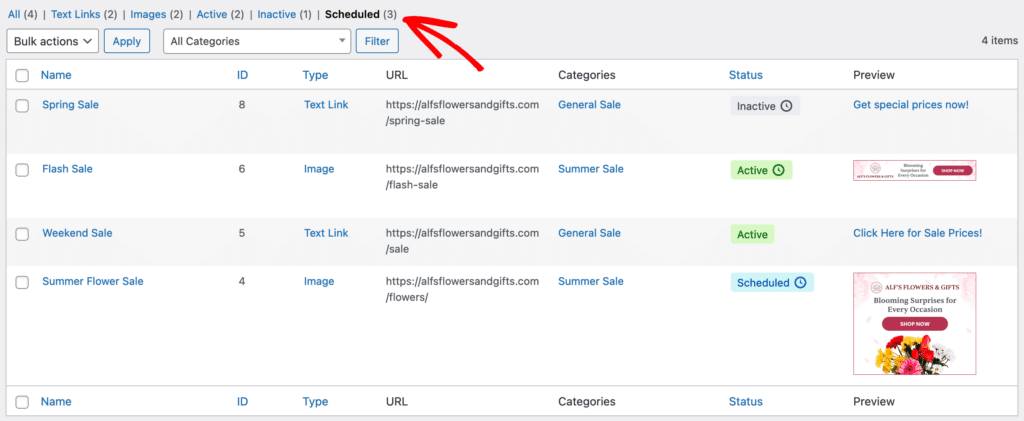
Hovering over a scheduled status will show details regarding start/end dates.


When hovering over a scheduled creative (you can see it in the image above), there are some quick action links available.
Activate Now – Creatives with a schedule that are Scheduled or Inactive have the Activate Now option. When you click Activate Now it updates the start date to the current date and sets the create to an Active status.
Deactivate Now – For scheduled creatives that are currently Active, the Deactivate Now option is available. When you click Deactivate Now it updates the end date to the current date and sets the creative to an Inactive status.
Additionally, there’s an Edit Schedule quick action (only on creatives with a schedule) that takes you to the Schedule section of the Edit Creative screen so that you can quickly adjust the schedule as desired.
How to Categorize Creatives
You can add categories to better organize your creatives into groups for affiliates.
To add or edit categories, click the Manage Categories button, or navigate to the Creatives » Categories option under the main AffiliateWP menu in the WordPress admin.
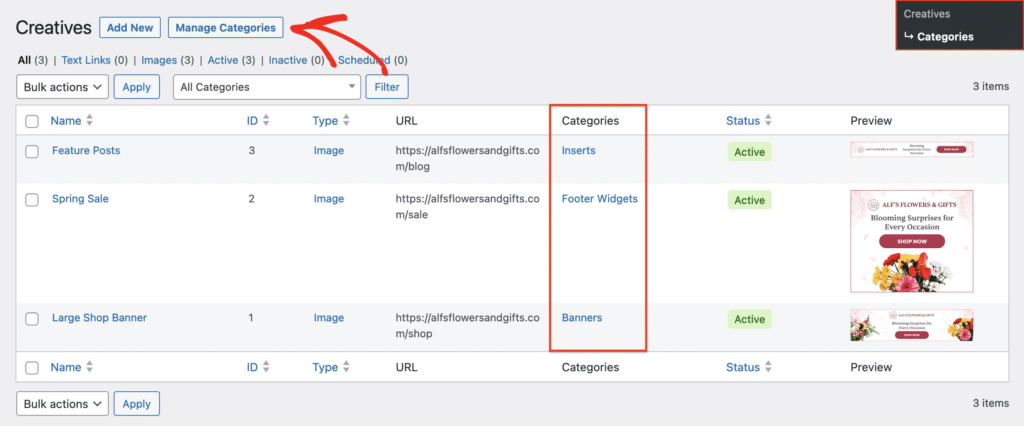
To add a category, click the Add New Category button.
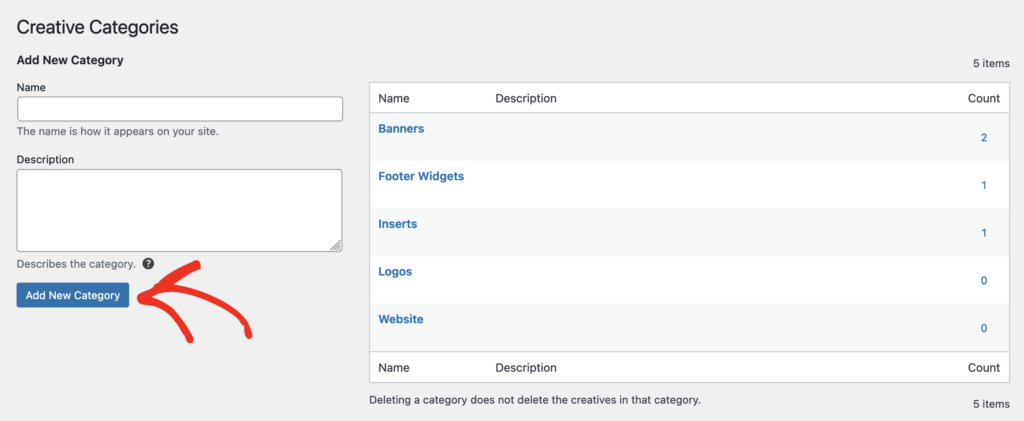
To add a new category, begin typing a category name in the Name field, enter a Description if desired, and click the Add New Category button to save your new category. Your saved category list will now appear on the right side of the screen.
To edit or delete a category, hover over the category name, and click either the Edit or Delete option.
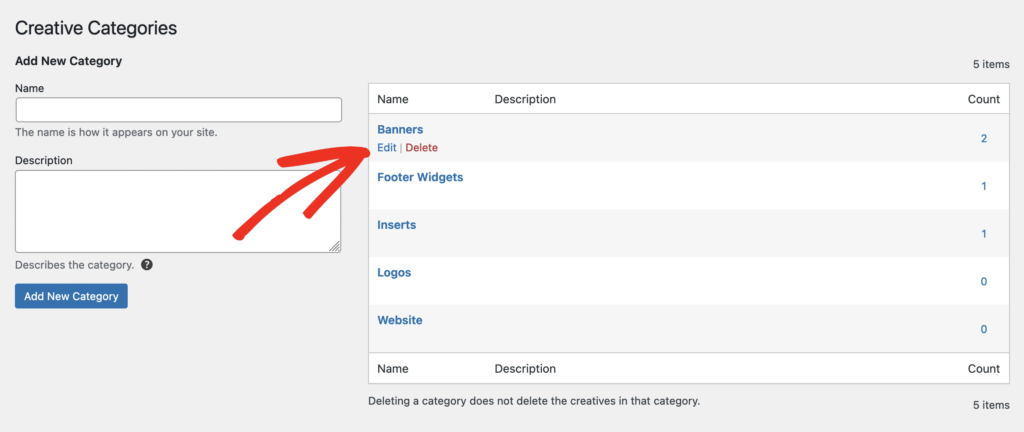
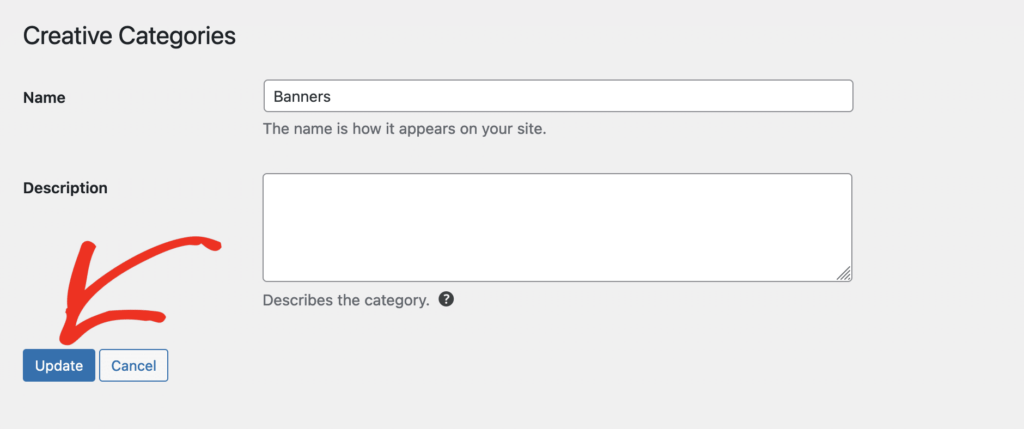
When editing the category name or description, after making your changes, click the Update button.
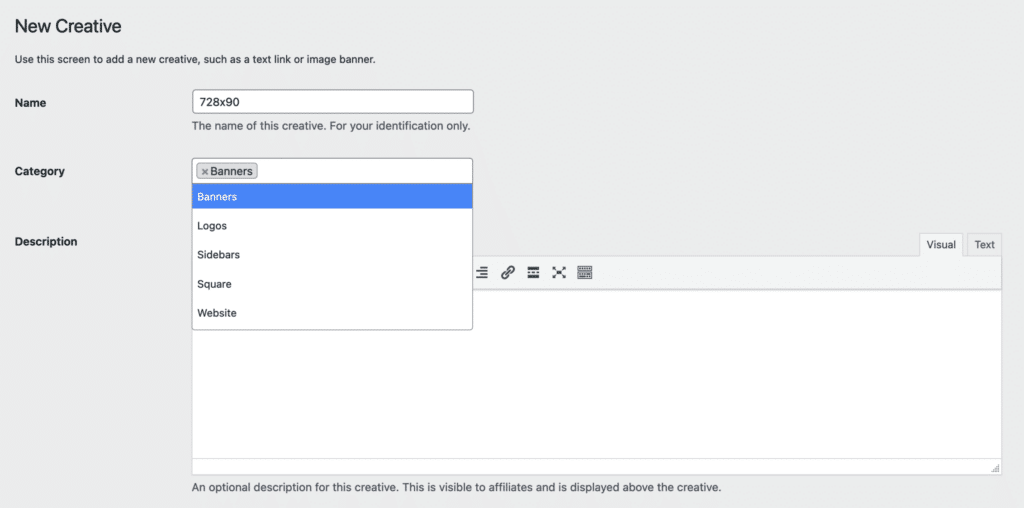
To select a category when adding or editing a creative, place the cursor in the Category field, select one or more categories, and click the Add Creative or Update Creative button at the bottom of the screen.
How to assign affiliates to creatives
You can choose an Affiliate Group and/or individual affiliates to share a creative privately in the Privacy section.
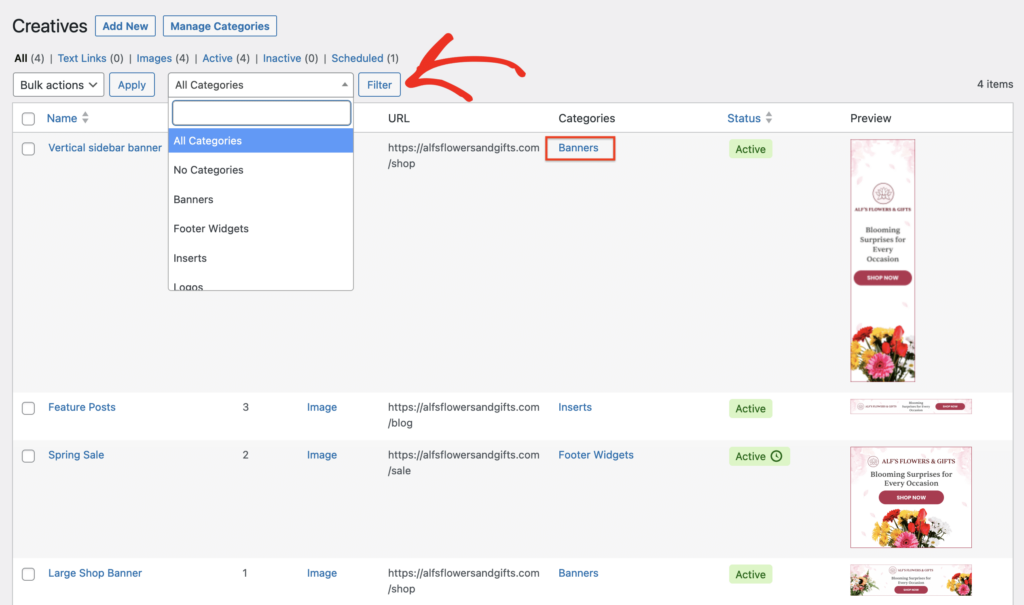
When viewing the Creatives list, you can filter by the Category by clicking on the category name, or selecting the category name from the All Categories list, and clicking the Filter button.
Creatives that have a status of Active will be automatically listed under the Creatives tab of the Affiliate Area on the front end of your website, meaning they are visible and available for use by all affiliates.
Viewing Creatives in the Affiliate Area
The default list view of the affiliate area’s Creatives screen.
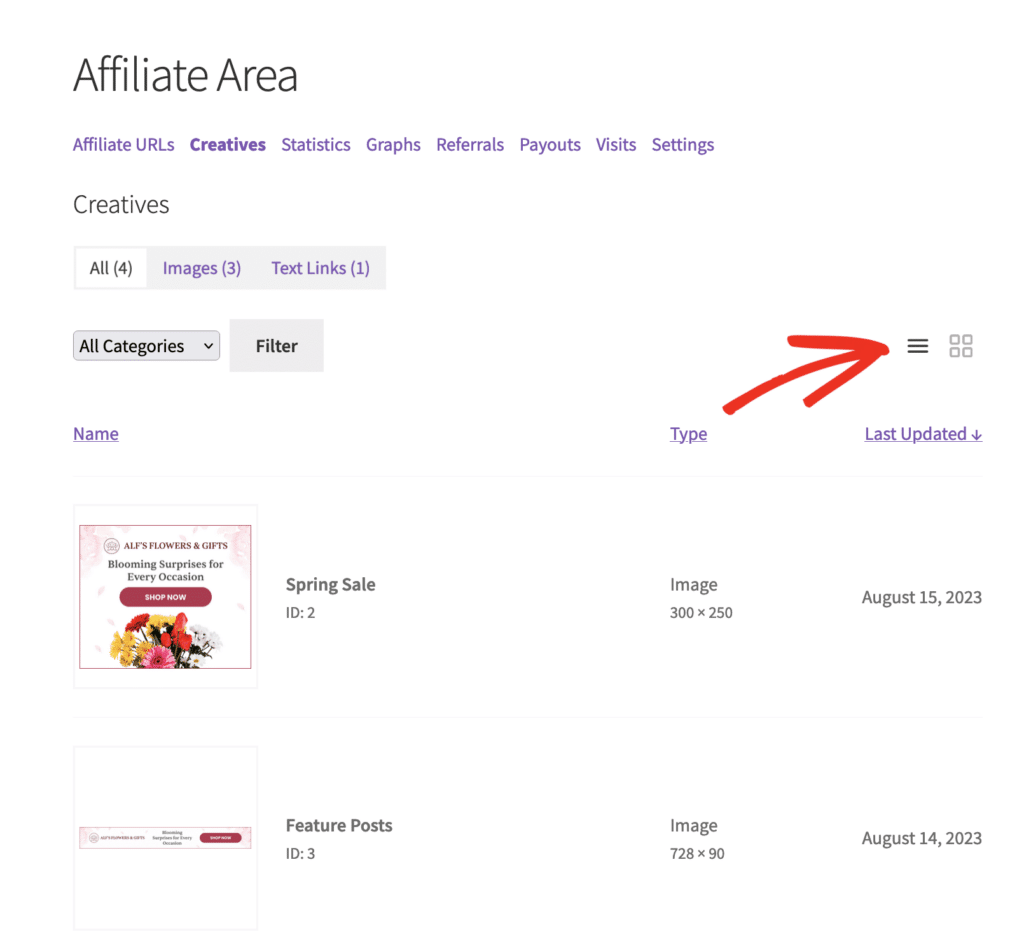
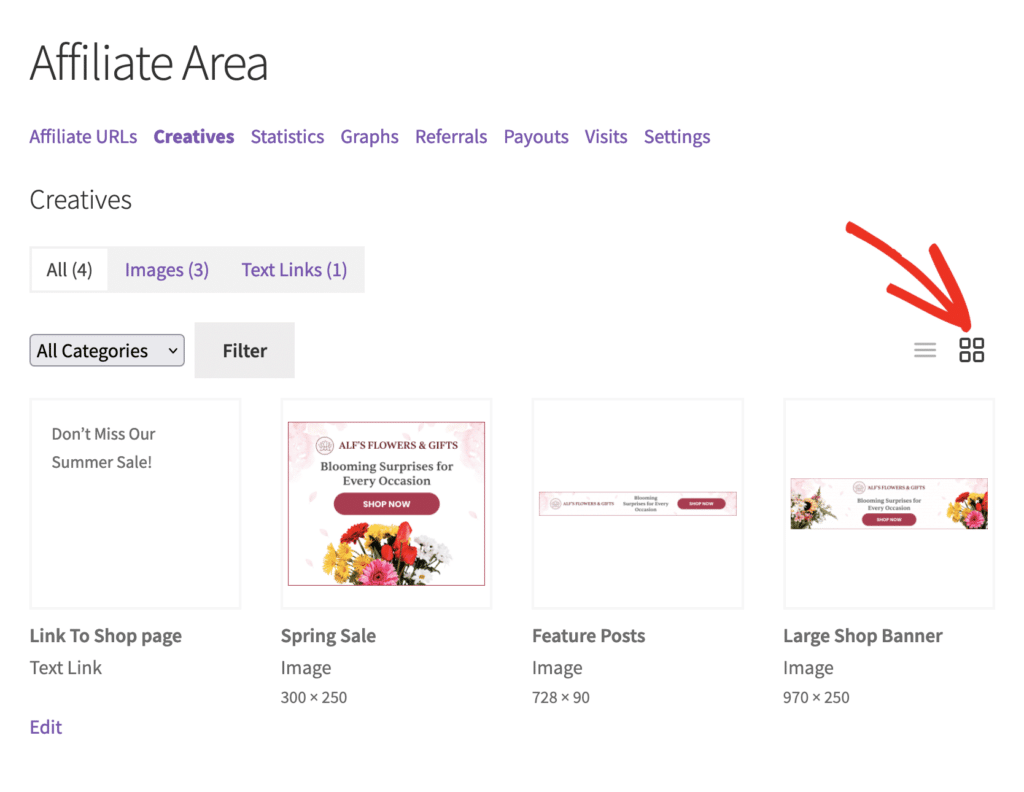
There is also a grid view option as well by clicking on the grid image.
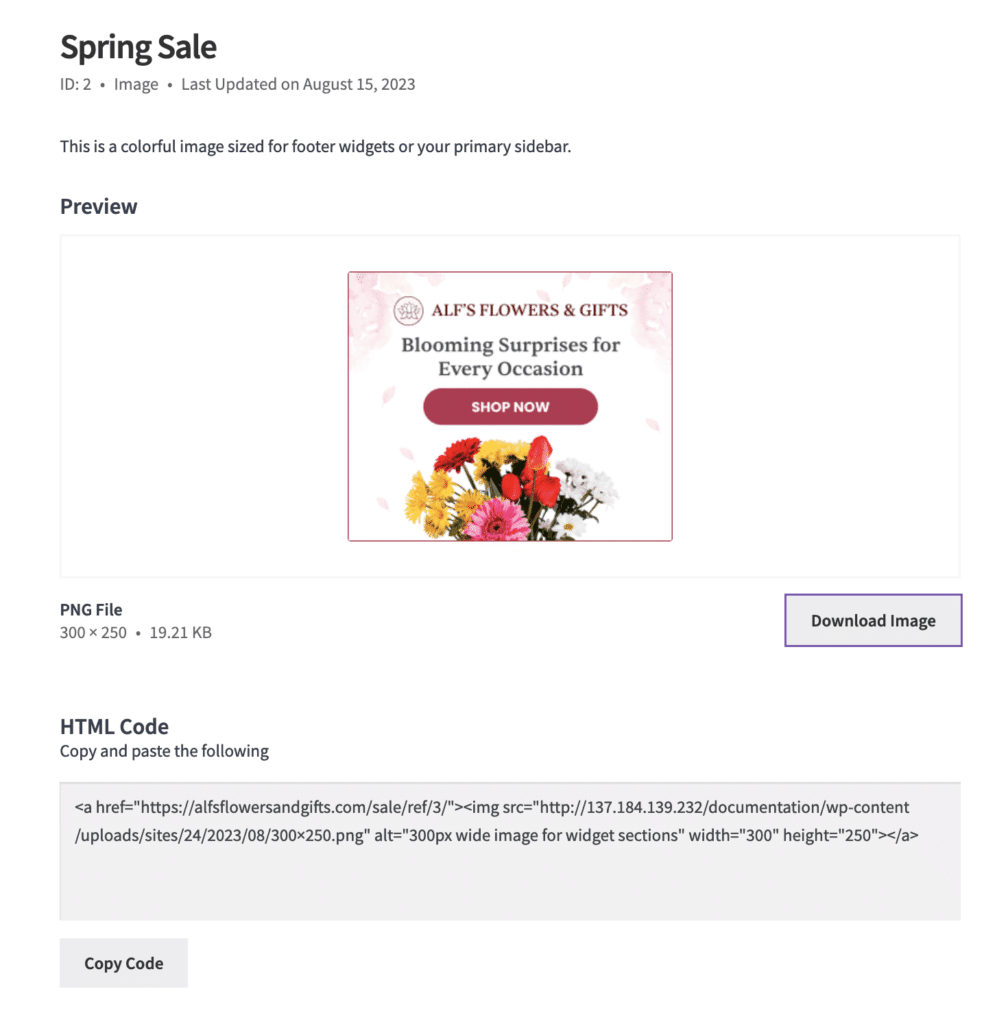
To see creative details, click on the creative entry to view. Here you can download the image, and copy the the HTML code with the click of the Copy Code and Download Image respectively.
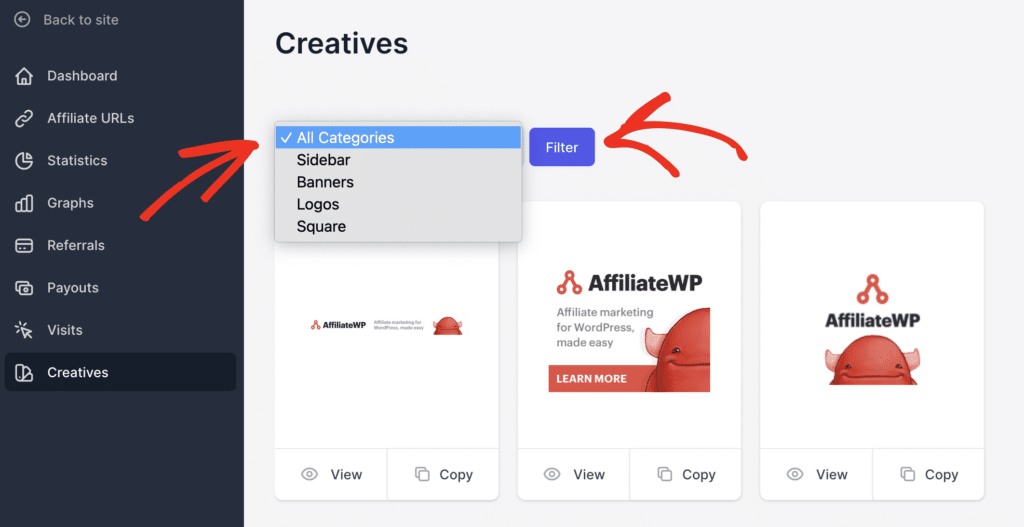
The grid view is the default in the Affiliate Portal creatives screen.
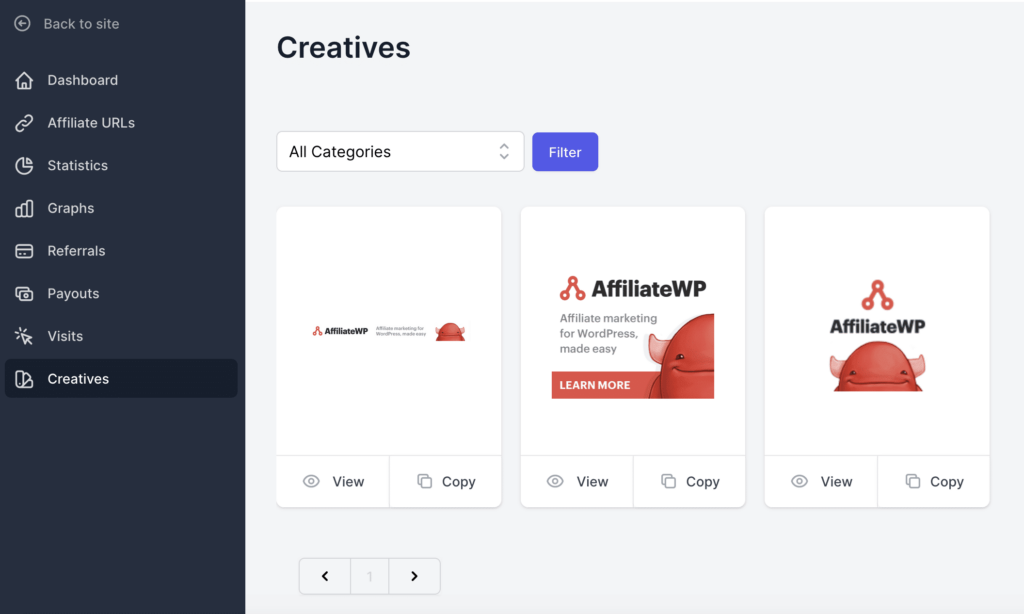
Affiliates can filter the creatives by category when selecting the category name from the All Categories dropdown list, and clicking the Filter button.
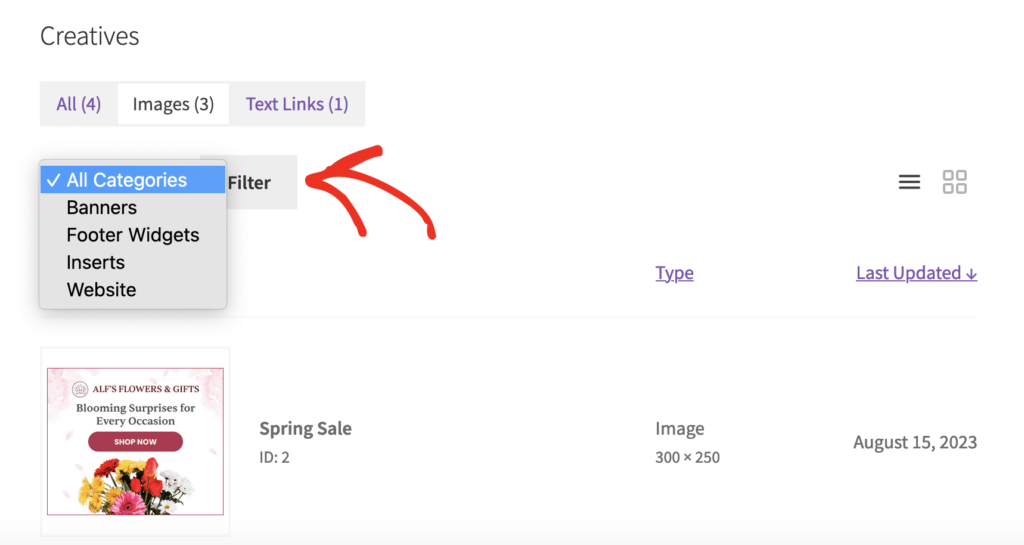
If there aren’t any categories or affiliate groups created yet, the All Categories dropdown list and Filter button will not appear.
You can also filter between the types of creatives by clicking on the name of each in the default affiliate area view.

And finally, there are column headers that can be clicked to toggle ascending and descending sorting order on each.

The Affiliate Portal offers the same dropdown list and Filter button.
Shortcodes for Creatives
- [affiliate_creatives] – this will display a list of all active Creatives
- [affiliate_creative id="123"] – this will display a specific creative designated by the id=”x” parameter. You can see more details on how to do this in our doc for the [affiliate_creative] shortcode.
Frequently Asked Questions
What are affiliate creatives in AffiliateWP?
Affiliate creatives are pre-made banners, image assets, or text links that affiliates can use to promote your products or services. These creatives simplify the promotion process for affiliates by providing ready-to-use marketing materials.
How do I add a new creative in AffiliateWP?
To add a new creative in AffiliateWP, navigate to AffiliateWP » Creatives in the WordPress admin. Click the Add New button at the top of the screen and fill out the form with the creative details, such as Name, Category, Description, Type, Image URL, Alt Text/Text, URL, Privacy, Status, and Notes. Finally, click Add Creative to save the new creative.
How do I schedule a creative to become active at a specific time?
To schedule a creative, go to AffiliateWP » Creatives and click Add New or edit an existing creative. In the Status dropdown menu, select Scheduled, then set the start date and end date for the creative. Save the creative, and it will automatically become active and inactive based on the scheduled dates.
How do I categorize creatives?
To categorize creatives, click the Manage Categories button in the Creatives section or navigate to AffiliateWP » Creatives » Categories. Click the Add New Category button, enter the category name and description, then click Add New Category. To edit or delete a category, hover over the category name and select the appropriate option.
Why can’t I see my new creative in the Affiliate Area?
If you can’t see your new creative in the Affiliate Area, first ensure the creative status is set to Active. If the creative is scheduled, verify that the current date falls within the scheduled start and end dates.
How can affiliates view and use the creatives?
Affiliates can view the list of active creatives in the Affiliate Area of your site. They can switch between list and grid views, filter by category, and use column headers to sort creatives. By clicking on a creative entry, affiliates can download the image and copy the HTML code for easy integration into their websites or email newsletters.
Are there shortcodes available for displaying creatives?
Yes, AffiliateWP provides the following shortcodes: id="x" parameter.
And that’s all there is to it! If you’d like more in-depth information on the best way to use image assets and banners for your affiliates, take a look at our article on best practices for affiliate creatives and banners .