Reward Your Customers with Free Products, Not Just Coupons
Not every reward needs to be a discount. Now you can offer any product from your store as a loyalty or referral reward - customers claim it, add to cart, and it's free.
Continue Reading →
Not every reward needs to be a discount. Now you can offer any product from your store as a loyalty or referral reward - customers claim it, add to cart, and it's free.
Continue Reading →
Welcome to the second post in our short series on using AffiliateWP to reward your affiliates for generating opt-in subscribers and leads on your WordPress website!
In this post we’ll show you how to:
We’ll also touch on how you can use Gravity Forms’ add-ons for popular email marketing services to collect form sign-ups for your potential leads or your opt-in audience.
Let’s get started!
In the WordPress admin, head over to the Affiliates → Settings → Integrations tab. Check the box next to Gravity Forms, and click Save Changes.
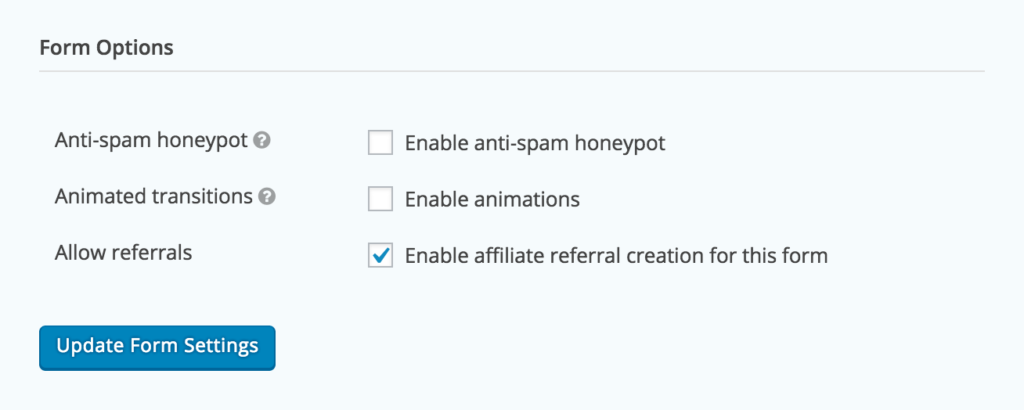
When a visitor clicks on an affiliate referral link and lands on your site, and successfully completes and submits this form, the referring affiliate will receive a $0.00 referral.
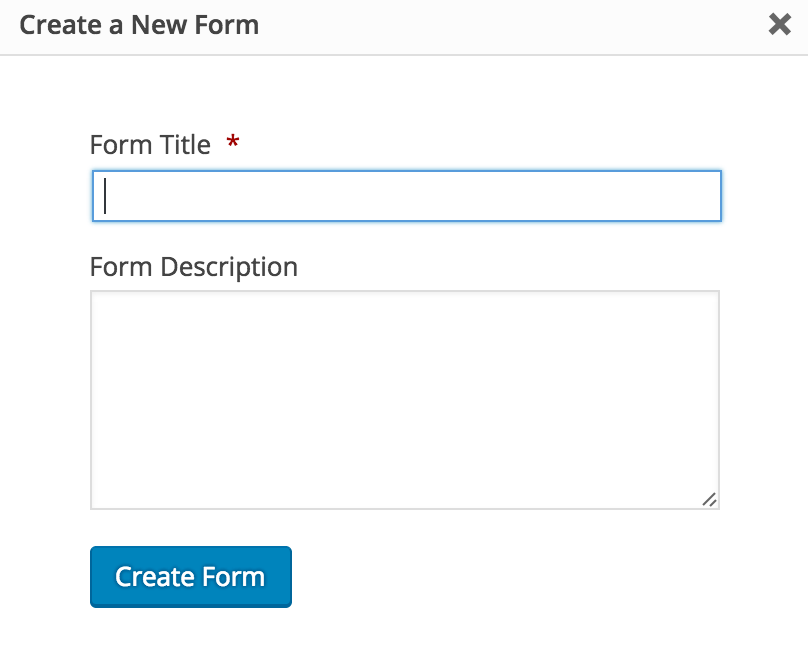
TIP: Which fields should you add? For opt-ins and lead generation, you’ll want to gather some contact details from your site visitor. We recommend adding some Advanced Fields such as Name, Phone, Address, Website, and Email.
Congrats! You’ve just created an opt-in or lead generation form that generates referrals for your affiliates. Yup, it’s that easy.
If you want to pay your affiliates a commission for opt-ins and leads they generate, you can set an amount (essentially, a “cost”) for the form that will then generate a commission for the referring affiliate. When a customer successfully submits the required details via a form, the affiliate will receive a referral with a value (i.e. $5.00 for every opt-in or lead they generate). Note: You need to be using a percentage referral rate type to use Gravity Forms in this way if you are also selling products on your site.

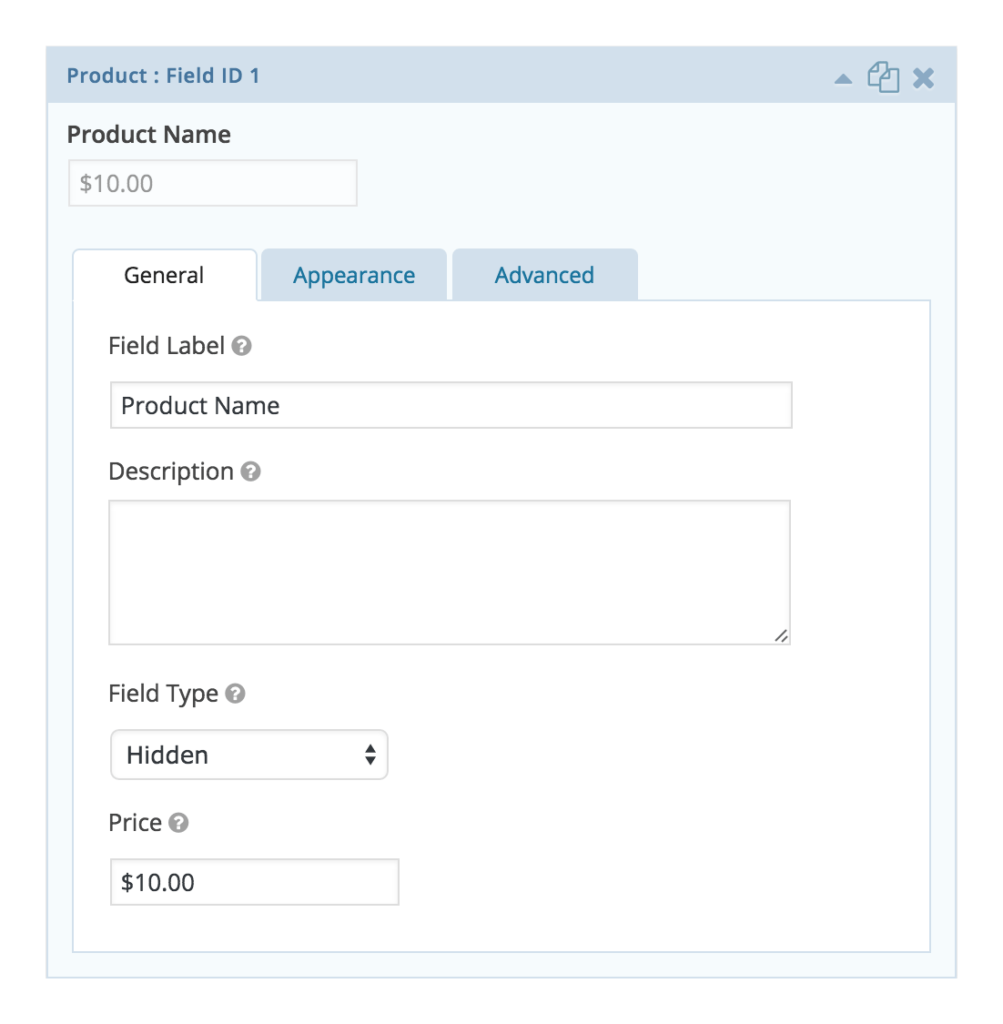
If you’re only wanting to generate leads or opt-ins on your website (and not selling products as well), you can set your global referral rate type to a Flat Rate, and make the rate whatever you want to pay your affiliates per opt-in/lead (i.e. $2.00 per lead). Simply ensure referrals are enabled for that form.
NOTE: Remember, if set, a per-affiliate rate will override the global referral rate.
You can stop here if you’ve created an epic Gravity Form that generates referrals. Nice work!
If you want to take it a step further and find out how to reward your affiliates for signing up NEW affiliates, or how to use Gravity Forms’ add-ons to grow your opt-in mailing list or potential leads, keep reading!
The Affiliate Forms for Gravity Forms pro add-on is incredibly useful, as it allows you to create a custom affiliate registration form with as many or as few fields as you want.
NOTE: You can only have one affiliate registration form.
You can also enable referrals to be generated for this registration form, so when an existing affiliate shares a link to it, and a new affiliate successfully registers, the existing affiliate will be awarded a $0.00 referral or a dollar amount commission for signing up a new affiliate.
Here’s how you can use the custom affiliate registration form and Affiliate Forms for Gravity Forms to incentivize your affiliates to recruit new affiliates.
When you use Affiliate Forms for Gravity Forms, the form you create becomes the affiliate registration form (which appears on the Affiliate Area page, where the [affiliate_area] shortcode is used, plus anywhere the [affiliate_registration] shortcode is used).
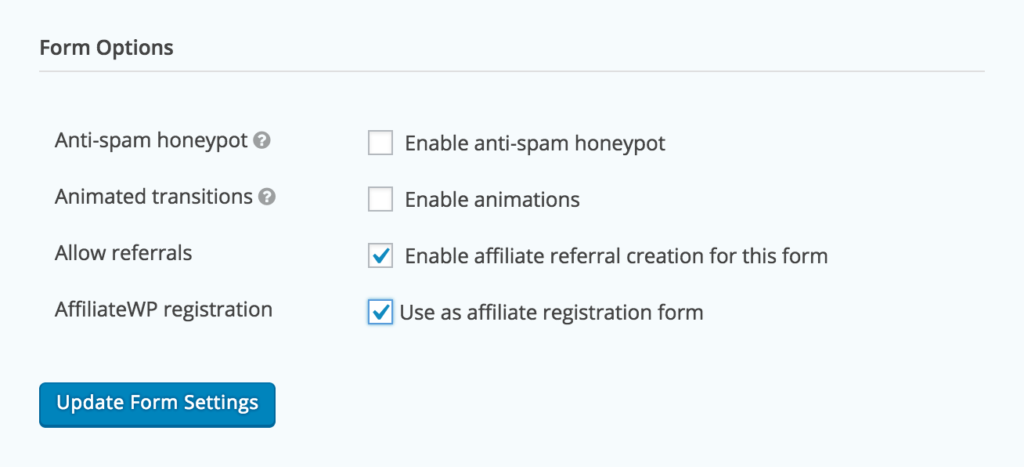
Using the method above to add a hidden product “cost” field to the form, you can generate a referral with a monetary amount for your affiliates when they register a new affiliate as an incentive. This process currently supports a global percentage referral rate type as set in the Affiliates → Settings → General tab. For example, if your global referral rate is 20%, and you want to pay your affiliates $0.50 for every new successful affiliate registration on your site, you would set the product cost on the form to calculate the final commission amount correctly. In this instance, the product cost on the form would be $2.50 (20% of $2.50 is $0.50), therefore, $0.50 is the commission awarded for a referred affiliate registration.
When an affiliate registers via your affiliate registration form on the Affiliate Area page, AffiliateWP performs several automatic actions:
If you place the registration form on another page of your website using the
shortcode, remember to set up a redirect so your new affiliates land on a page that makes sense for your website. For best practice, we recommend redirecting affiliates to your Affiliate Area, however you may like to redirect them to a custom success page. This may show the affiliate a link or button to visit their affiliate area, their affiliate referral URL so they can start promoting your site and products straight away.To set up a redirect, go to the Confirmations tab in your Form Settings and click Edit on the Default Confirmation.
By default, the confirmation type will be set to Text. Change this to Redirect and enter the page URL you want your affiliates to be redirected to in the Redirect URL field. Click Save Confirmation, and you’re done!
Gravity Forms is an excellent form-builder out of the box, however its various add-ons can make it even more powerful.
When your business or marketing focus is lead generation, contact details are crucial so you can follow up with qualifying prospects at a later date. Gravity Forms’ integration add-ons with various email marketing services will automatically add prospective lead details to your email list when a form is submitted. This makes it super easy to connect with prospects when you’re ready to get in touch with them.
Similarly, if your goal is to grow your website subscribers, these add-ons will allow you to easily add your opt-in contacts to a dedicated, manageable mailing list for seamless email marketing and communication.
You’ll need Gravity Forms, and a license or account with one of the supported email marketing services (listed below). When you have purchased a license or signed up for an account, you’ll have access to your account or API details for the email service, which are required to set up and use the integration add-on. Once the add-on is set up and ready to go, you can select the form you will use to collect contact information. In your email marketing system, set up a mailing list with a relevant title which is easily identifiable. Then, using the add-on, you can connect a form to your chosen mailing list so the data is automatically transferred to the list when the form is submitted.
Link a regular contact form so prospective leads and opt-ins are automatically saved into a mailing list. Or, use the Affiliate Forms for Gravity Forms custom registration form if you wish to quickly and easily capture the email addresses of your new affiliates.
The Gravity Forms email marketing system add-ons are available with either a Business or Developer Gravity Forms license. Check out the list of mail services Gravity Forms has created add-ons for below:
See the Gravity Forms website to find out more about the functionality of these add-ons, or check out Gravity Forms’ documentation.
TIP: You can also use these add-ons, along with your custom affiliate registration form (using the Affiliate Forms for Gravity Forms pro add-on) to collect your affiliates’ contact details and add them to a dedicated mailing list, so you can quickly and easily email your affiliates at any time.
Using the steps outlined in this tutorial, you can turn your AffiliateWP-powered affiliate program and integration with Gravity Forms into a streamlined lead-generation and opt-in marketing system, which will help make you more sales, grow your business, and boost the number of affiliates promoting your website and products.
Are you already using AffiliateWP as a lead-generation platform? Are you incentivizing your affiliates to bring in subscribers, or to recruit new affiliates? Leave us a comment below and let us know how!
Disclosure: Our content is reader-supported. This means if you click on some of our links, then we may earn a commission. We only recommend products that we believe will add value to our readers.
Launch your affiliate program today and unlock a new revenue channel to grow your business faster.
We use cookies to improve your experience on our site. By using our site, you consent to cookies.
Manage your cookie preferences below:
Essential cookies enable basic functions and are necessary for the proper function of the website.
Statistics cookies collect information anonymously. This information helps us understand how visitors use our website.
Marketing cookies are used to follow visitors to websites. The intention is to show ads that are relevant and engaging to the individual user.
Very useful article! However, this option did not fit me, I managed to make the desired form through stepFORM. But maybe I’ll apply this option for other tasks.