AffiliateWP’s integration with Elementor enables the creation of custom affiliate registration forms using Elementor’s Form widget and allows affiliates to promote any form on your site. When a referred user submits a form, a referral is recorded in AffiliateWP.
This guide explains how to set up the Elementor integration, create an affiliate registration form, and activate referral tracking for Elementor forms.
To create a custom affiliate registration form or enable referral tracking on any form using Elementor, you’ll need access to the Form widget, which is only available with Elementor Pro.
Enabling the Elementor Integration
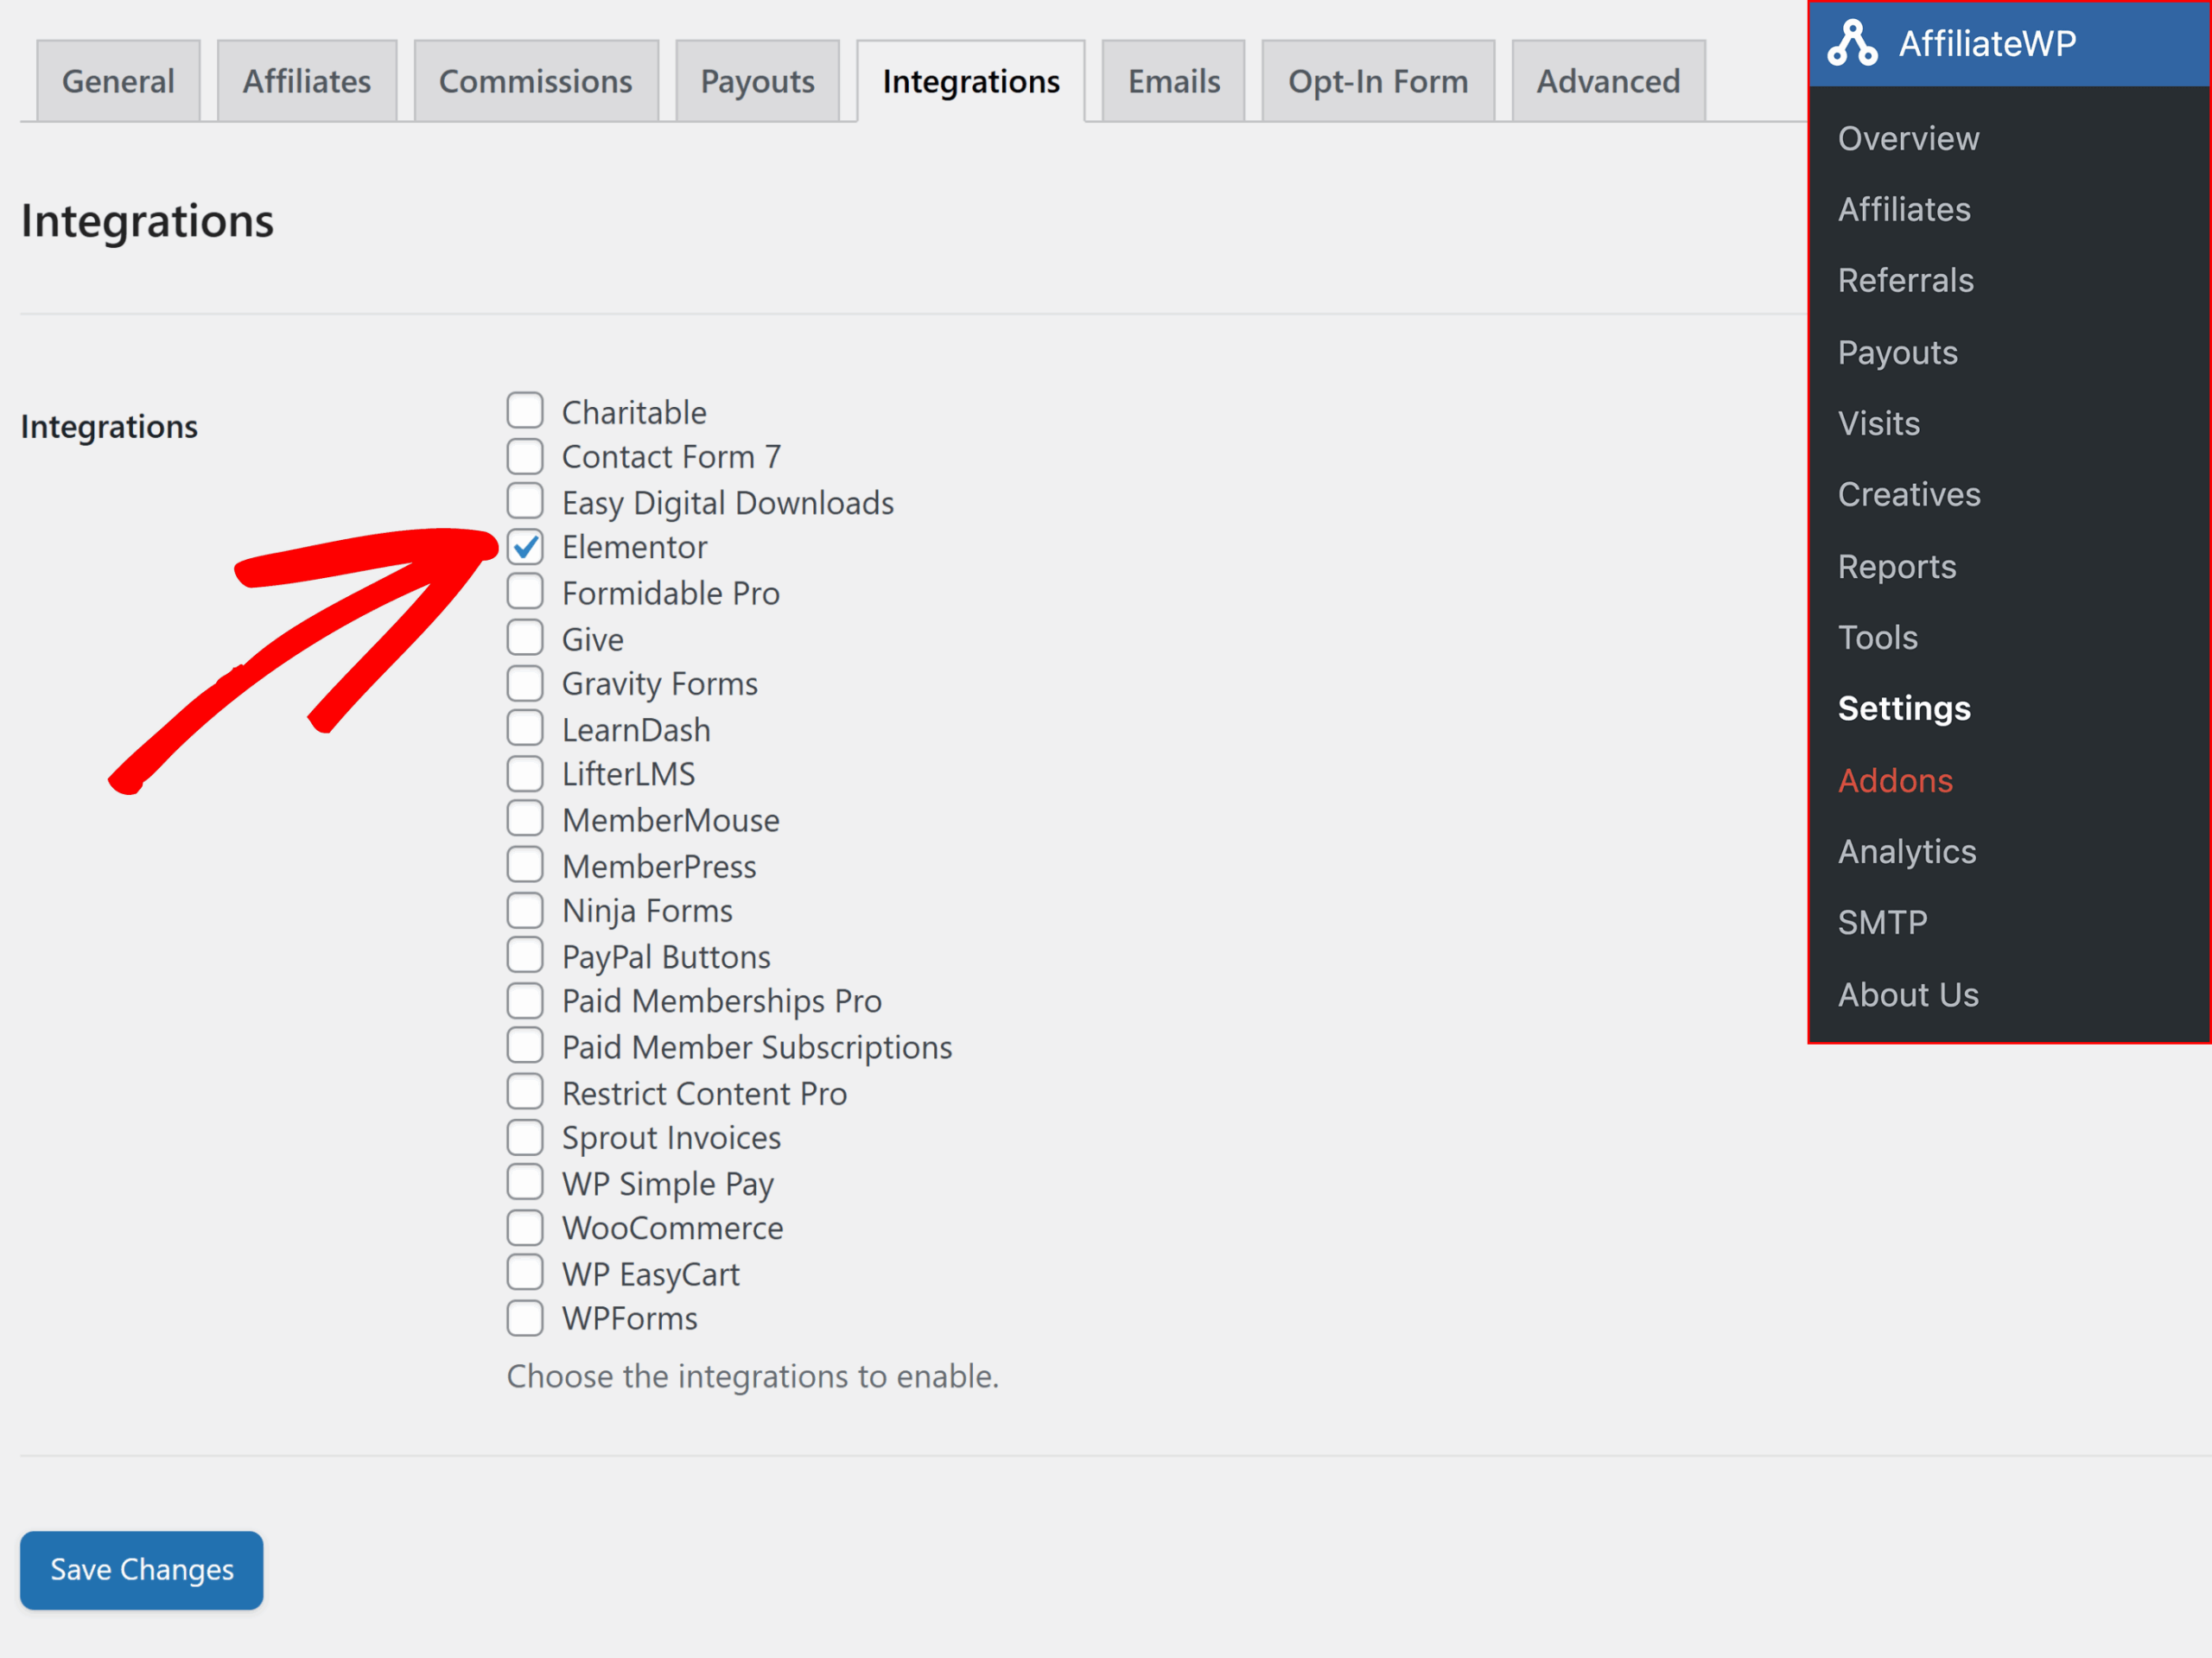
To enable support for Elementor, go to AffiliateWP » Settings » Integrations. Enable the Elementor checkbox and click Save Changes.
Adding the Form Widget and Customizing Fields
Want a head start on building your registration form? Import our template file
To make it easier to build your affiliate registration form, we’ve created an Elementor page template. You can import this template into your site and start customizing.
Download the page template →
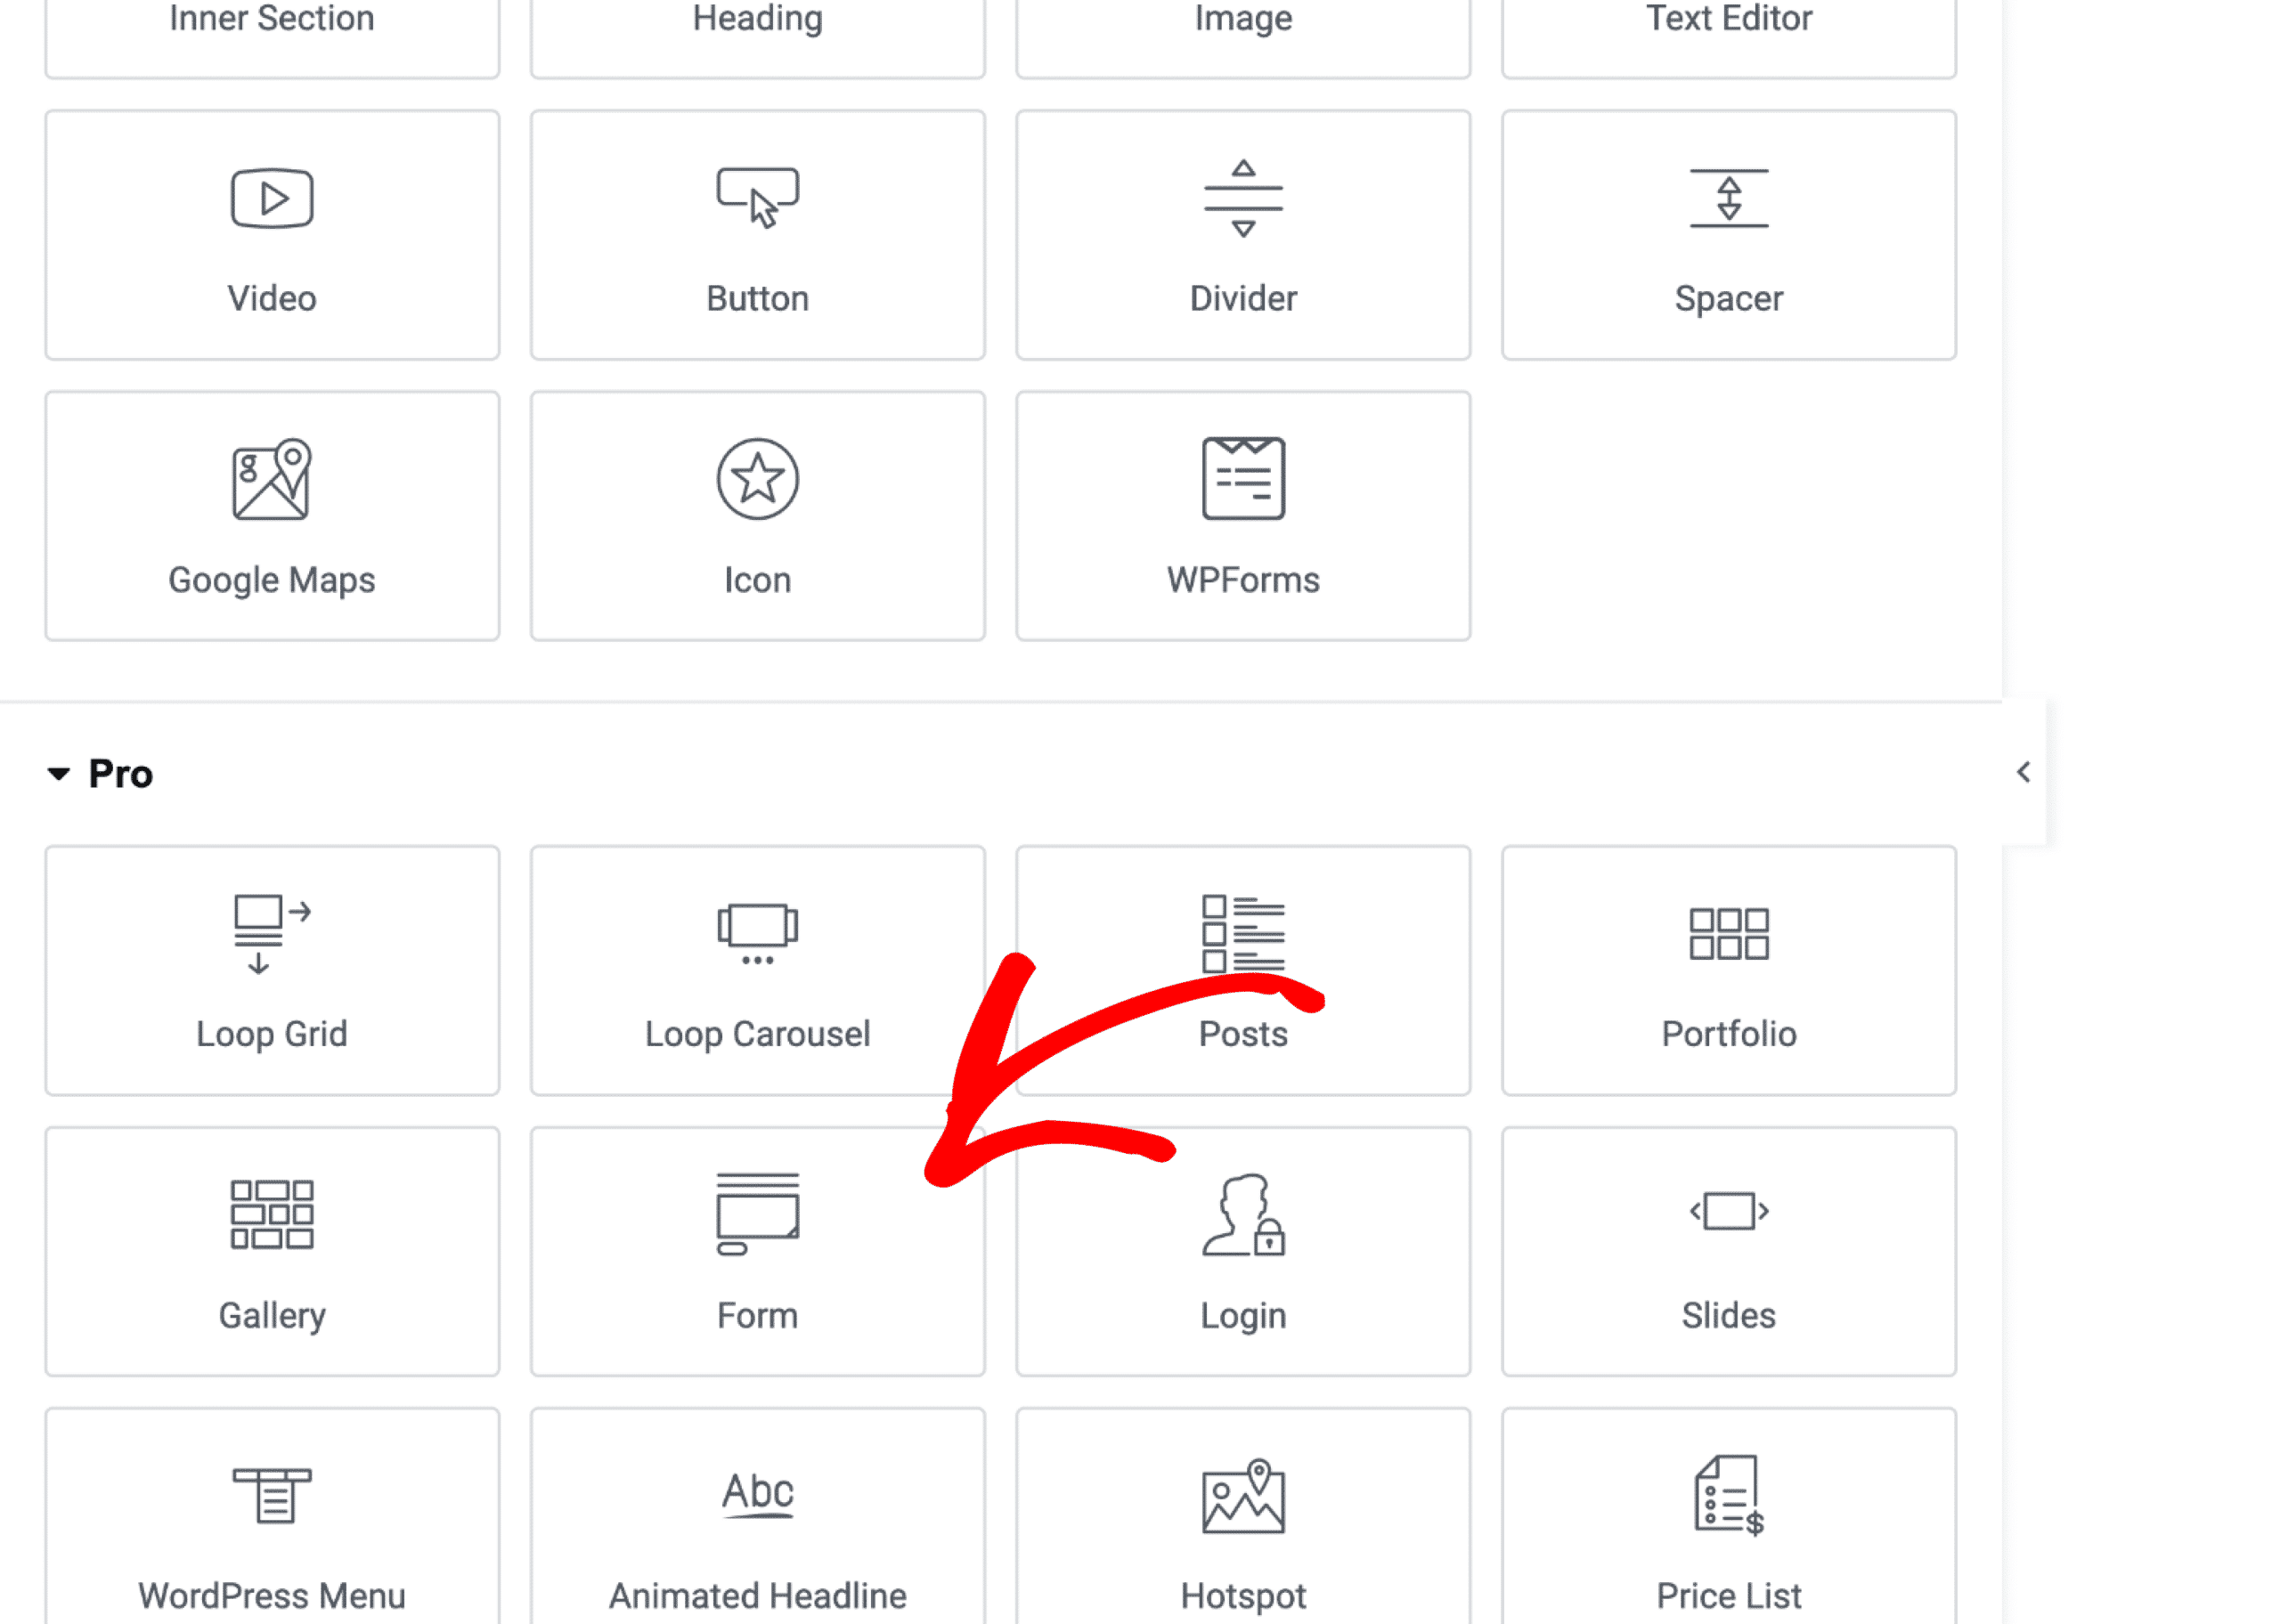
While editing your page with the Elementor page builder, locate the Form widget and insert it on to the page.
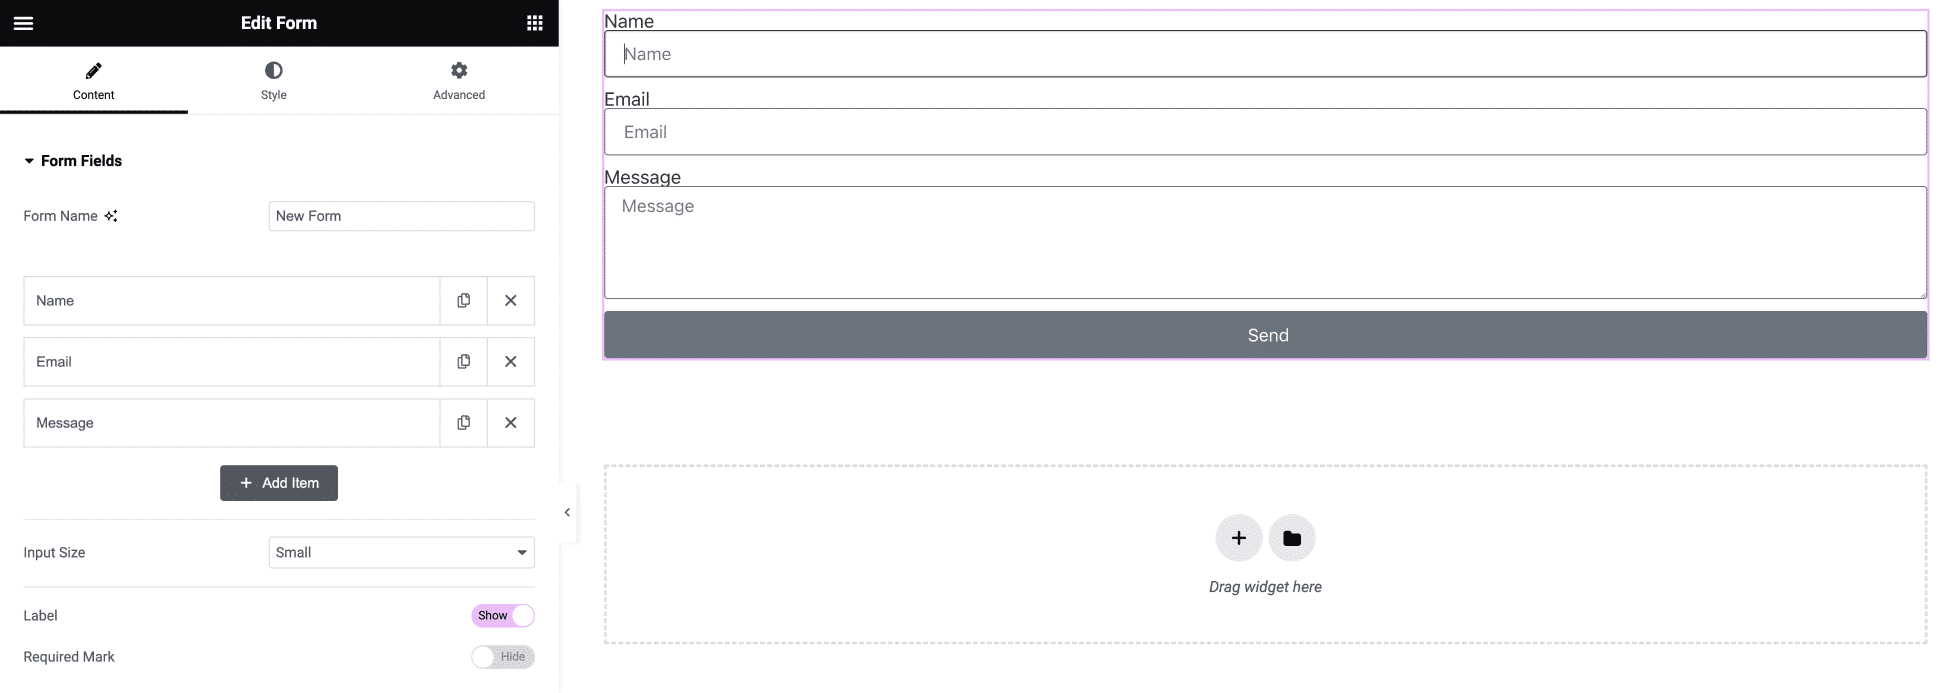
Once the Form widget has been inserted, a basic form will appear and the widget’s editing panel will be displayed.
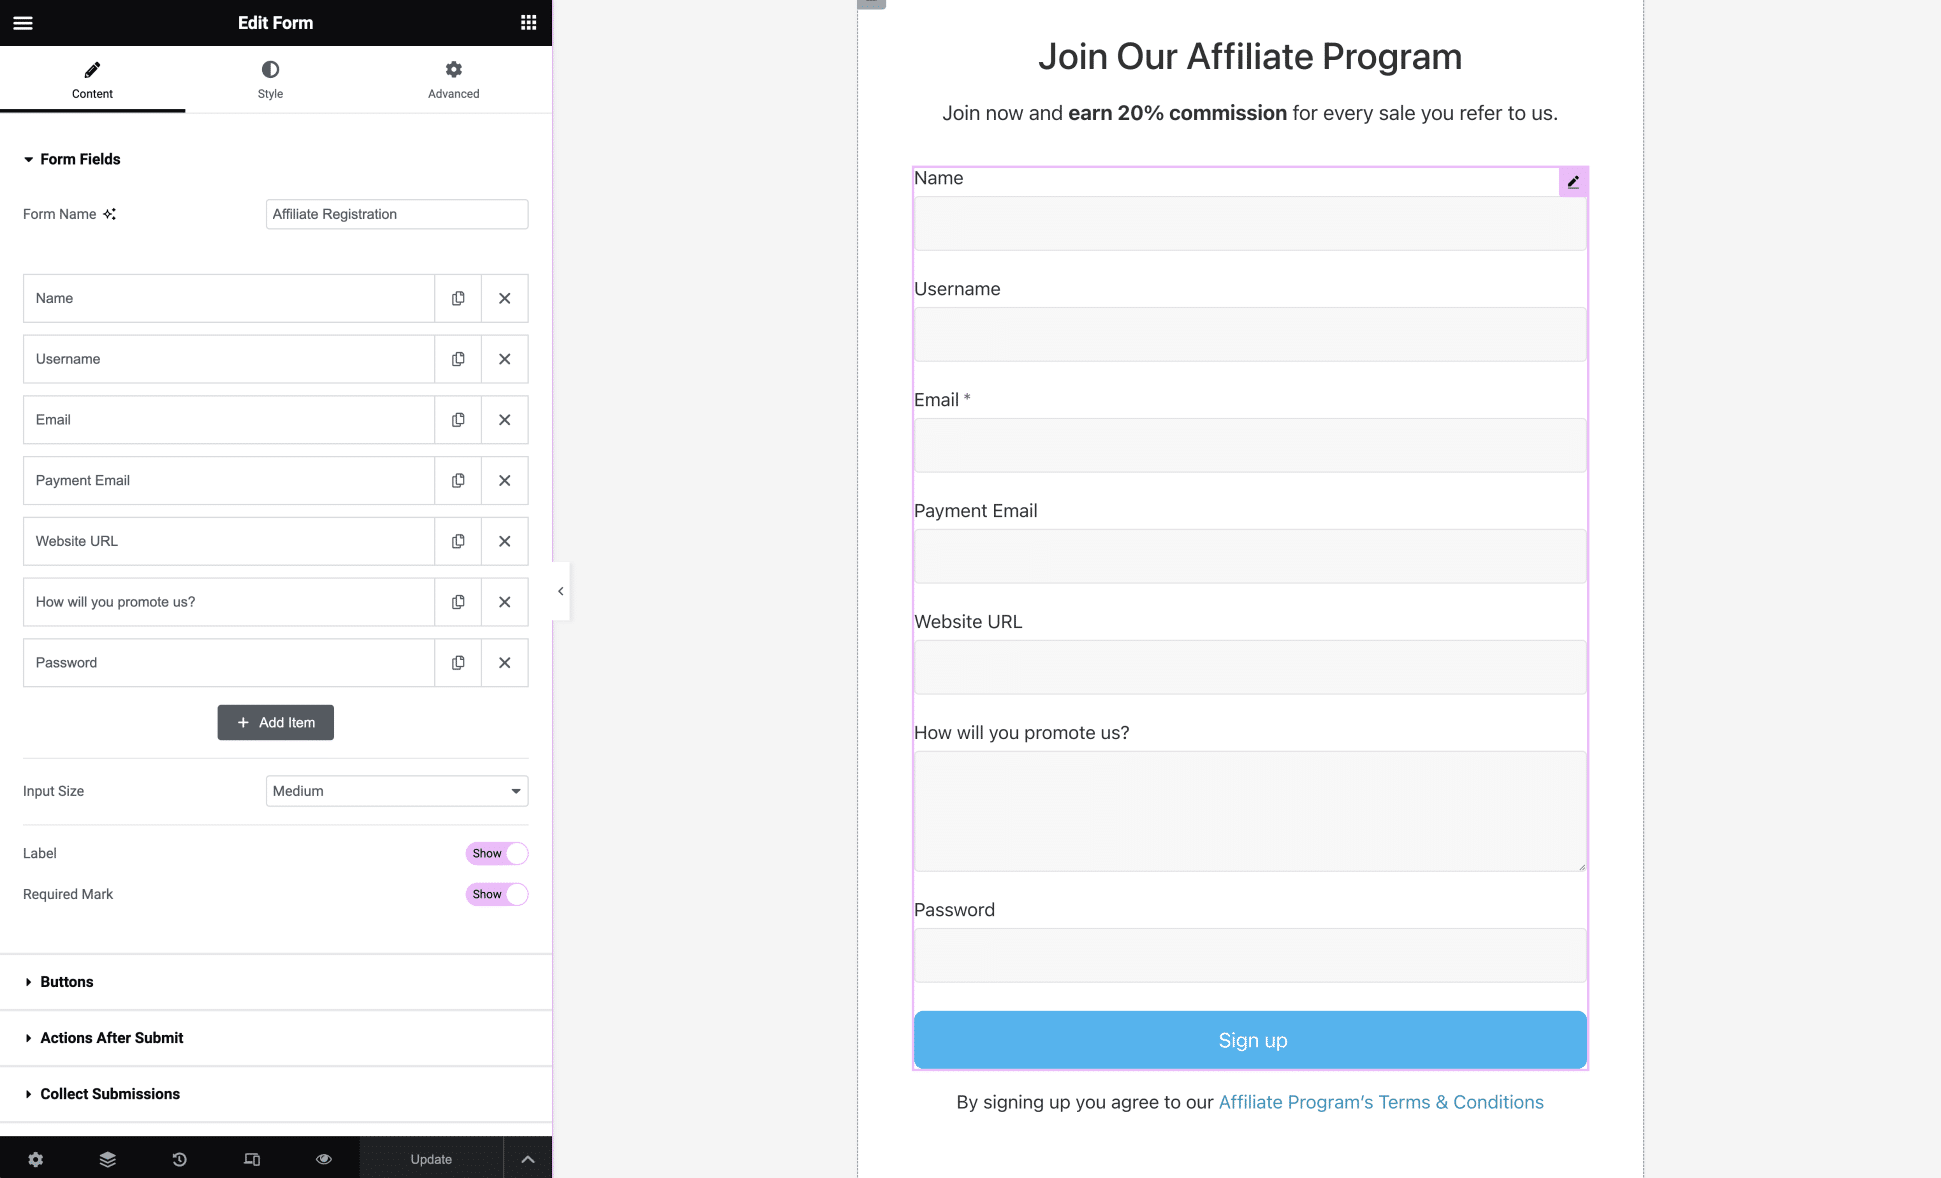
Start by customizing the fields you’d like to show on your affiliate registration form.
For example, you might add some fields like the following:
Name
Type: Text
The affiliate’s name.
Username
Type: Text
The affiliate’s desired username.
Email
Type: Email
The affiliate’s email address.
Payment Email
Type: Email
The affiliate’s payment email for systems such as PayPal, Moneybookers, or others.
Website URL
Type: URL
A website where the affiliate intends to promote your site from.
How will you promote us?
Type: Textarea
How the affiliate intends to promote your business.
Password
Type: Password
The affiliate’s password for their new account.
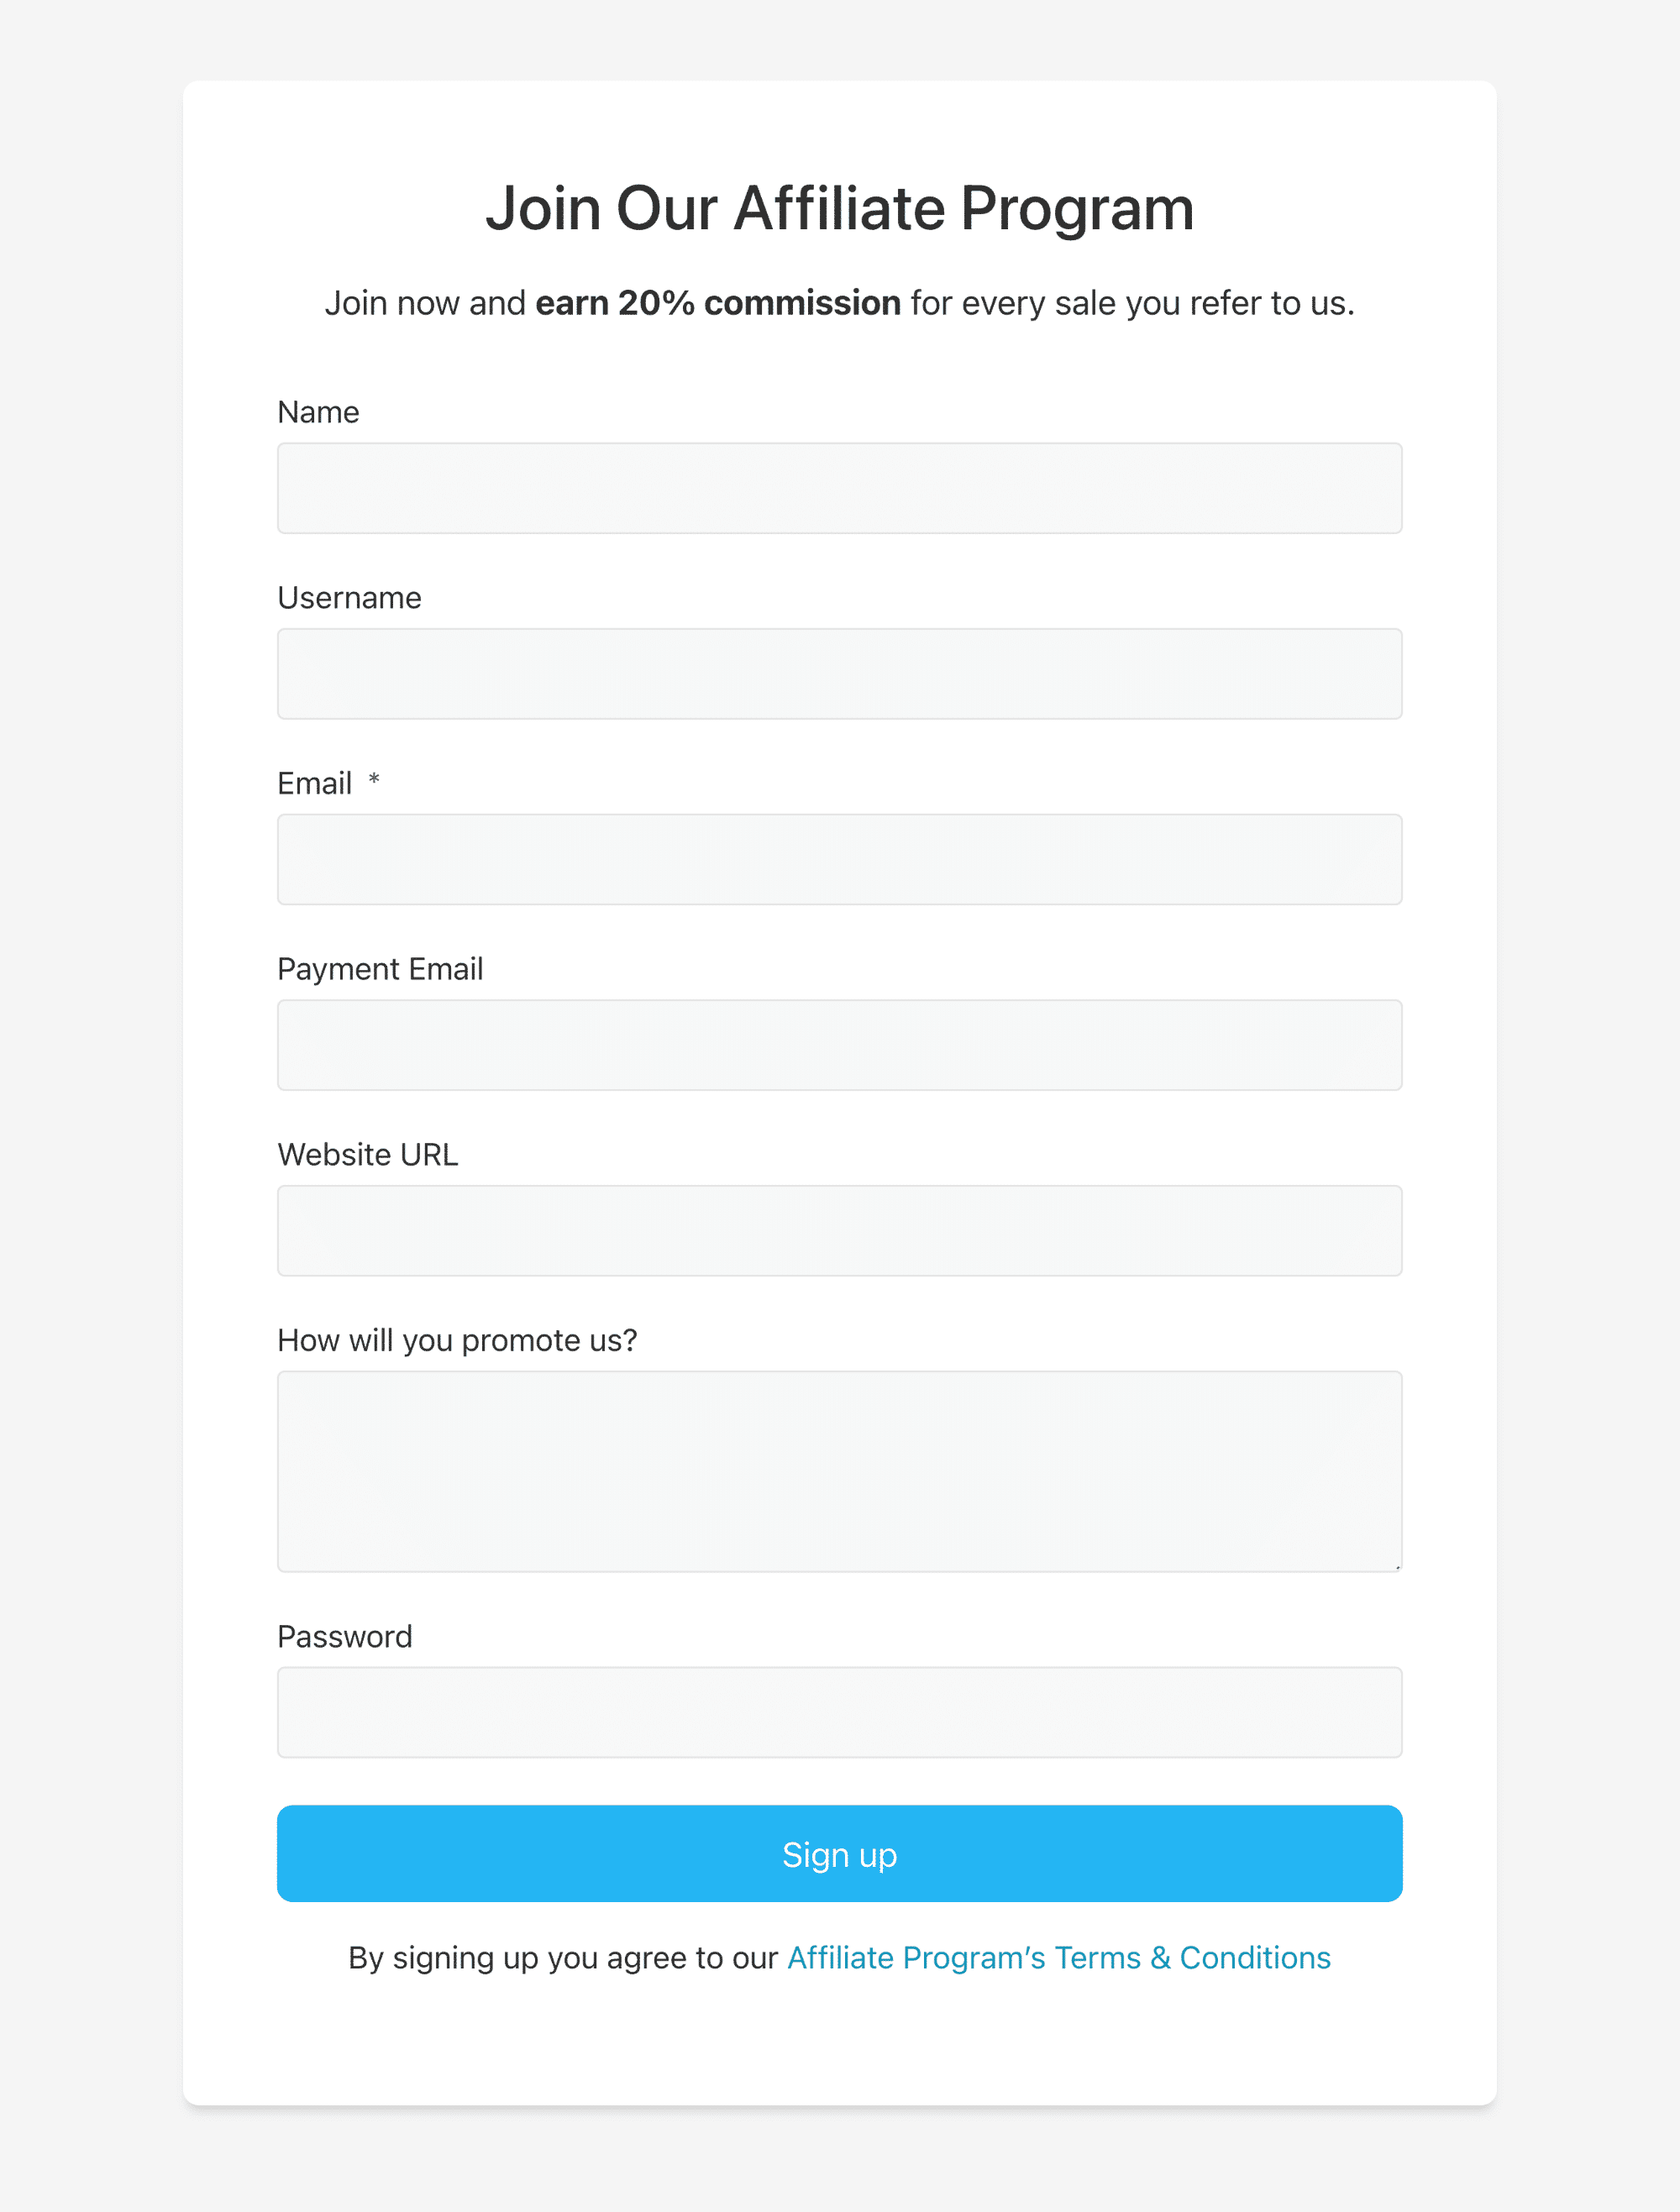
After you have finished adding/editing fields and customizing the styling it might look something like the following:
Adding a Terms of Use Checkbox
To add a Terms of Use checkbox to your form, start by generating the Terms of Use page. Go to AffiliateWP » Tools and click the Terms of Use Generator menu.

From here click on Create a New Terms of Use Page button and AffiliateWP will automatically create Terms of Use Page.

Next, open the registration page in Elementor Builder, and click on the form widget to display the form fields. In the left sidebar, under Form Fields, click the Add Item button to add a new field.
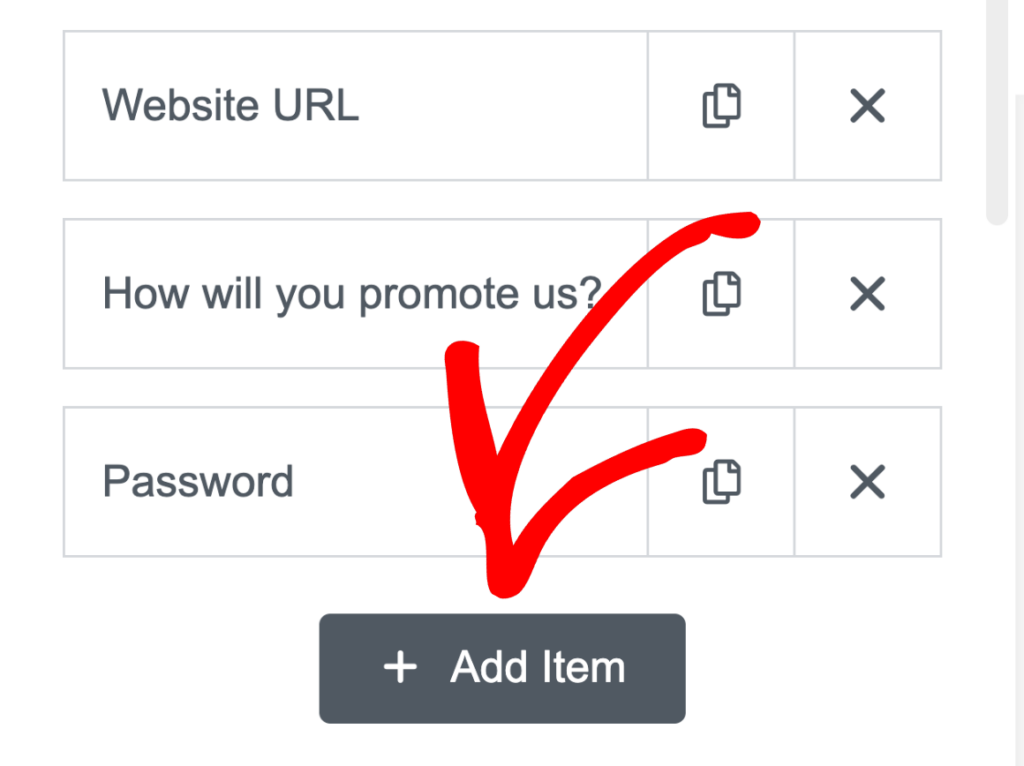
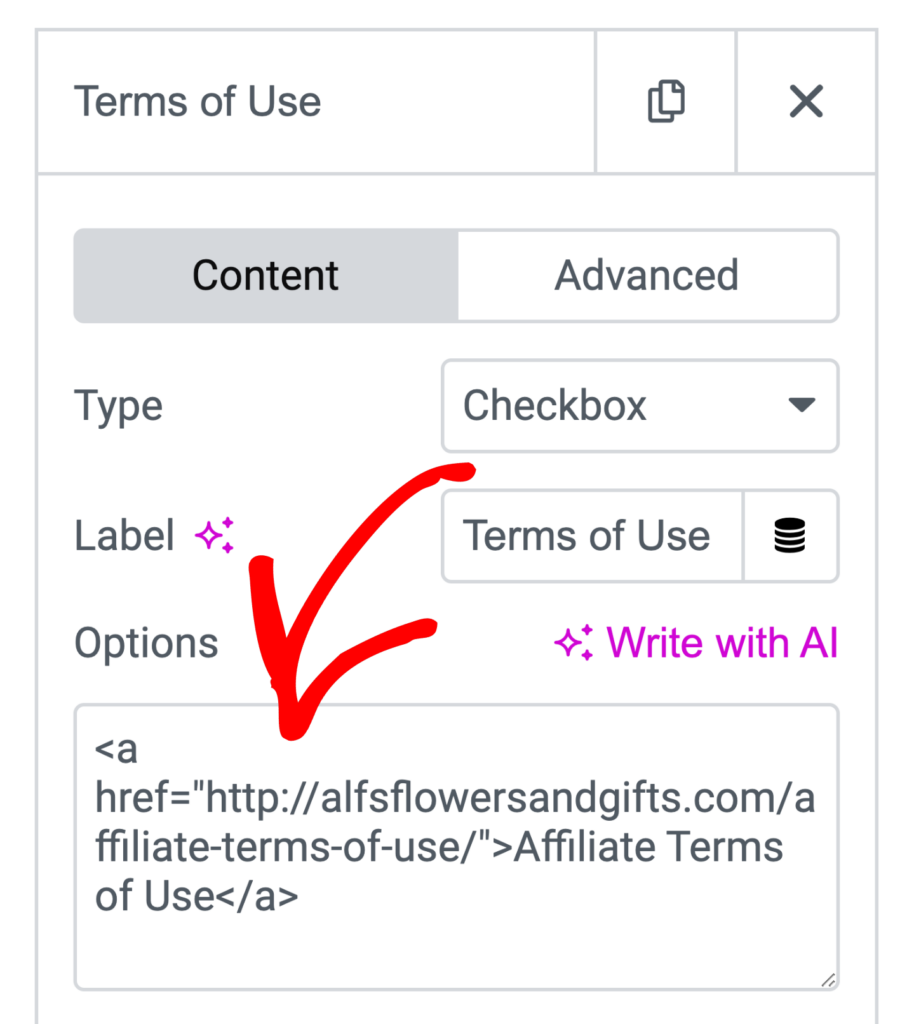
Change the field type to Checkbox in the type field. In the options field, add the HTML link to the Terms of Use page.
Enabling Affiliate Registration
Now we need to tell AffiliateWP that your form is an affiliate registration form.
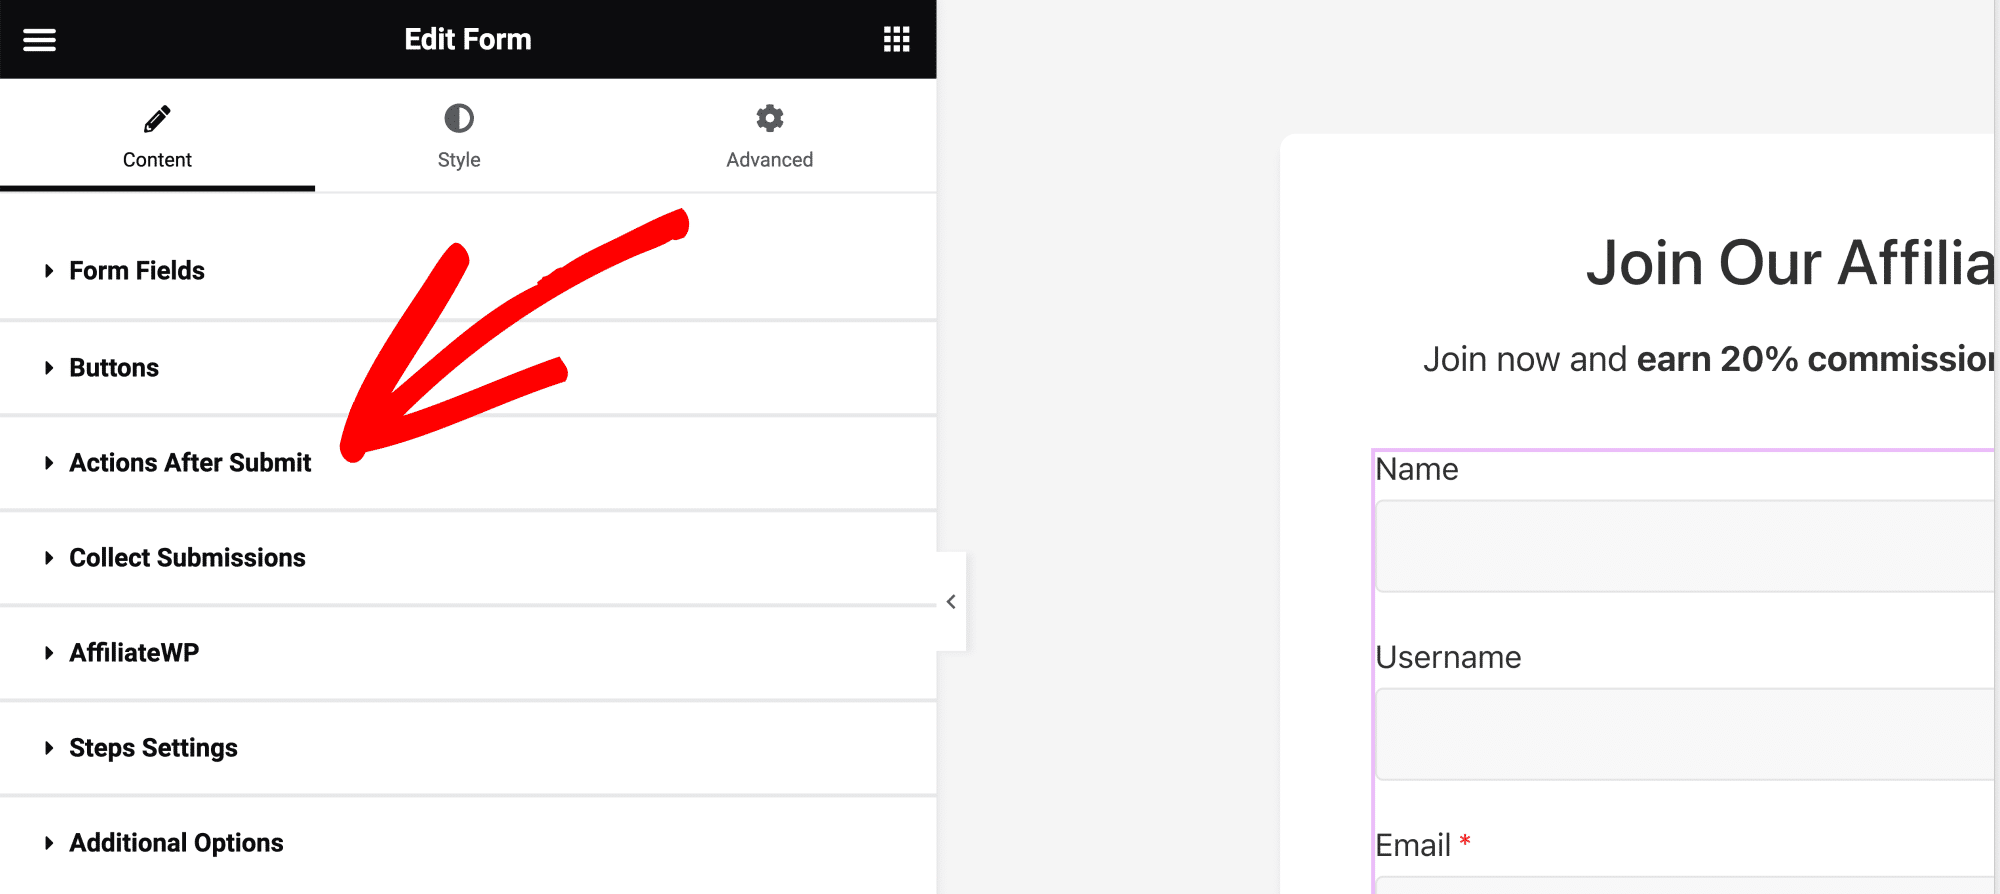
Click on Elementor’s Actions After Submit section.
Once opened, click into the Add Action field (or alternatively, click the + icon) and select AffiliateWP from the list.
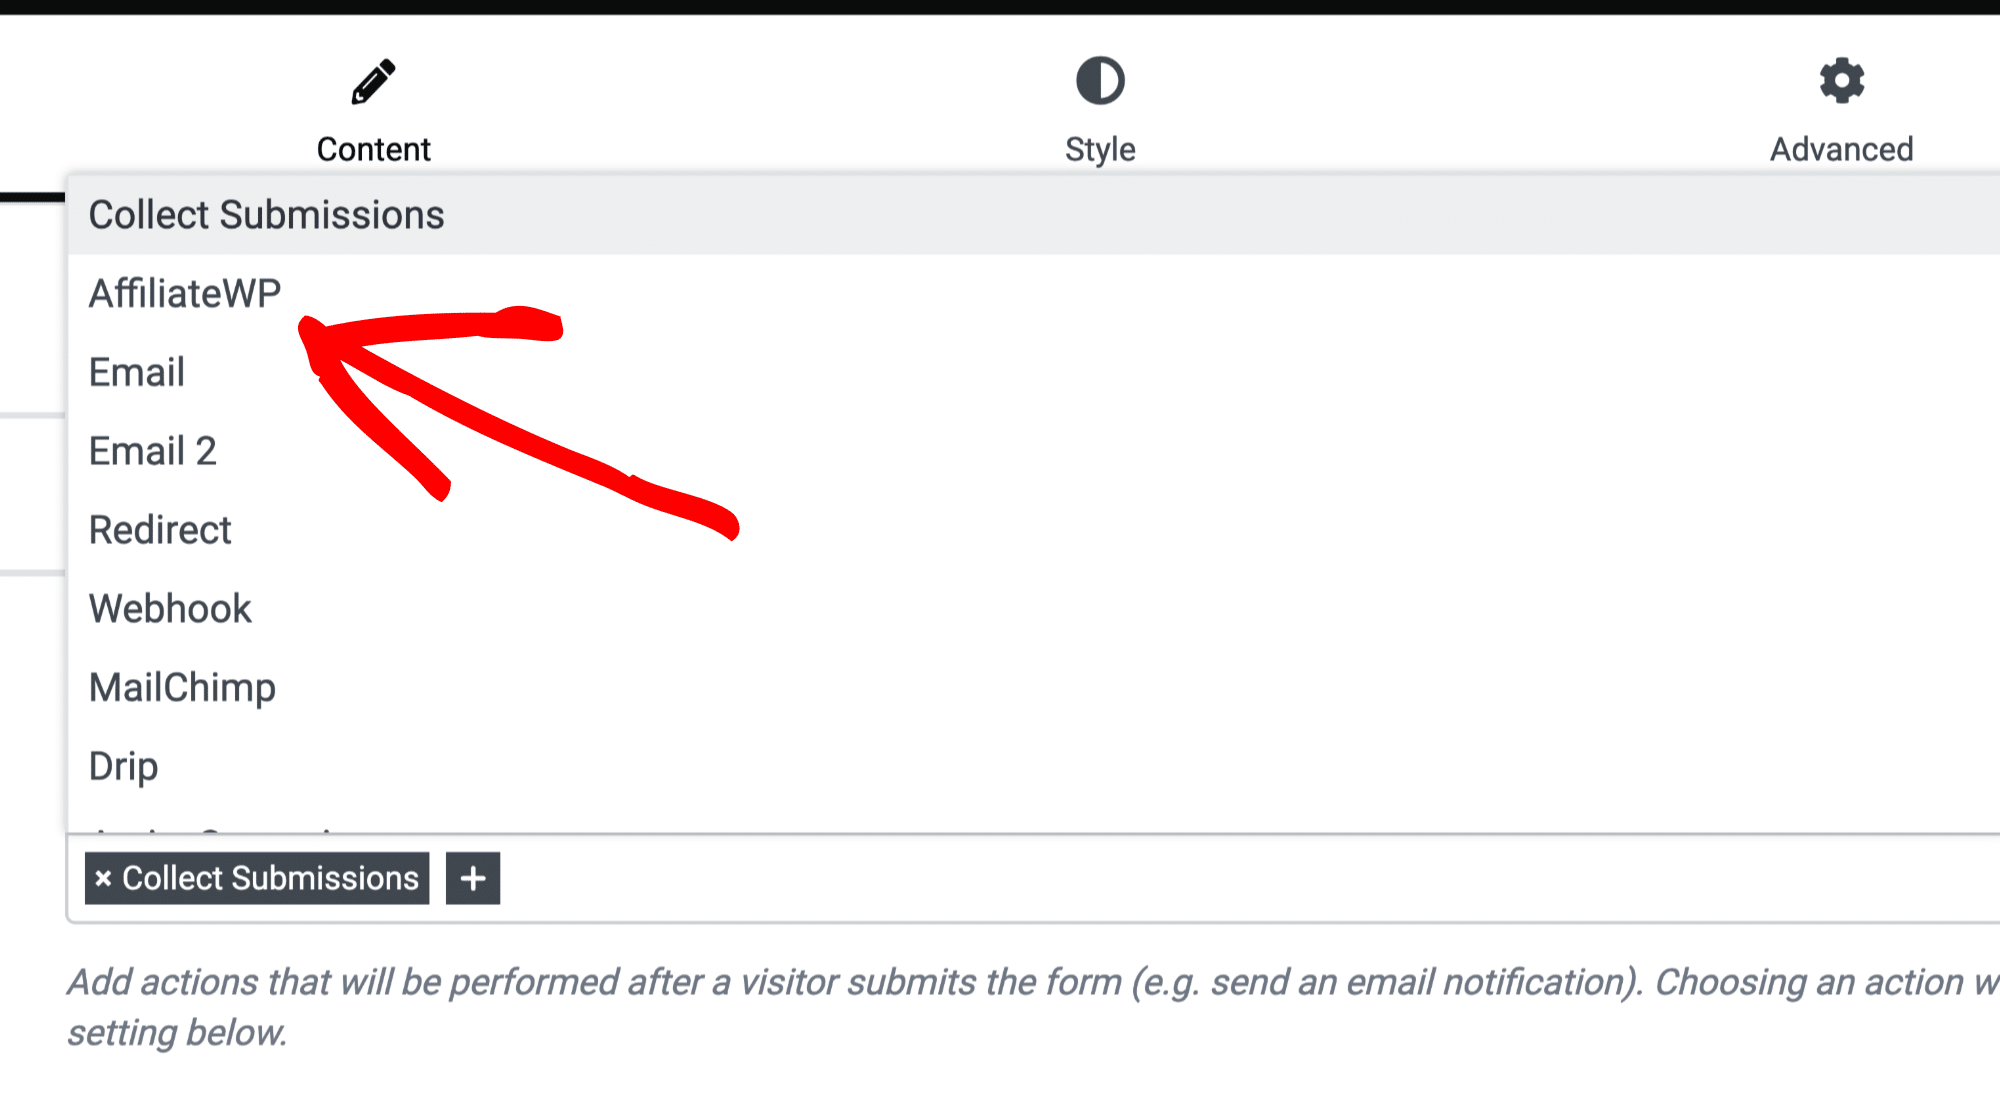
Once the custom action has been added, a new AffiliateWP section will appear in the panel below.
Click to open the AffiliateWP section and click the Enable Affiliate Registration toggle switch to turn on affiliate registration.
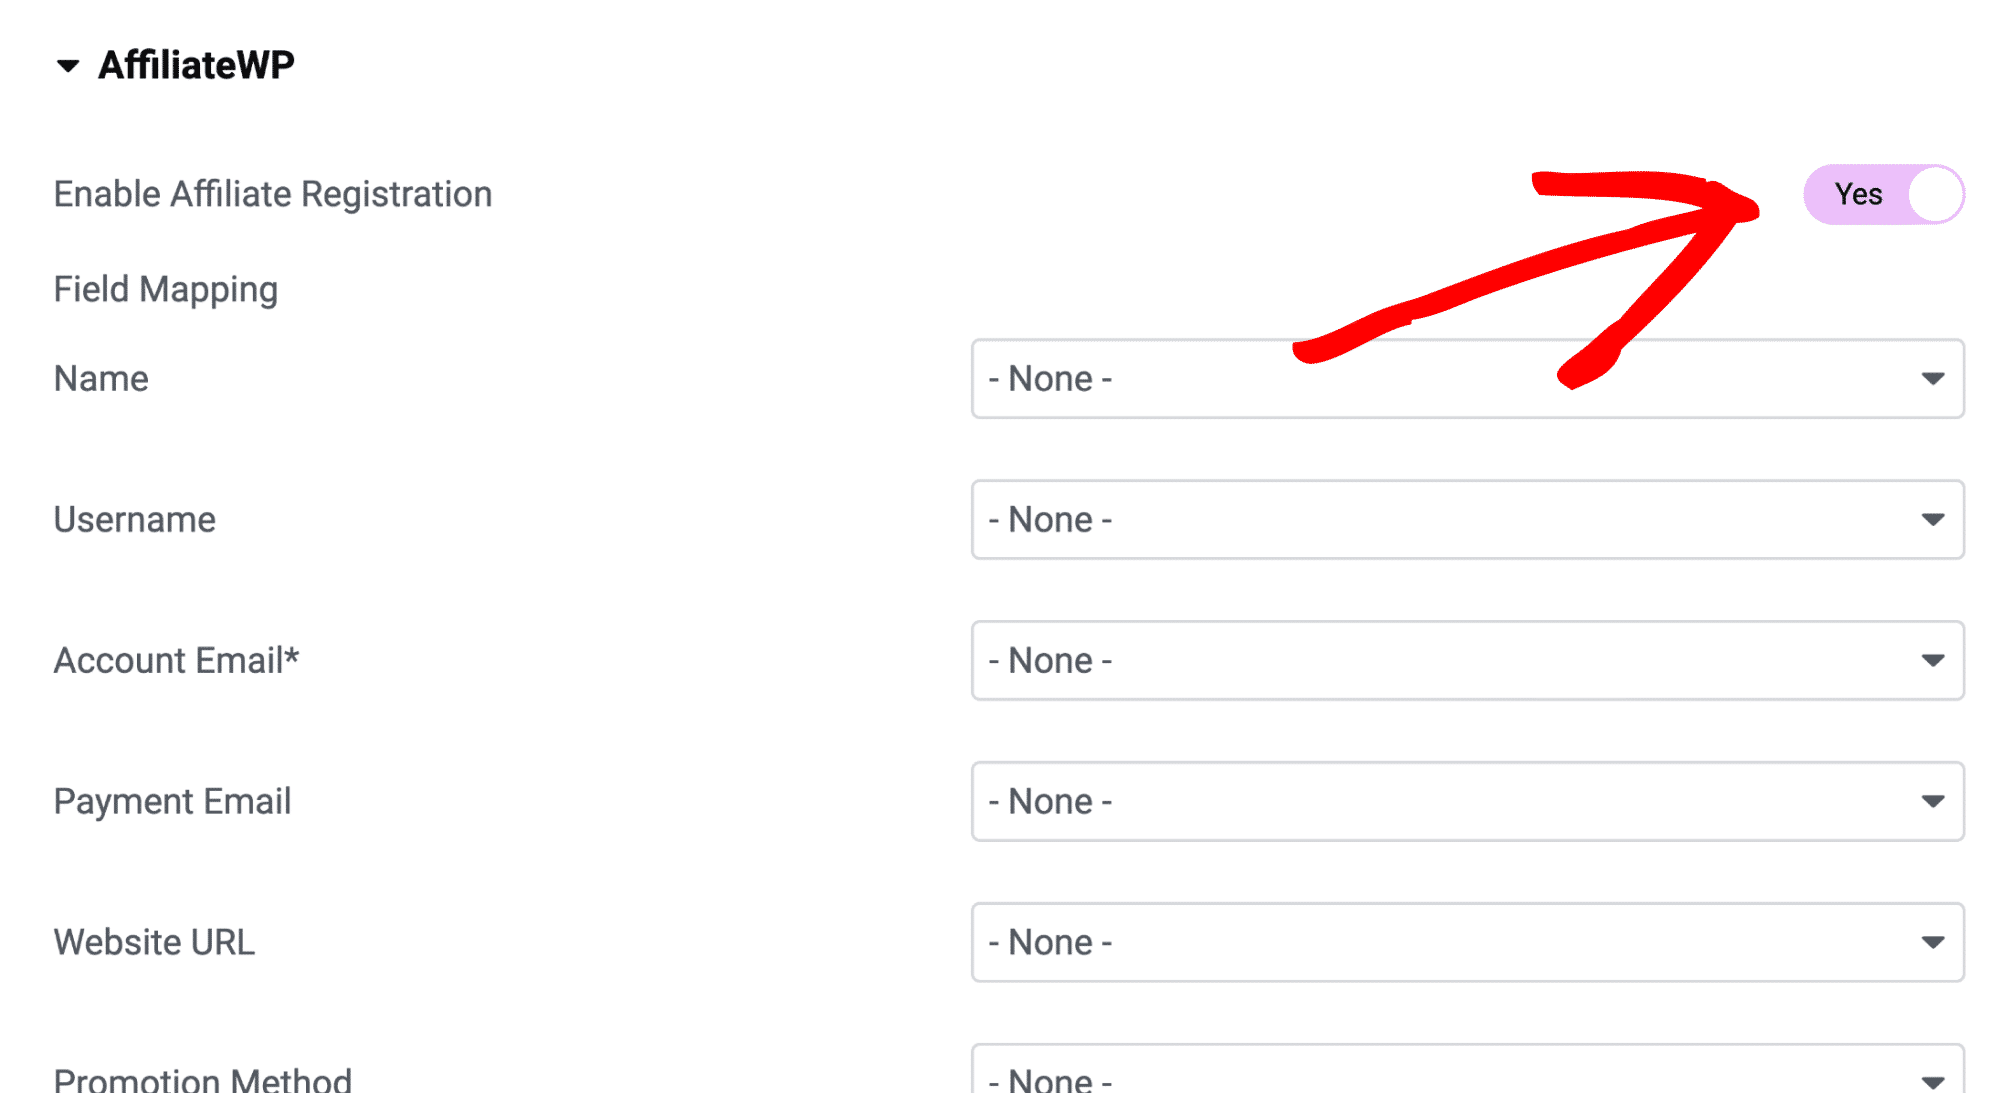
Next we need to map the fields. This lets AffiliateWP know which fields need to do specific tasks. We recommend mapping as many fields as possible.
To map the fields, choose a field from the select menu that matches the label on the left.
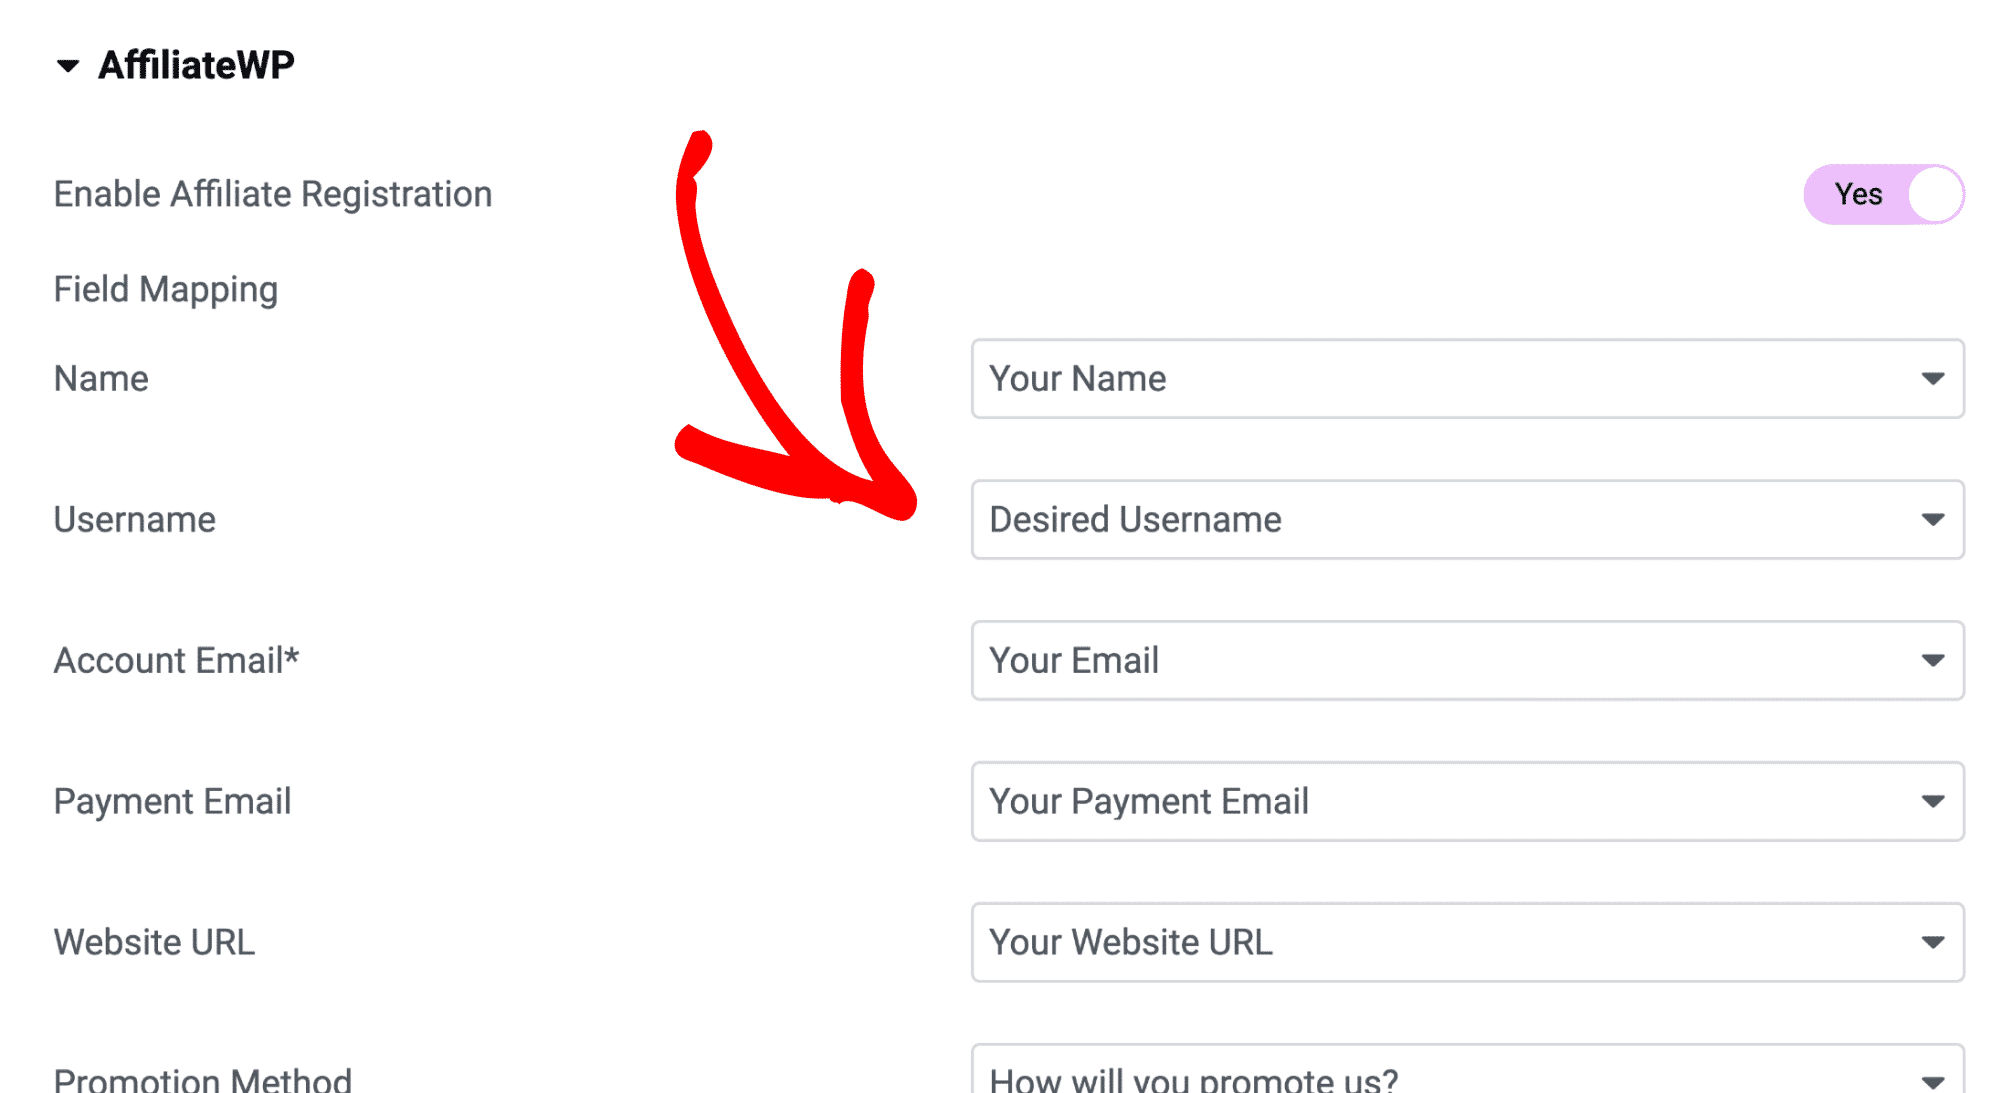
For example, when the Username field is mapped, the value of this field will be used for the affiliate’s WordPress username.
When the Password field is mapped, AffiliateWP will use that for the affiliate’s WordPress account password.
Name
The selected field will be used to populate the user’s First Name and Last Name fields on the user profile screen.
Username
Used for the affiliate’s WordPress Username.
Account Email
Used for the affiliate’s WordPress account email.
Note: The Account Email field is the only required field. If no Username field is mapped, the Account Email will be used to generate an affiliate’s WordPress username.
Payment Email
Used for the affiliate’s Payment Email (if needed). This is shown on the affiliate’s edit screen within AffiliateWP.
Website URL
The Website URL is shown while reviewing an affiliate. It’s also shown on an affiliate’s edit screen and on their WordPress user profile page.
Promotion Method
The Promotion Method is shown while reviewing an affiliate. It’s also shown on an affiliate’s edit screen.
Password
The Password field is used to generate a password for the affiliate’s WordPress user account. If no password field is mapped, a password will be automatically generated for the affiliate.
That’s it! You now have a custom affiliate registration form, created entirely in Elementor:
Viewing an Affiliate’s Submitted Data
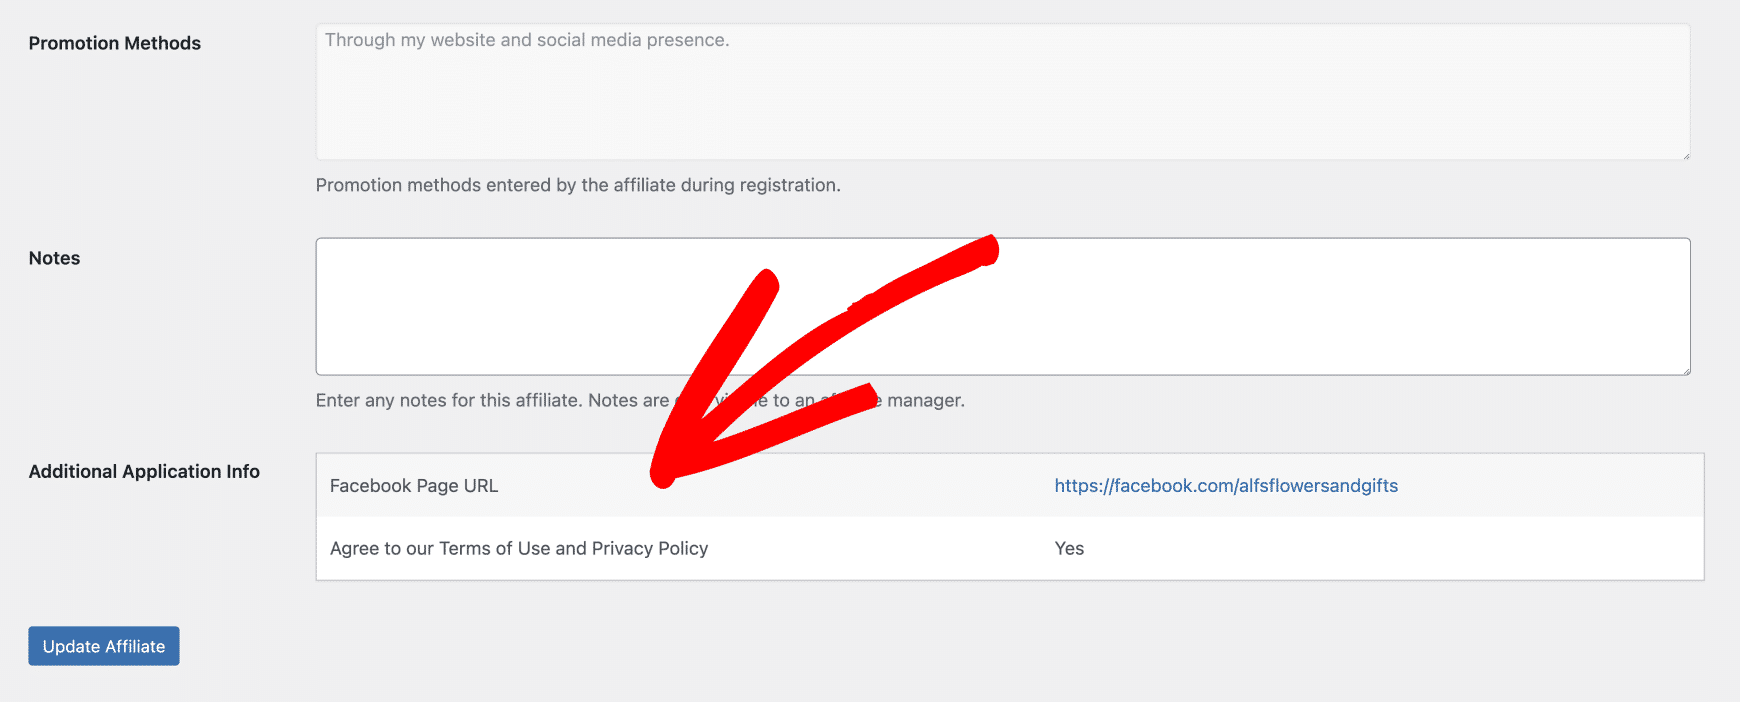
While reviewing an affiliate’s application, you can see all the values from AffiliateWP’s mapped fields.
If your affiliate registration form has unmapped fields, they will be displayed in an easy to read table. Approving, or rejecting affiliates in AffiliateWP is a breeze.
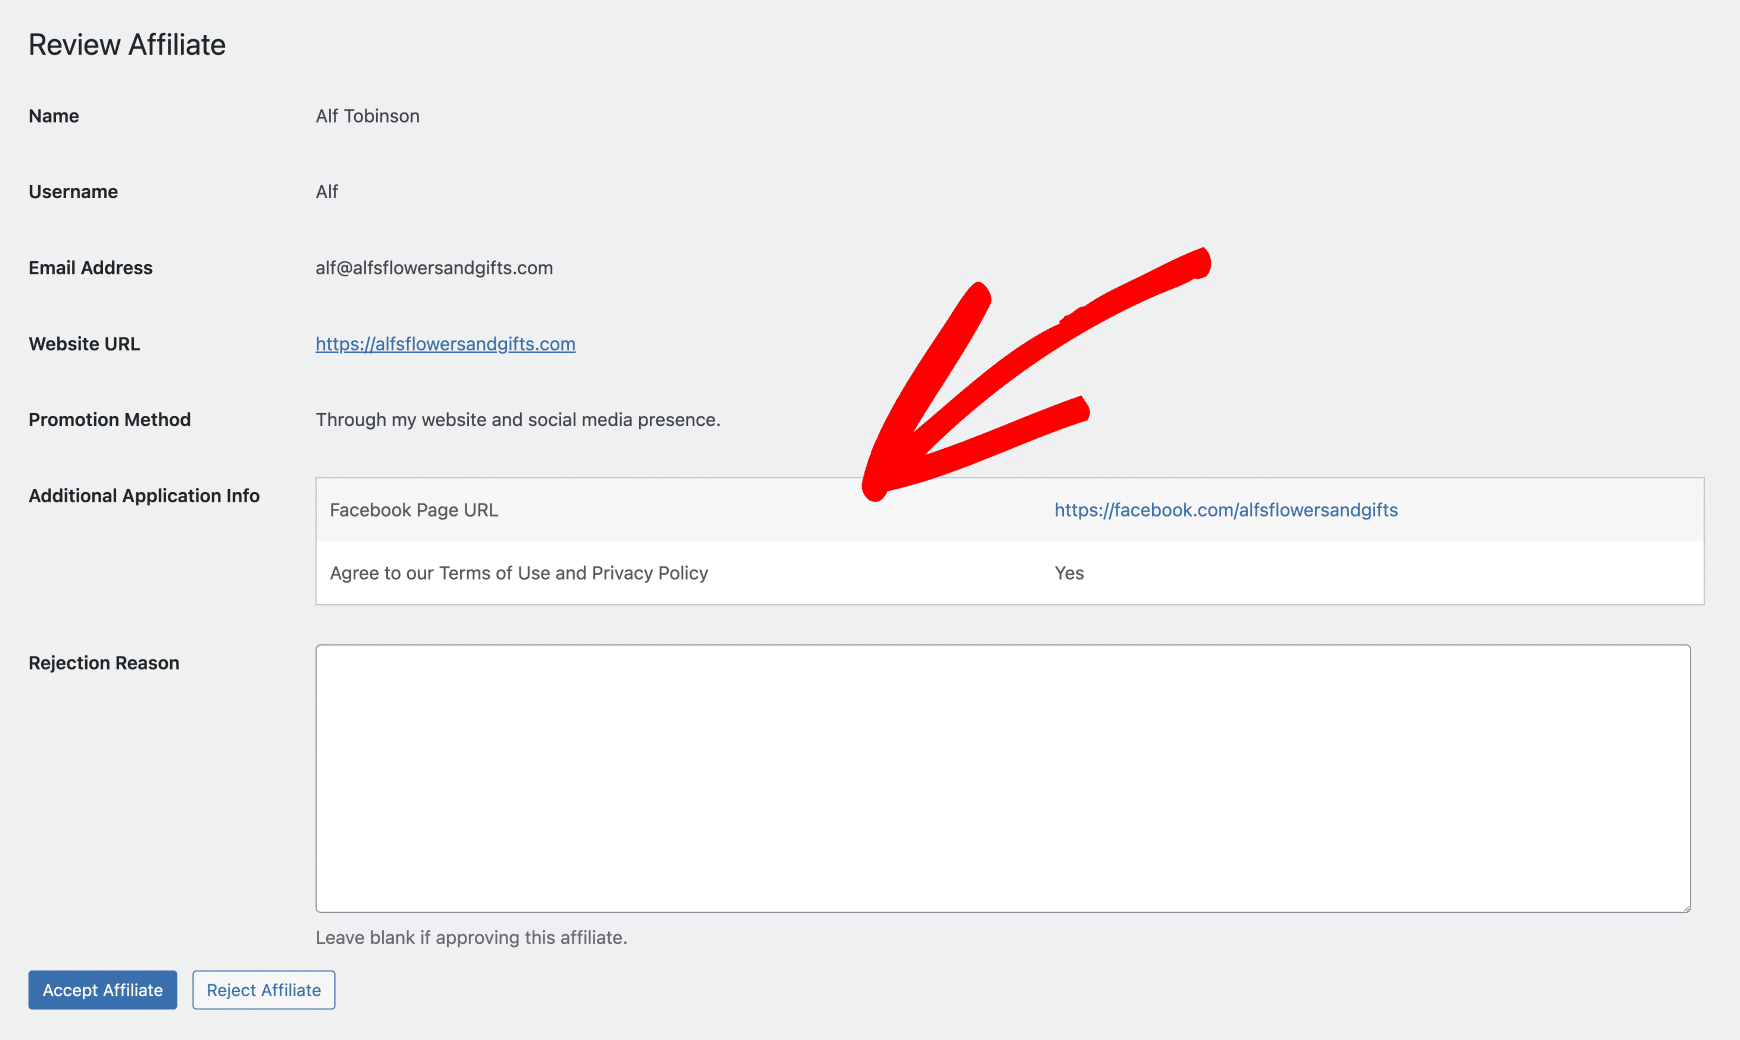
If you want to review affiliate applications before affiliates become active, enable Require Approval from AffiliateWP » Settings » Affiliates.
After an affiliate has joined your affiliate program, their originally submitted data is always available. To see this, navigate to the main Affiliates screen at AffiliateWP » Affiliates and click on an affiliate’s name. All data mapped to AffiliateWP fields, and any custom data, will be shown on the screen:
Enabling Referral Tracking
Elementor Referral Tracking boosts conversions by letting affiliates promote any form on your site, such as email sign-ups, lead generation, feedback, surveys, webinar sign-ups, job applications, and more. Any time a user is referred by an affiliate and submits a form, a referral is created inside AffiliateWP.
To configure an Elementor form to generate referrals, start by adding the Form widget to your page as shown in the section above.
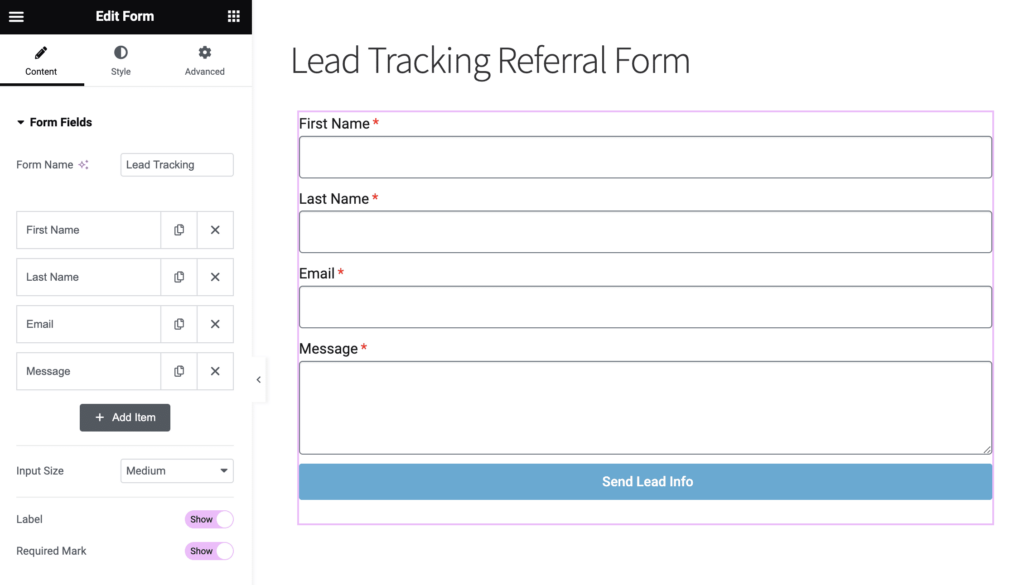
Once the Form widget has been inserted, you can customize the fields that will be captured on your referral tracking form.
The following fields are available to be mapped to the referral entry:
First Name
Type: Text
The lead’s first name.
Last Name
Type: Text
The lead’s last name.
Email
Type: Email
The lead’s email address.
Here is a sample lead form after adding the fields above and making a few styling adjustments:
Next we need to enable this form to create a referral.
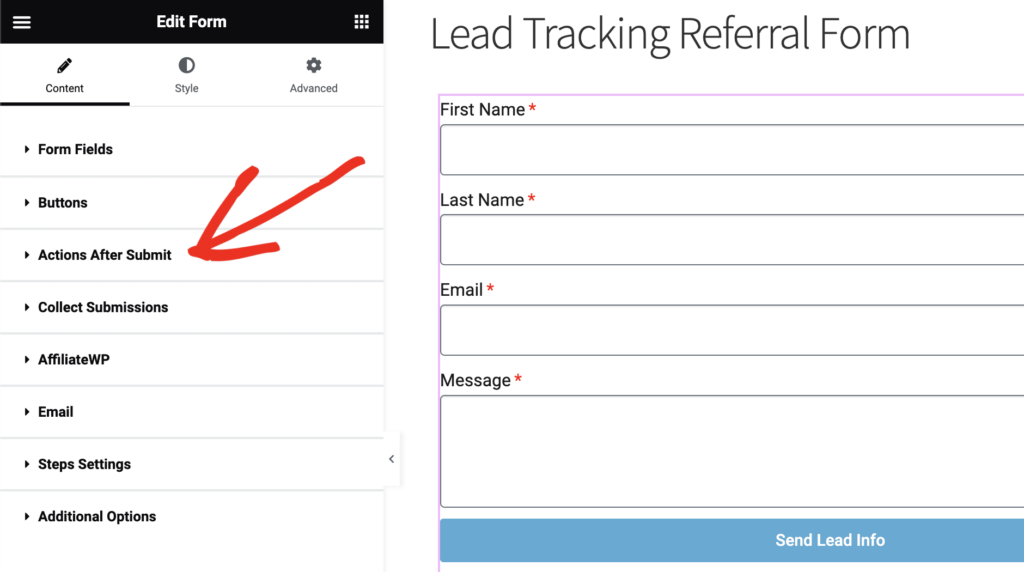
Click on Elementor’s Actions After Submit section.
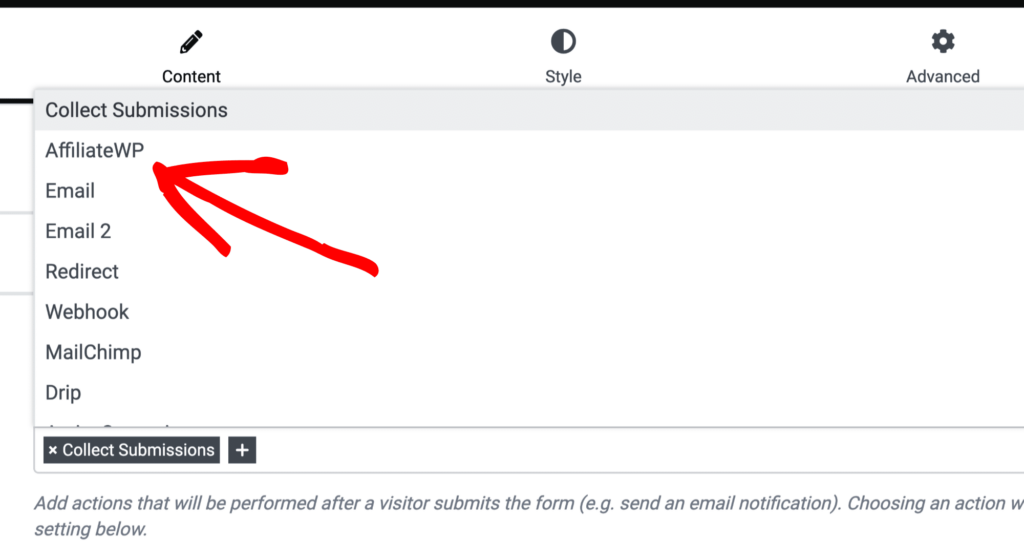
Once opened, click into the Add Action field (or alternatively, click the + icon) and select AffiliateWP from the list.
Once the custom action has been added, a new AffiliateWP section will appear in the panel below.
Click to open the AffiliateWP section and notice the Enable Referrals toggle switch will already be turned on for referral tracking.
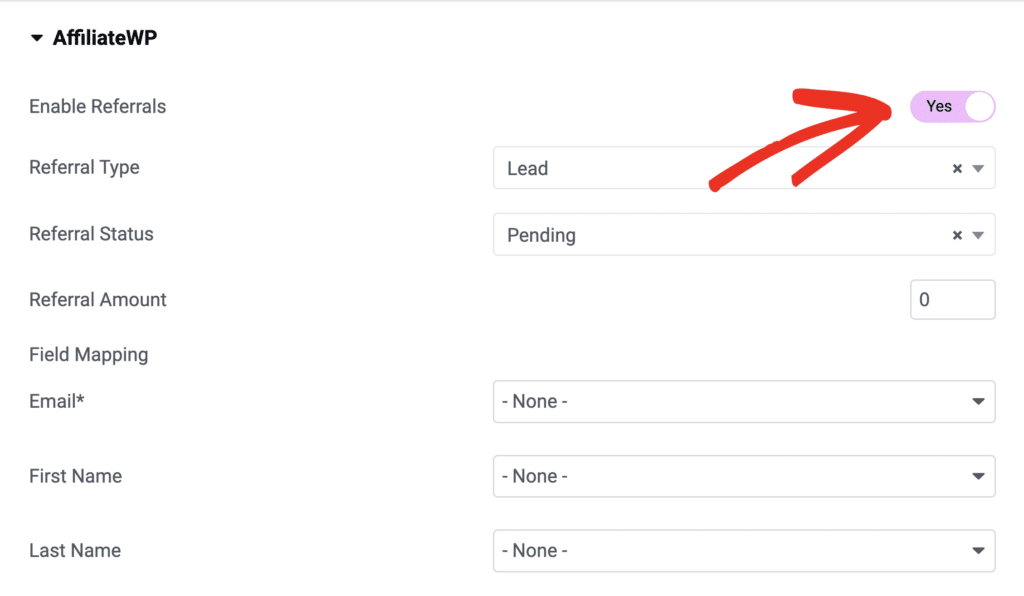
Next you can configure the AffiliateWP section referral settings, and map the form field contents to their destinations.
To map the fields, choose a field from the select menu that matches the label on the left.
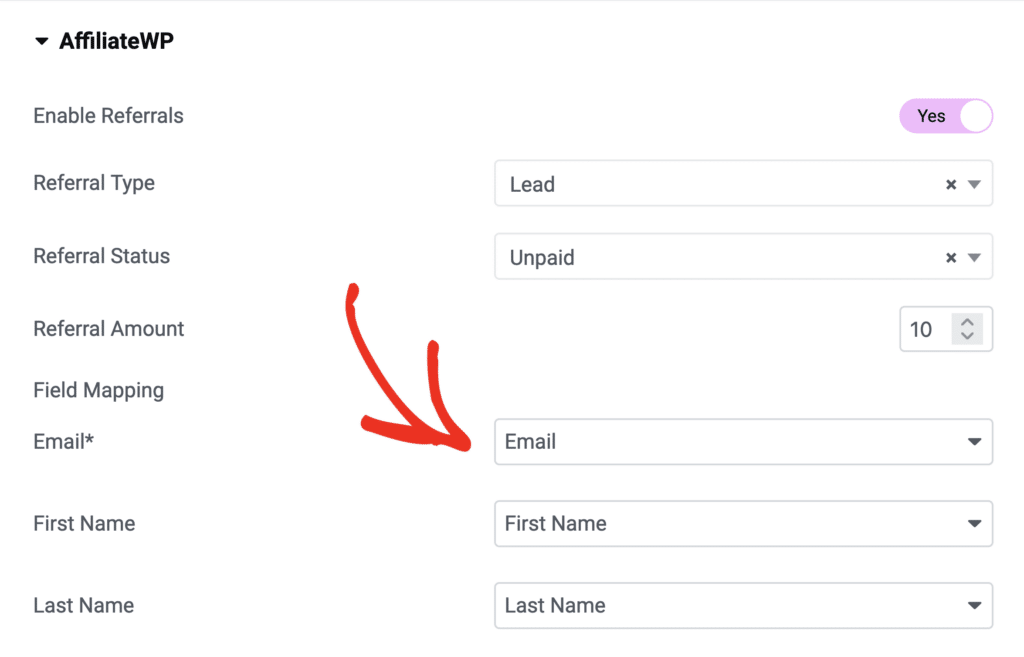
Referral Type
The referral type can be Lead or Opt-in. The referral type appears on the main AffiliateWP » Referrals screen.
Referral Status
The referral status can be Pending or Unpaid. Pending referrals are best used for instances where the referral amount is greater than zero. This allows the affiliate manager to verify the lead.
Referral Amount
This is the amount of the referral that is created.
That’s all there is to it! Now you have a custom referral tracking form created in Elementor!
View an Affiliate’s Referral Entry
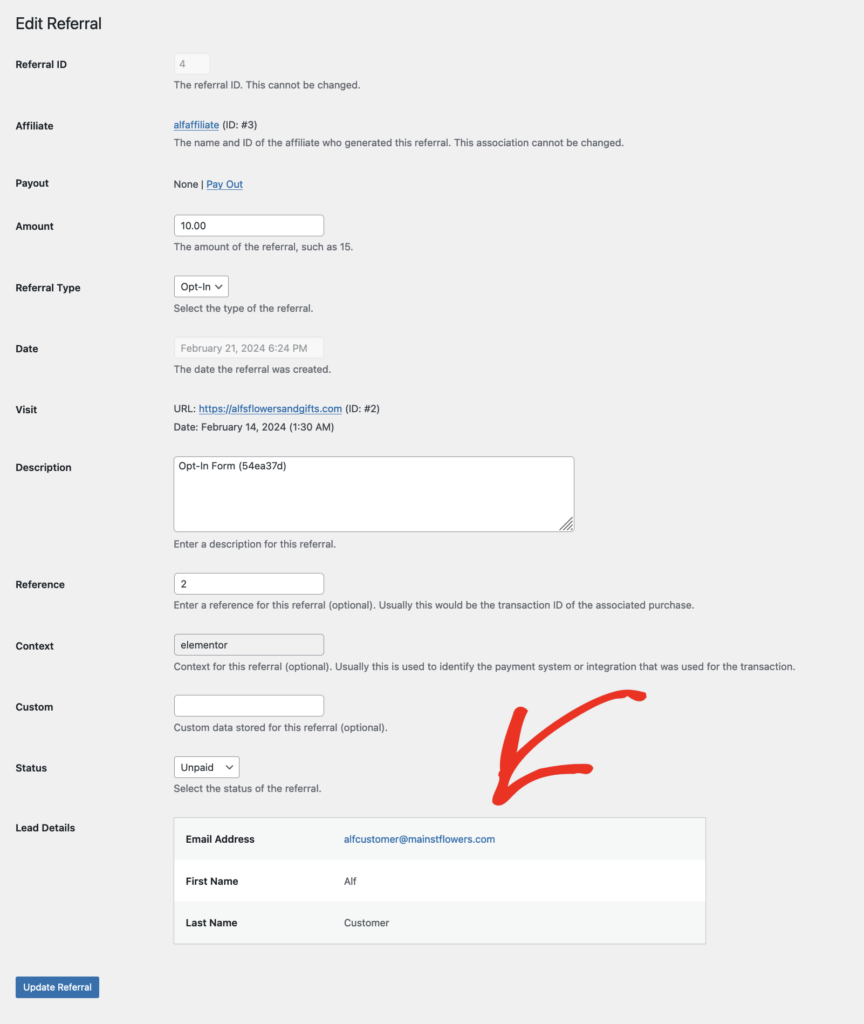
To view the referrals generated by the Elementor form, navigate to the AffiliateWP » Referrals screen in the admin where you will see the name of the form, and the email address in the referral description field:

Click the Edit link in the Actions column to see the referral’s edit screen, where you can view the Lead Details section at the bottom showing the mapped data from the Elementor form:
Frequently Asked Questions
What is the Elementor integration in AffiliateWP?
The Elementor integration in AffiliateWP allows you to create custom affiliate registration forms and track referrals using Elementor’s Form widget. This integration enables affiliates to promote any form on your site, and when a referred user submits the form, a referral is recorded in AffiliateWP.
Do I need Elementor Pro for this integration?
Yes, you need Elementor Pro to access the Form widget, which is necessary for creating custom affiliate registration forms and enabling referral tracking.
Can I approve or reject affiliates before they become active?
Yes, you can enable the Require Approval option from AffiliateWP » Settings » Affiliates to review and approve or reject affiliate applications before they become active.
Why isn’t my Elementor form recording referrals?
To troubleshoot why your Elementor form isn’t recording referrals, first ensure that the Elementor integration is enabled by navigating to AffiliateWP » Settings » Integrations and confirming that the Elementor checkbox is checked. Next, verify that the AffiliateWP action is added under Actions After Submit in the Elementor form settings, and ensure the Enable Referrals toggle is turned on. Lastly, confirm that the form fields are correctly mapped to the corresponding AffiliateWP fields to ensure data is properly recorded and tracked.
That’s it! You now have a way to harness the power of Elementor forms, allowing affiliates to generate Opt-in or Lead tracking referrals to expand their reach.