





It’s the start of the month, and paying affiliates means opening the payouts screen, checking who’s owed what, and sending every payment yourself. It’s the same job every time, and it only grows as your program does.
You can hand that job to AffiliateWP. A payout schedule at AffiliateWP » Payouts » Schedules runs weekly or monthly on the Pro plan, and it pays each affiliate through their own payout method: Stripe, PayPal or store credit.
This guide is for store owners who already track referrals with AffiliateWP. In this post, I’ll show you how to set up the payout methods, decide which method each affiliate uses, create the schedule, and see what AffiliateWP does when a payout fails.
What you need
Before you start, it helps to have three things in place. Here’s what each one is and why the schedule depends on it:
- AffiliateWP plan: payout schedules need AffiliateWP Pro or higher. Every payout method, the Pay Affiliates screen, batches and retries work on every plan, so if you’re on Personal or Plus you can still pay affiliates through Stripe or PayPal by hand.
- A payout method that sends money: you’ll need a Stripe account (you’ll paste its secret key), a PayPal app with Payouts enabled, or WooCommerce or Easy Digital Downloads for store credit.
- Approved affiliates with referrals: a schedule pays unpaid referrals, so you need some to pay. If you’re starting from scratch, set up your program first with our guide on how to set up an affiliate program.
Pay affiliates automatically. Payout schedules are part of AffiliateWP Pro, along with Lifetime Commissions and Recurring Referrals. Every plan has a 14-day money-back guarantee. See AffiliateWP plans
How to set up automatic affiliate payouts
There are five steps here, and the first three happen before you ever create a schedule. That’s because a schedule can only pay affiliates who have a working payout method behind them.
Step 1: Turn on the payout methods you’ll use
To get started, you’ll switch on the methods that will actually move the money. Head over to AffiliateWP » Settings » Payouts and scroll down to the Payout Methods section.
You’ll see that each method has its own card. Click Configure on a card to open its settings, then turn on the toggle on that card. Here’s what each one asks for:
- Stripe: paste your Secret Key (or Test Secret Key for sandbox testing). On a live, HTTPS site, AffiliateWP connects the Stripe events it needs on its own. You’ll find the full setup in the Stripe payouts doc.
- PayPal: enter the Client ID and Secret from a PayPal app with Payouts enabled, then click Test Live Credentials. The PayPal payouts doc shows you where to find them.
- Store Credit: this needs WooCommerce, or Easy Digital Downloads with the EDD Wallet extension. Your affiliates then spend the credit at your checkout.

One thing worth knowing before you go further: a schedule can only pay affiliates through a method that sends money or credit on its own. Here’s how each method behaves in a scheduled run:
| Payout method | What the affiliate receives | Paid by a schedule? |
|---|---|---|
| Stripe | Money in their bank account, through a Stripe account AffiliateWP creates for them or a direct bank payout | Yes |
| PayPal | Money in their PayPal account, in your store’s currency | Yes |
| Store Credit | Credit to spend in your WooCommerce or EDD store | Yes |
| Manual | Whatever you send them yourself, outside AffiliateWP | No, skipped |
So Stripe, PayPal and store credit can all run on autopilot, while Manual stays in your hands. Now that your methods are on, let’s decide which one each affiliate gets.
Step 2: Choose each affiliate’s payout method
You won’t find a payout method field on the schedule itself. That’s because each affiliate is paid through the method set for them, which means a single run can pay some affiliates through Stripe, others through PayPal and others in store credit.
So before you create a schedule, it helps to know how AffiliateWP decides which method to use for each person. It checks three things, in this order:
- Your override for that affiliate. Open the affiliate at AffiliateWP » Affiliates, choose a method in the Payout Method field, and save. While an override is set, the affiliate can’t change it.
- The affiliate’s own choice, if you turn on Allow affiliates to choose their payout method in the Payout Settings section. It’s off by default, and the affiliate only sees a choice when at least two methods are enabled.
- The Default Payout Method at the top of AffiliateWP » Settings » Payouts, which covers everyone else.
I’d set the default first, since it covers everyone who has no override and no choice of their own.

You’ll notice Manual is never offered to affiliates. It’s for people you pay by bank transfer or check yourself, and a schedule skips them with the note “Skipped: set to Manual, which can’t be paid automatically.”
You can keep paying those affiliates from the Pay Affiliates screen, as the manual payouts doc explains. Next, we’ll make sure your affiliates have given AffiliateWP somewhere to send their money.
Step 3: Have affiliates finish their payout details
This step happens on your affiliates’ side, so it’s worth asking them to do it before your first run. They add their details in the Settings tab of their Affiliate Area, under How you’ll be paid.
What each affiliate does there depends on their method:
- Stripe: the affiliate picks the country they get paid in and clicks Set up payouts. Stripe then asks for their identity and bank details on a secure Stripe page. They don’t need a Stripe account beforehand, because AffiliateWP creates a Stripe Express account for them, or, for some countries abroad, pays their bank directly.
- PayPal: the affiliate enters the email on their PayPal account in the Your Payment Email field. If they leave it blank, AffiliateWP uses their account email.
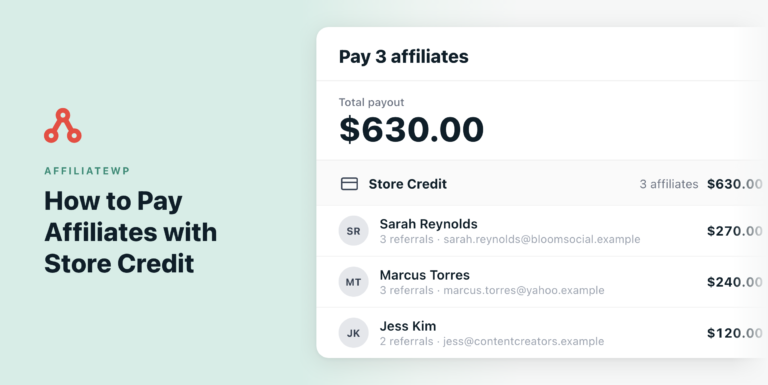
- Store Credit: there’s nothing for the affiliate to set up. On WooCommerce the balance is offered at checkout the next time they shop; on EDD it goes into their EDD Wallet.

Now that the money has somewhere to go, let’s create the schedule that sends it.
Step 4: Create a payout schedule
This is where you set the rhythm. Go to AffiliateWP » Payouts, open the Schedules tab and click Add Schedule.
This opens the New payout schedule drawer. Here’s what it asks for and what to choose in each field:
| Field | What to choose |
|---|---|
| Affiliates | Search for individual affiliates or affiliate groups, or leave it empty to include every eligible affiliate. |
| Frequency | Weekly on any day of the week, or Monthly on the 1st to the 28th or the last day of the month. |
| Minimum earnings | Optional. Affiliates below this amount aren’t paid yet, and their earnings roll over to a later run. |
| Holding period | Shown only if you use a commission holding period. Leave it unticked so commissions still being held stay unpaid. |
| Schedule name | Filled in for you, for example “Monthly payout”. Rename it if you run more than one schedule. |
Once you’ve filled those in, take a look at the Summary at the bottom of the drawer. It reads your choices back as a sentence, such as who will be paid every Friday if they’ve earned at least $50.
If it says what you meant, click Create schedule. AffiliateWP then shows you the date of the next run.

You don’t need to set a date range. A run pays every unpaid, eligible referral the selected affiliates have, and it starts at midnight in your site’s timezone on the chosen day.
Already paying by hand? On the Pay Affiliates screen’s Preview step, click Save as schedule. It carries over the affiliates, groups and minimum you picked, so all you choose is the frequency.
With your schedule saved, the last step is knowing where to look after it runs.
Step 5: Check what each run paid
Each run creates one payout batch on the Batches tab, labelled with the schedule’s name. If a batch paid through more than one method, it shows as Mixed (per-affiliate routing).
Over on the Schedules tab, you’ll see each schedule’s Last run and Next run. The menu on each row has Edit, Pause, Run now and Delete.
If you’d like to see a real batch before the first scheduled day, I’d use Run now. That way your first look at a scheduled run isn’t on payday itself.

That’s your schedule running. Next, let’s look at what happens on the days a payout doesn’t go through.
What happens when an automatic payout fails
A payout can fail for reasons outside AffiliateWP. An affiliate might not have finished their Stripe setup, a PayPal email might not match an account, or your Stripe balance might not cover the run.
When that happens, AffiliateWP responds in four ways:
- The affiliate manager gets an email. When any batch finishes with failures, AffiliateWP emails the affiliate manager, once per batch, and says whether a schedule or a person started it. It’s on by default under AffiliateWP » Settings » Emails.
- The affiliate is told what to fix. With Auto-email affiliates about failed payouts on (the default), affiliates whose payout failed for something they can fix, like verifying their PayPal email, get an email asking them to act.
- AffiliateWP tries again. With Auto-retry failed payouts on, AffiliateWP checks daily and retries once the affiliate has fixed the problem. It’s on by default. If you’ve turned it off, switch it back on in the Payout Settings section.
- The affiliate is held out of later runs. An affiliate with a failed payout isn’t paid again by a schedule until that payout is resolved. The schedule’s Last run shows how many affiliates were blocked.
With those defaults on, a failed payout can be picked back up without you stepping in. If you’d rather retry by hand, you can use Retry Payout in a payout’s menu on the Payouts tab, or the Retry failed payouts bulk action on Batches.
PayPal has one extra case to keep in mind. An affiliate without a PayPal account gets an invitation, and PayPal returns the money if it isn’t claimed within 30 days. The doc on paying affiliates automatically covers each status in detail.
Where this stops is worth being upfront about. Schedules run weekly or monthly, with no daily or every-two-weeks option, and they can’t pay affiliates set to Manual.
AffiliateWP also doesn’t email you when a run succeeds. So the Batches tab is where you confirm what was paid.
Frequently asked questions
Which AffiliateWP plan do I need to pay affiliates automatically?
You need AffiliateWP Pro or higher, which includes the Growth Bundle. On Personal and Plus you can still pay every affiliate through Stripe, PayPal or store credit from the Pay Affiliates screen; you just start each payout yourself. If you move down from Pro, existing schedules stop running until you upgrade again. See pricing for each plan.
Can I pay affiliates daily or every two weeks?
No. A payout schedule runs weekly, on any day of the week, or monthly, on a day from the 1st to the 28th or the last day of the month. If you need two payouts a month, you can create two monthly schedules for the same affiliates, for example on the 1st and the 15th.
Can one schedule pay affiliates through Stripe and PayPal together?
Yes. A schedule has no method of its own, because each affiliate is paid through the method set for them. So one run can pay some affiliates through Stripe, some through PayPal and some in store credit, and the Batches tab shows that run as a single mixed batch.
Do my affiliates need a Stripe account?
No. When an affiliate picks Stripe and clicks Set up payouts, AffiliateWP creates a Stripe Express account in their name, and they confirm their identity and bank details on a Stripe page. For some countries abroad, Stripe pays their bank directly with no account at all. See international affiliate payouts for how that works.
Next, pay affiliates outside your country
Now that your payouts run on their own, the next question is usually about affiliates who live abroad. The Stripe settings you turned on in step 1 decide whether a schedule can reach them.
Our guide to paying international affiliates explains which store countries can use each Stripe option and when PayPal is the better route. And if you’d like the full reference, see paying your affiliates.
Set your payout day once
AffiliateWP Pro pays every affiliate on the schedule you choose, each through their own method. The first year is discounted, renewals are at the regular price, and there’s a 14-day money-back guarantee.

Can this payout process be automated and scheduled? For example, is there an option to “Pay all affiliate balances once a month on the 15th.” Or do we have to set a calendar reminder, log in, and manually go through the payout process?
Hi Billy. Our support team will gladly help you with any questions about the Payout Process. Reach out here: https://affiliatewp.com/contact/ Thanks!